Your exhaust fan has stopped spinning, and now you’re dealing with poor airflow, lingering odors, or dangerous smoke buildup. This is a common problem that affects bathroom fans, kitchen range hoods, and laser cutter ventilation systems alike. The good news is that most causes are fixable with basic tools and a few minutes of troubleshooting.
This guide walks you through every diagnostic step, from checking power connections to cleaning clogged blades, so you can get your exhaust fan spinning again fast.
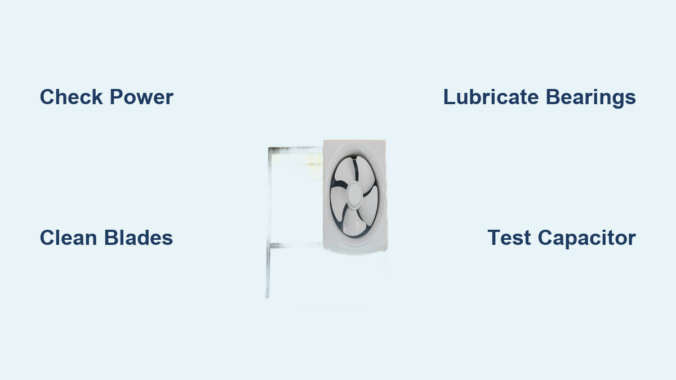
Confirm the Fan Should Be Running
Before assuming something is broken, verify that the fan is supposed to be operating right now.
Some Fans Only Run During Active Use
Exhaust fans on laser engraving machines like Glowforge do not run continuously. They activate only when a cutting or engraving job is running.
Test it: Start a short job with an empty bed and watch if the fan kicks in. If it does, the system is working as designed.
A properly functioning exhaust pulls air at up to 30 mph, creating negative pressure that draws smoke inward instead of letting it escape.
Check Power and Wiring First
No power means no spin. Many supposedly broken fans are simply disconnected or have a tripped breaker.
Verify Power Is Reaching the Fan
Check these items in order:
- Confirm the circuit breaker is on
- Make sure the wall switch is flipped to the on position
- Test and reset any GFCI outlets if applicable
- Inspect plug connections for plug-in bathroom fan models
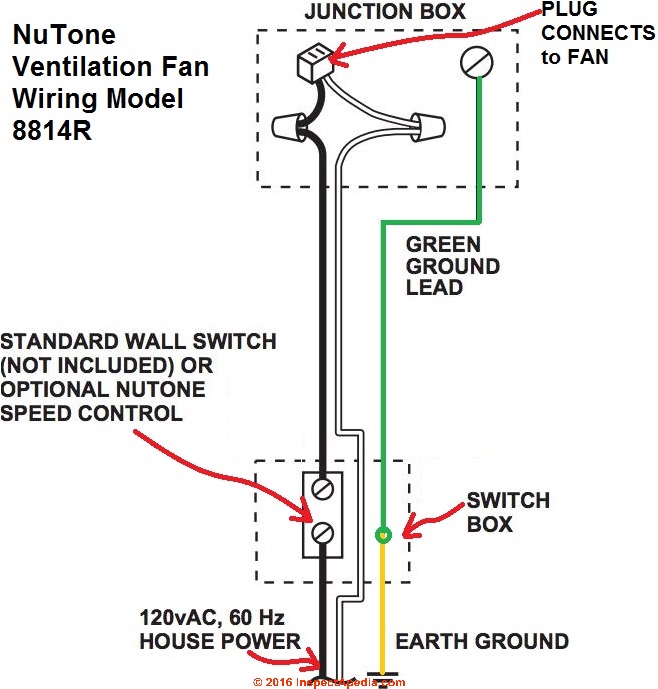
Look for Loose or Faulty Wiring
Inspect wiring at the switch, junction box, and motor terminals. Look for loose screws, frayed ends, or corrosion.
Use a voltage tester to confirm power actually reaches the motor terminals.
Manually Spin the Fan Blade
Turn off power at the breaker, then gently try to spin the fan blade by hand.
Blade Spins Freely Indicates Electrical Problem
If the blade rotates smoothly with no resistance, the motor should run but lacks starting torque. This points to a failed capacitor.
The capacitor gives the motor the initial push to start. When worn out, the fan typically hums but won’t spin.
Signs of capacitor failure:
- Humming noise without blade movement
- Fan starts only after you give it a manual nudge
Blade Is Stiff or Won’t Move Means Mechanical Issue
Resistance when turning the blade by hand indicates something is physically blocking or seizing the system.
Clean Clogged Blades and Ducting

Grease, dust, sawdust, or debris can jam the fan and prevent rotation.
Kitchen and Bathroom Fan Cleaning
Over time, oily residue coats blades and makes them too heavy to spin.
Cleaning steps:
- Turn off power at the breaker
- Remove the filter screen and access panel
- Apply TSP or a strong degreaser
- Scrub blades and housing with a nylon brush
- Wipe clean with a damp cloth, avoiding soaking the motor
Laser Cutter Exhaust Cleaning
Materials like Proofgrade Draftboard produce fine, sticky particulate that clogs systems badly.
Deep clean tips:
- Use a vacuum with a brush attachment on the fan housing
- Clear ducting with pipe cleaners or flexible rods
- Blow out debris with compressed air at low pressure
- Check roof or wall caps for external blockages
Diagnostic trick: With the machine off, run a vacuum hose over the exhaust outlet. If the fan spins from the suction, the issue is internal clogging.
Lubricate Dry Bearings or Bushings
Dry bushings are the number one cause of a seized fan shaft. Without lubrication, friction locks the motor in place.
Apply Lubricant to Fix Squealing or Grinding
What you need:
- Silicone-based lubricant or light machine oil
- Dropper or small brush
Steps:
- Power off the unit completely
- Locate the bushing near the motor shaft
- Apply 1 to 2 drops of lubricant
- Spin the blade by hand to distribute the oil
- Restore power and test
Warning: Do not over-lubricate. Excess oil attracts dust and actually worsens performance over time.
Lubricate annually to extend motor life.
Diagnose and Replace the Capacitor
If the fan hums but won’t start, the capacitor is likely dead.
Test the Capacitor
- Disconnect power
- Discharge the capacitor by shorting its terminals with an insulated screwdriver
- Use a multimeter in capacitance mode
- Compare the reading to the labeled value
Signs of failure:
- Bulging or leaking capacitor casing
- Low or zero capacitance reading
Can You Replace It
Some older and industrial fan models allow capacitor replacement. Many modern sealed units do not.
If the capacitor is accessible and low-cost, replace it. Otherwise, consider full unit replacement.
Inspect for Mechanical Obstructions
Even small blockages can stop rotation entirely.
Check These Common Culprits
Look inside the fan housing, ducting, and roof or wall cap for:
- Bird nests
- Ice buildup in cold climates
- Lint or sawdust clumps
- Collapsed flexible ducting
Use rigid metal ducting with minimal bends. The longer and more curved the ducting, the more static pressure the fan must overcome.
Fix Imbalanced or Warped Blades
A wobbling or rattling fan may not spin freely due to blade damage.
Causes of Blade Problems
- Grease buildup creating uneven weight distribution
- Heat damage from kitchen hoods
- Chemical exposure in laser systems
Fix: Remove blades, clean thoroughly, and inspect for warping. Replace if bent.
Tighten Loose Mounts
Vibration loosens screws over time. Check that the motor mount and venturi plate are secure. Ensure the blade doesn’t scrape the housing when spinning.
Test for Negative Pressure Failure
Even if the fan spins, poor exhaust design can let smoke escape.
Check for Backflow
A working exhaust creates negative pressure. Air should be pulled into the machine through every gap.
Diagnostic method: Turn off room lights and shine a flashlight during operation. Watch for airborne particles, which reveal airflow direction.
If smoke escapes, clean clogged ducts, repair leaks, or install a backdraft damper to prevent wind reversal.
When to Replace the Exhaust Fan
Sometimes repair isn’t worth the effort.
Signs You Need a New Fan
- Motor hums but won’t start after capacitor check
- Bearings are seized beyond lubrication repair
- Cracked housing or burnt motor windings
- Unit is over 10 years old
Plug-In Models Are Easy Replacements
Many bathroom fans connect via standard AC plug to a ceiling socket. Unclip the unit, unplug it, and install the new one.
Replacement time is about 15 minutes. No electrician needed for most plug-in models.
Cost ranges from $20 to $50 for basic units.
Hardwired Units Require Care
If you’re uncomfortable with electrical work, hire a licensed electrician. Always turn off the breaker, label wires, and proceed cautiously.
Prevent Future Failures
Avoid repeat issues with simple maintenance.
Clean Every 1 to 3 Months
Focus on fan blades, filter screens, ducting, and roof or wall caps. Use non-corrosive cleaners and never soak the motor.
Lubricate Annually
Apply light oil to bushings once a year. This prevents seizing and doubles motor life.
Optimize Your Duct Layout
Use straight, rigid ducts with minimal bends. Match duct size to the fan collar exactly. Avoid sagging or crushing.
Better airflow means less strain and longer motor life.
Monitor Performance
Watch for slower startup, unusual noises, or weaker suction over time. Early detection saves motors.
Frequently Asked Questions About Exhaust Fan Not Spinning
Why does my exhaust fan hum but not spin?
This is a classic sign of a failed capacitor. The motor receives power but cannot generate enough starting torque to overcome inertia. Replace the capacitor or the entire fan unit.
Can I fix a non-spinning exhaust fan myself?
Yes. Most issues are fixable with basic tools. Clean clogged blades, lubricate dry bearings, check wiring connections, and test the capacitor. Most repairs take under 30 minutes.
How often should I clean my exhaust fan?
Clean every 1 to 3 months depending on usage. Kitchen fans need more frequent cleaning due to grease buildup. Laser cutter fans may need cleaning monthly due to fine dust.
What causes an exhaust fan to stop spinning suddenly?
Common causes include a failed capacitor, dry or seized bearings, clogged blades, power supply issues, or a mechanical obstruction in the ducting.
Is it worth repairing an old exhaust fan?
If the motor hums but won’t start, bearings are seized, or the unit is over 10 years old, replacement is usually more practical than repair. Replacement fans are inexpensive and easy to install.
Key Takeaways for Fixing Your Exhaust Fan
A non-spinning exhaust fan is rarely a mystery. Start by confirming power reaches the motor, then manually test blade freedom. Clean accumulated debris from blades and ducting, lubricate dry bushings, and test the capacitor if the fan hums but won’t start. For laser cutter systems, remember that the exhaust only runs during active jobs.
Replace the entire unit if the motor is failed or the fan is over 10 years old. Plug-in bathroom fan replacements take about 15 minutes and cost $20 to $50.
Clean regularly, lubricate annually, and use rigid ducting to keep your exhaust fan spinning reliably for years to come.
Leave a Reply