
Installing a bathroom exhaust fan without attic access can feel like solving a puzzle. You have limited overhead space, no way to see inside the ceiling cavity, and must work through tight clearances. Yet this is a common upgrade that thousands of homeowners complete successfully every year. Whether you are replacing a noisy builder-grade unit or adding ventilation to a bathroom that has never had proper exhaust, it is entirely possible with the right approach.
This guide walks you through every step of the process. You will learn how to align ducts blindly, choose between roof and wall venting, and secure your fan without joist access. The methods covered here work for vaulted ceilings, cathedral roofs, and any situation where you cannot reach the space above your bathroom ceiling.
Measure Ceiling-to-Roof Clearance First
Before purchasing a fan or cutting any drywall, you must determine how much space exists between your bathroom ceiling and the roof. This single measurement dictates your entire installation strategy.
Determine Available Depth
Use a stud finder to locate ceiling joists, then drill a small exploratory hole between them near the intended fan location. Insert a stiff wire or depth gauge to estimate the cavity depth.
- Less than 12 inches: You likely have a cathedral or vaulted ceiling. Work quickly because space is extremely tight.
- 12 to 36 inches: Moderate clearance allows flexible duct routing or even dropped rigid duct.
- More than 36 inches: Possible to run longer ducts, but you still need indirect methods for alignment.
Visual cue: If your drill bit hits roofing nails or sheathing within 12 inches, you are in a low-clearance zone.
Select Vent Route Based on Clearance
- Low clearance: Vent through the roof using a short duct run.
- Moderate clearance: Either roof or wall venting works. Wall venting is typically easier.
- No roof access possible: Switch to wall venting near the ceiling.
Drill a Pilot Hole to Align Roof Vent

Without attic access, you need a way to perfectly align the interior fan housing with the exterior roof vent. A long drill bit solves this problem.
Use an Extra-Long Drill Bit
- For low clearance (12 inches or less): Use a 12-inch extension bit.
- For deeper cavities (up to 6 feet): Use a 48- to 72-inch flexible or rigid auger bit.
- Attach the bit to a powerful drill. A corded drill is preferred for better torque.
Drill Straight Up from Fan Location
- Mark the center of your planned fan housing.
- Drill upward through the roof sheathing.
- Confirm plumb alignment by using a level on the drill or bit guide.
Pro tip: Wrap tape around the bit at your measured depth to avoid over-penetration into the roof cavity.
Locate the Pilot Hole on the Roof
Go outside and find the protruding tip of the drill bit. If it is not visible, use a flathead screwdriver to probe the roof felt or shingles nearby.
Once found:
* Cut a 5-inch hole using a hole saw.
* Install a roof cap with flashing and backdraft damper.
* Seal edges with roofing cement to prevent leaks.
Mount the Fan Without Joist Access
Securing the fan is challenging when joists are not accessible or blocking is missing.
Install Blocking for Stability
If the fan does not align with ceiling joists:
1. Cut a rectangular access hole (12 inches by 12 inches) between joists.
2. Insert 2×4 blocking and secure with screws or nails.
3. Mount the fan to the blocking using side flanges or hanger bars.
Alternative: Use toggle bolts or adhesive-mounted brackets if wood framing is completely unreachable.
Use Adjustable Hanger Bars
Most modern fans include telescoping hanger bars that span between joists. Expand them until snug, then tighten the set screws.
- Ensure bars rest on solid wood, not just drywall.
- Test stability before connecting any wiring.
Run Ductwork Blindly
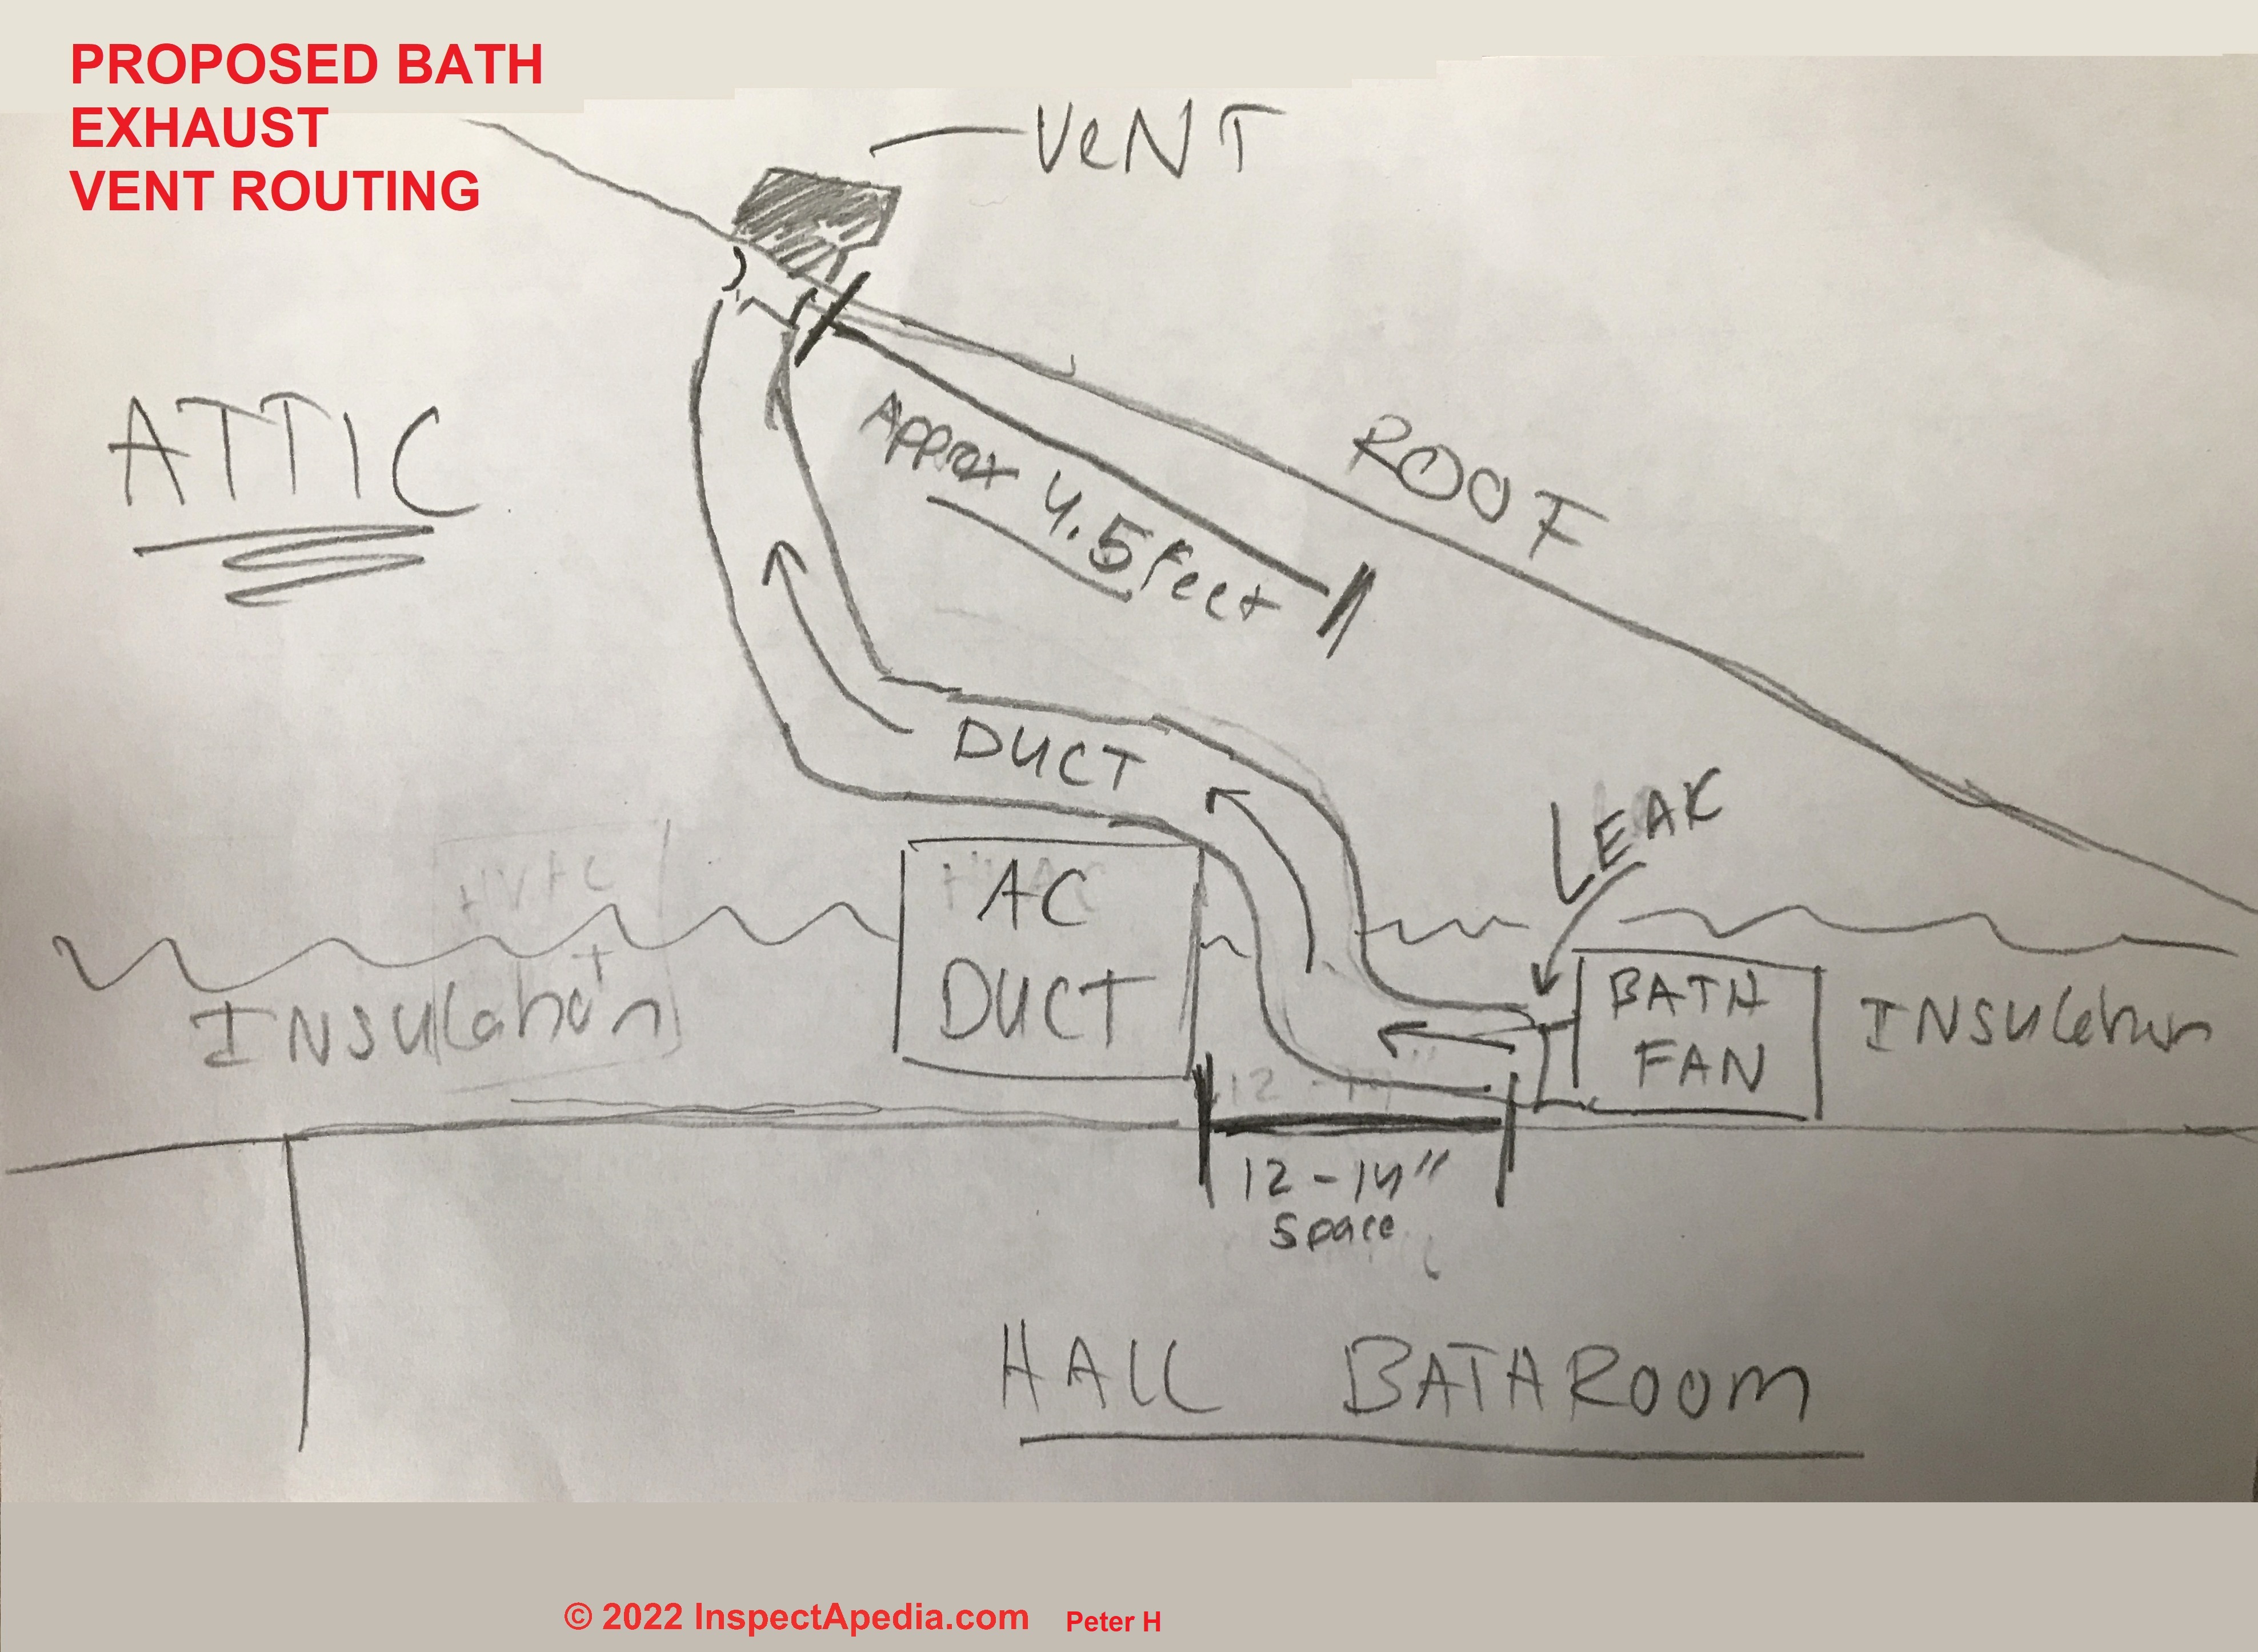
Routing duct without seeing the cavity requires strategy and the right materials.
Choose Flexible Duct for Tight Spaces
- UL-listed aluminum flex duct (4-inch diameter) is ideal for concealed runs.
- Fully stretch it to avoid sagging.
- Support every 4 feet with wire or straps, even if hidden.
Avoid: Plastic or foil duct not rated for continuous flex. These collapse and restrict airflow.
Use Rigid Duct When Alignment Is Certain
- Galvanized metal or PVC pipe offers better airflow performance.
- Drop it from the roof: After cutting the roof hole, lower the rigid duct into the cavity and guide it over the fan outlet.
- Secure with foil tape or duct clamps. Never use duct tape.
Vent Through Wall Instead
If roof access is unsafe or impractical, vent through an exterior wall near the ceiling. This method is often easier and results in shorter duct runs.
Cut Wall Opening Near Ceiling
- Locate a spot within 12 inches of the ceiling.
- Use a stud finder to avoid wall studs.
- Drill a pilot hole outside to confirm placement.
- Cut a 4- to 5-inch hole through siding and sheathing.
Install Wall Cap with Damper
- Use a weatherproof wall vent cap with a backdraft damper.
- Seal edges with exterior-grade caulk.
- Connect duct directly from fan to cap.
Advantage: Shorter duct runs mean better airflow, less condensation buildup, and no roof penetration.
Connect Wiring Safely and Correctly
Electrical work must meet code, even in retrofit situations.
Turn Off Power at Breaker
- Shut off the bathroom circuit at the main panel.
- Test wires with a non-contact voltage tester before touching.
Reuse Existing Wiring if Possible
Most fans connect using standard wiring:
* Black (hot) to black
* White (neutral) to white
* Ground (bare or green) to ground
Use wire nuts and tuck connections into the housing. No exposed copper should remain.
Warning: If the circuit powers a GFCI outlet or nearby sink, ensure the fan is on the load side or protected by GFCI.
Add Junction Box if Splicing
- Any wire splice must be in an accessible junction box.
- Mount it nearby, such as in a closet ceiling, if attic access is unavailable.
Select the Right Fan for Tight Spaces
Not all fans fit in low-clearance ceilings. Choose wisely.
Prioritize Low-Profile Models
- Depth: 3 to 4 inches maximum
- Recommended brands: Panasonic FV-0511VQ1, Broan 688, NuTone 678RP
- Sone rating: 0.7 to 1.0 for quiet operation
Match CFM to Bathroom Size
- Under 50 square feet: 50 CFM minimum
- Over 50 square feet: 1 CFM per square foot
- With shower or tub: 80 to 110 CFM
Example: A 6×8 bathroom (48 square feet) needs at least 50 CFM.
Avoid Common Installation Mistakes
Even experienced DIYers make errors that reduce performance or create hazards.
Do Not Use Duct Tape on Joints
- Duct tape melts over time and fails under heat.
- Use aluminum foil tape or duct clamps instead.
Do Not Allow Sagging Flexible Duct
- Sagging creates airflow resistance and traps moisture.
- Stretch fully and support every 4 feet.
Do Not Vent Into Attic or Soffit
- This violates building code and causes mold growth.
- Vent must exit outside the building, at least 12 inches from windows or doors.
Do Not Ignore Backdraft Damper
- Without a working damper, cold air flows back into the bathroom during winter.
- Ensure roof or wall cap includes a functional backdraft damper.
Test and Finish the Installation
Final steps ensure performance and aesthetics.
Test Fan Before Closing Up
- Temporarily install the grille.
- Turn on power and verify:
* Strong airflow at vent exit
* No unusual noise or vibration
* Damper opens when fan runs
Pro tip: Hold a tissue near the grille. It should stick when the fan is running.
Patch and Paint Drywall
If you enlarged the opening:
* Cut along stud lines for clean edges.
* Reuse the original drywall piece if possible.
* Tape, mud, and sand smooth.
* Prime and paint to match.
Maintain for Long-Term Performance
A well-installed fan lasts 10 to 15 years, but only with proper care.
Clean Every 6 to 12 Months
- Remove the grille.
- Wipe blades and housing with a damp cloth.
- Vacuum dust from intake and duct entrance.
Inspect Roof or Wall Vent Annually
- Clear leaves, animal nests, or ice buildup.
- Confirm damper moves freely.
- Re-seal roof flashing if leaks appear.
Replace Motor if Needed
- Some brands, such as Broan, offer replaceable motors.
- This extends the life of your fan without requiring new ductwork or wiring.
When to Call a Professional
Consider professional help in these situations:
* You are uncomfortable working on a roof.
* Electrical wiring needs upgrading.
* The cavity has obstructions such as pipes or existing wires.
* You are unsure about vent alignment.
Cost note: Professional installation averages $300 to $600, but ensures code compliance and maintains warranty coverage.
Frequently Asked Questions About Installing a Bathroom Exhaust Fan Without Attic Access
Can I install a bathroom exhaust fan if my bathroom has a vaulted ceiling?
Yes. Vaulted ceilings often have very limited clearance between the ceiling and roof, but you can still install a fan. Use a low-profile fan (3 to 4 inches deep) and route ducting through a short vertical run to the roof. The key is using a long drill bit to create a pilot hole for precise alignment.
What is the best venting option when I cannot access the attic?
Wall venting is often the best alternative when attic access is impossible. Cut a hole through an exterior wall near the ceiling, install a wall cap with damper, and connect a short duct run. This method eliminates the need for roof penetration and results in better airflow due to shorter duct runs.
How do I secure the fan when there are no ceiling joists nearby?
Install 2×4 blocking between existing joists to create a secure mounting surface. Cut a small access hole between joists, insert the blocking, secure with screws, then mount the fan. Alternatively, use toggle bolts or adhesive-mounted brackets if wood framing is completely unreachable.
What type of duct should I use for hidden ceiling spaces?
Use UL-listed aluminum flex duct for tight, invisible cavities. Fully stretch it to prevent sagging, and support every 4 feet with wire or straps. For short, straight runs where alignment is certain, rigid duct offers better airflow performance.
Do I need a permit to install a bathroom exhaust fan?
Permit requirements vary by location. Most jurisdictions require a permit for electrical work, and some require permits for any exhaust fan installation. Check with your local building department before starting the project.
Key Takeaways for Installing a Bathroom Exhaust Fan Without Attic Access
Installing a bathroom exhaust fan without attic access requires different techniques than standard installations, but it is absolutely achievable with the right approach.
The most critical steps are measuring your ceiling-to-roof clearance first, then choosing between roof venting (using a long pilot hole for alignment) or wall venting (easier and shorter runs). Secure the fan using blocking between joists or adjustable hanger bars, and always use aluminum foil tape or duct clamps instead of standard duct tape.
Remember to select a low-profile fan that fits your clearance (3 to 4 inches deep), match CFM to your bathroom size (50 CFM minimum for small bathrooms), and choose ultra-quiet models (0.7 to 1.0 sone) for comfortable operation. Finally, vent must always terminate outside the building with a backdraft damper to prevent cold air from entering during winter months.
Now that you understand the techniques professionals use, you can tackle this project with confidence. Take your time with the pilot hole alignment, and test the fan before closing up the ceiling. Your bathroom will stay dry, mold-free, and properly ventilated for years to come.
Leave a Reply