
Is your garage stuffy, smelly, or filled with fumes after using power tools or lawn equipment? A shutter exhaust fan can transform it into a safer, more comfortable space. This ventilation solution actively pulls stale air, heat, and dangerous vapors outside while self-closing shutters seal tight when the fan is off to keep out pests, rain, and cold drafts.
Installing a shutter exhaust fan isn’t just for professionals. With the right planning, tools, and step-by-step guidance, most homeowners can complete the job in one weekend for under $400. This guide walks you through choosing the right CFM-rated fan, cutting the wall opening, building a secure frame, weatherproofing with J-channel, wiring safely, and ensuring long-term performance.
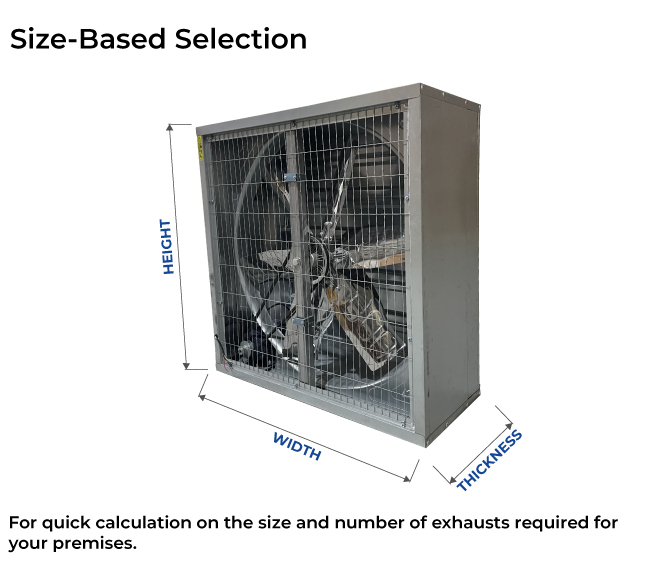
Choose the Right Shutter Exhaust Fan Size
The success of your exhaust system depends on airflow capacity, measured in Cubic Feet per Minute (CFM). Too small, and the fan won’t clear fumes; too large, and it wastes energy.
Calculate Required CFM
Use this formula to determine the right fan size for your space:
Required CFM = (Room Volume × Air Changes per Hour) ÷ 60
First, calculate room volume by multiplying floor area by ceiling height. For example, a 20′ × 20′ garage with 8-ft ceilings equals 3,200 cubic feet. Next, decide how often you want the air replaced. Standard workshops need 5 air changes per hour (ACH), while heavy-duty use like painting or welding requires 10 to 15 ACH.
For a 3,200 cubic foot garage at 5 ACH, the calculation is (3,200 × 5) ÷ 60, which equals approximately 267 CFM. Always round up and consider doubling CFM if you regularly run high-fume activities.
Match Fan to Your Garage Size
Use these guidelines when selecting your shutter exhaust fan:
| Garage Type | Recommended CFM |
|---|---|
| 1-Car Garage | 160–360 CFM |
| 2-Car Garage | 240–550 CFM |
| 3-Car Garage | 450–1,050 CFM |
| Large Workshop (2,400+ sq ft) | 3,000–8,000+ CFM |
Choose a 120V model for residential garages. For shops or industrial spaces needing over 500 CFM, consider 240V fans for better efficiency. Look for TEFC motors (sealed against dust and moisture), built-in polypropylene shutters (resist corrosion), and low noise ratings under 3 sones for frequent use.
Plan the Installation Location
Mounting your shutter exhaust fan in the right spot ensures maximum airflow and performance.
Pick High and Opposite
Hot air and fumes rise, so mount the fan near the ceiling, ideally within 6 to 12 inches of the top plate. Place it on an exterior wall, far from the main door or windows to promote cross-flow ventilation.
Ensure fresh air enters from the opposite side, creating a full air exchange. If the garage has no intake vents, leave a half-inch gap under the door or install a wall vent.
Avoid Hidden Hazards
Use a stud finder to map out framing. Install between 16-inch or 24-inch on-center studs, and never cut into load-bearing headers or beams.
Check both sides of the wall before cutting. Use a voltage tester to avoid electrical wires. Look for plumbing, gas lines, or HVAC ducts inside the cavity. Avoid areas behind outlets or switches.
For aesthetics, pick a less visible wall (back or side of house) and keep the exterior vent clear of landscaping or obstructions.
Cut the Wall Opening for Your Fan
Accurate cutting ensures a proper fit for your shutter exhaust fan.
Mark and Drill Starter Holes
Follow the fan manufacturer’s template. If none is provided, measure the housing and add quarter-inch clearance on all sides.
Use a pencil and level to draw a square or rectangular outline on the drywall. Drill a half-inch hole in each corner to give the jigsaw blade room to start.
Cut with Jigsaw or Reciprocating Saw
Insert the jigsaw blade into one hole and cut along the lines. Move slowly to avoid splintering. Remove drywall, insulation, and sheathing as you go.
If working with vinyl siding, use a siding removal tool to lift and remove panels above and below the cut zone. Cut through the exterior sheathing from inside to maintain control.
Pro Tip: Cut slightly undersized first, test-fit the fan or spacer frame, then trim as needed.
Build a Solid Mounting Frame

A proper frame prevents damage and ensures shutters operate freely.
Install Header and Saddle
Cut two pieces of 2×4 or 2×6 lumber to fit horizontally between the studs at the top and bottom of the opening. The top header supports the fan’s weight, while the bottom saddle prevents sagging and aligns the frame.
Secure both with 3-inch deck screws driven into the vertical studs. This reinforced box creates a stable base and prevents wall damage during installation.
Add a Wooden Spacer Frame
Many shutter exhaust fans bind if mounted flush against the wall. To prevent this, build a spacer frame from 2×4s that extends 2 to 3 inches past the wall surface. Attach it to the header and saddle using lag bolts (three-quarter-inch diameter, 3 to 4 inches long). Countersink holes with a Forstner bit for a clean finish.
This protrusion ensures shutters open and close freely, no pressure warps the housing, and proper airflow clearance is maintained.
Warning: A tight fit can jam shutters open, causing drafts, energy loss, and pest entry.
Install J-Channel and Weatherproofing
Proper weatherproofing prevents water damage and drafts.
Fit J-Channel for a Clean Finish
J-channel creates a weathertight seal and gives the exterior a professional look. Cut four lengths to fit around the opening. Miter corners at 45 degrees for seamless joints. Install with aluminum or PVC nails, overlapping upper pieces over lower ones like shingles. Slide existing siding into the channel.
Ensure the opening remains fully exposed and unobstructed.
Seal Against Water Intrusion
Apply butyl flashing tape behind all J-channel edges and around the hole. This self-adhering membrane stops water from seeping behind the wall.
Optional but recommended additions include installing a drip cap above the opening to direct rain away and using DAP DynaFlex Ultra caulk between J-channel and siding for flexibility.
Test: Spray water around the area after installation. No leaks should appear inside.
Mount the Fan Housing
Proper mounting ensures long-term stability and performance.
Position and Test Before Securing
Slide the fan into the spacer frame or against the wall. Confirm the airflow arrow points outward. Check that shutters open when pulled slightly away and blades spin freely.
Temporarily connect power and run the fan. Watch for vibration, noise, or shutter binding.
Fix Now: If shutters stick, adjust the frame or add shims before permanently securing.
Secure Fan with Heavy-Duty Screws
Once aligned, fasten the housing using quarter-inch lag screws or structural screws with washers under each head to distribute pressure. Drive screws through the flange into the spacer frame or studs. Do not overtighten, as this can warp the plastic housing.
Double-check that the unit is level and stable before proceeding.
Wire the Exhaust Fan Safely
Electrical work requires careful attention to safety.
Run Correct Gauge Electrical Cable
Most 120V fans draw 5 to 7 amps. Use 14/2 NM-B wire for 15A circuits or 12/2 for 20A. Run the cable from the power source (breaker panel, junction box, or nearby outlet) to the fan location.
Feed the wire through the knockout on the fan housing. Leave 12 inches of slack inside.
Connect Wires and Install Switch
Inside the housing, connect black (hot) to black, white (neutral) to white, and bare copper (ground) to the ground terminal. Use wire nuts rated for outdoor use. Tug each connection to ensure it’s tight.
Mount a wall switch or timer switch in a nearby electrical box. A 2-hour auto-off timer prevents accidental overuse and saves energy.
Safety First: Turn off power at the breaker. Test wires with a voltage tester before touching. Hire an electrician if unsure.
Seal and Finish the Installation
Complete weatherproofing ensures years of trouble-free operation.
Weatherproof Exterior Joints
Apply flexible exterior caulk where the fan meets the J-channel. Seal all seams and screw heads. Avoid covering shutter blades or hinges, as this could restrict movement.
Insulate and Patch Interior
On the inside, fill gaps around the housing with acoustic sealant or spray foam. This reduces noise, prevents air leaks, and improves insulation.
Patch drywall if needed. Sand and paint to match the wall.
For extra draft protection, install a backdraft damper or ensure the fan has dual internal shutters.
Test Fan Operation and Airflow
Verification ensures your installation works correctly.
Verify Outward Airflow
Turn on the fan and go outside. Hold your hand near the shutters. You should feel strong airflow pushing out.
If air is pulling in, reverse the wiring (swap hot and neutral at the switch). Never operate a fan blowing inward.
Check Shutter Function
When powered off, shutters must close completely within seconds. If they remain open, inspect for debris or ice. Adjust the spacer frame or lubricate hinges lightly with silicone spray.
Test Intake: Open a door or window on the opposite side. Without fresh air entering, the fan will struggle to move air.
Maintain Your Fan for Longevity
Regular maintenance extends the life of your shutter exhaust fan.
Clean Blades and Shutters Every 6 Months
Dust, grease, and spider webs reduce airflow and strain the motor. Turn off power, remove the grille if present, wipe blades with a damp cloth or use compressed air, and clean shutters and hinges gently.
Avoid harsh chemicals that can degrade plastic components.
Inspect Seals and Fasteners Annually
Check exterior caulk for cracks, screws for tightness, J-channel for damage, and shutters for smooth operation. Reapply sealant or replace worn parts as needed.
Lubricate motor bearings only if the manufacturer recommends it.
Troubleshoot Common Issues
Knowing how to diagnose problems saves time and money.
Shutters Won’t Close
This issue typically stems from a warped housing due to over-tightening or missing spacer frame. Install a 2 to 3-inch spacer frame to relieve pressure.
Fan Is Noisy or Vibrating
Loose mounting or unbalanced blades causes this problem. Tighten all screws, clean blades, and ensure the frame is solid.
Water Leaking Inside
Poor J-channel installation or missing flashing leads to water intrusion. Reinstall J-channel with proper overlap and add butyl tape.
No Airflow Despite Running
Inadequate intake air (closed doors) prevents proper airflow. Open a door or install an intake vent.
Fan Cycles On/Off Rapidly
A faulty thermostat or humidistat causes erratic cycling. Bypass the sensor temporarily to test.
Frequently Asked Questions About Installing Shutter Exhaust Fans
What CFM size do I need for a 2-car garage?
For a standard 2-car garage (approximately 400 sq ft with 8-ft ceilings), you need a minimum of 240 to 550 CFM. If you use the space for painting, welding, or running gas-powered equipment, double this to 500+ CFM for effective fume removal.
Can I install a shutter exhaust fan myself?
Yes, most homeowners can install a shutter exhaust fan with basic tools and electrical knowledge. The project takes 6 to 10 hours spread over one to two days and costs $120 to $400 in materials.
Where should I mount the shutter exhaust fan?
Mount the fan high on an exterior wall near the ceiling (within 6 to 12 inches of the top plate). Place it on the opposite wall from doors and windows to create cross-flow ventilation.
Do I need a spacer frame for my shutter exhaust fan?
Yes, a wooden spacer frame (2 to 3 inches proud of the wall surface) is critical. Without it, the housing can warp and bind the shutters open, causing drafts, energy loss, and pest entry.
How do I weatherproof the installation?
Install J-channel around the opening with proper overlap (like shingles), apply butyl flashing tape behind all edges, and seal seams with flexible exterior caulk. Add a drip cap above the opening for extra rain protection.
What electrical requirements does a shutter exhaust fan need?
Most residential fans run on 120V power and draw 5 to 7 amps. Use 14/2 NM-B wire for 15A circuits or 12/2 for 20A circuits. A timer switch is recommended to prevent accidental overuse.
Key Takeaways for Installing Your Shutter Exhaust Fan
Installing a shutter exhaust fan dramatically improves air quality, safety, and comfort in garages and workshops. The most critical success factors are selecting the correct CFM based on room size and intended use, building a proper mounting frame with a spacer to prevent shutter binding, and thoroughly weatherproofing with J-channel, flashing tape, and caulk.
Safe electrical wiring with a timer switch prevents accidental overuse and saves energy. With typical DIY costs of $150 to $400 and a one-day installation timeline, this project pays for itself in cleaner air and peace of mind. Once installed, simple semi-annual maintenance keeps your fan running efficiently for years to come.
Leave a Reply