
If your bathroom ceiling fan cover looks yellowed, cracked, or dusty, you’re not alone. Over time, heat and humidity take a toll on plastic covers, leaving them brittle and unsightly. The good news is that installing an exhaust fan cover is a quick, affordable DIY fix that takes less than 10 minutes. With just a few simple steps, you can refresh your bathroom’s look, improve airflow efficiency, and make cleaning easier. In this guide, you’ll learn how to safely remove the old cover, choose the right replacement, and install it securely. No electrician required.
Safety First: Turn Off Power
Before touching the fan, protect yourself by cutting power to the unit. Even though replacing the cover does not involve wiring, turning off the circuit prevents accidents if you accidentally bump into wires or decide to clean the fan housing.
Locate the Correct Circuit
Go to your home’s switchboard and turn off the breaker that powers the bathroom. If you are unsure which one, turn on the fan before switching off breakers one by one until the fan stops.
Confirm Power Is Off
Flip the bathroom light and fan switch to test. No response means it is safe to proceed.
Warning: Never skip this step. Electrical safety should always come first, even for simple tasks.
Remove the Old Exhaust Fan Cover
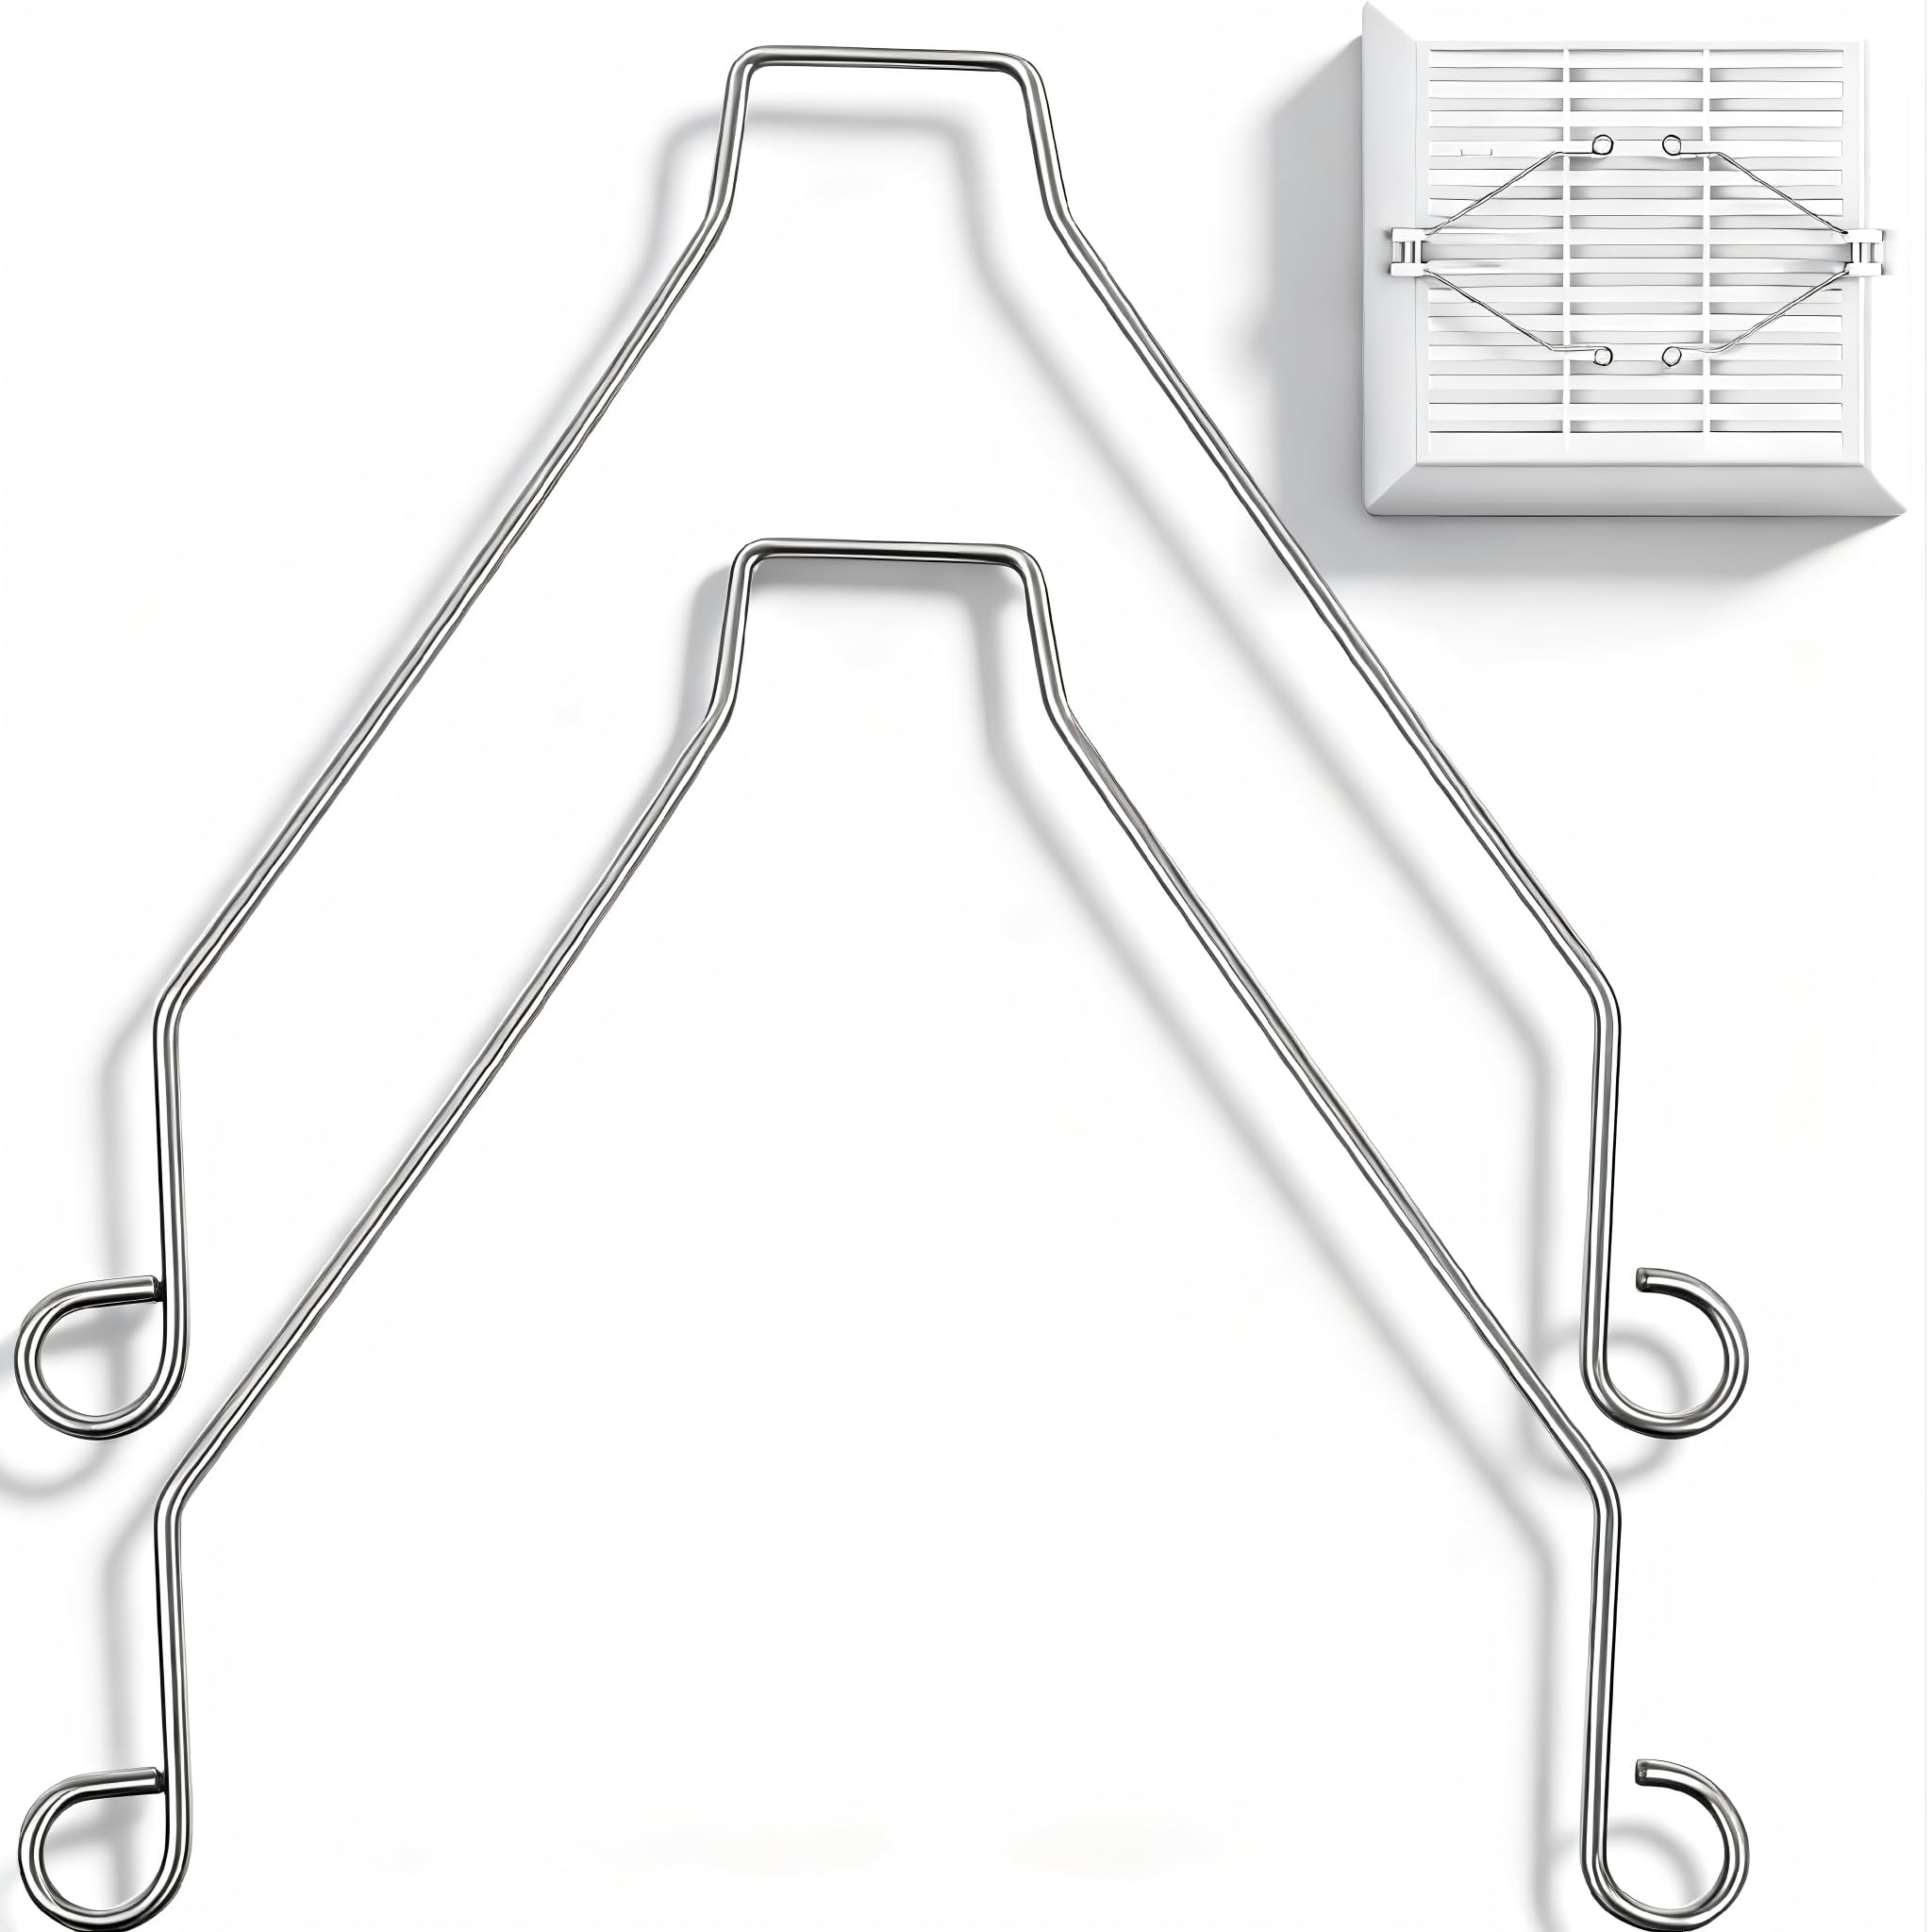
Most exhaust fan covers are held in place with spring clips that slide into slots in the housing. Understanding how these clips work makes the removal process much easier.
Pull the Cover Down Gently
Use both hands and apply even pressure. Pull the cover straight down about 5 to 10 centimeters. Do not yank or twist because it could break the clips or damage the ceiling.
Release the Spring Clips
Once the cover is loose, you will see two metal spring clips attached to the sides. Squeeze them inward slightly and guide the cover out of the mounting slots.
Pro Tip: If the cover is stuck, gently wiggle it side to side while pulling down. Avoid using tools that could scratch or crack the plastic.
Clean the Fan Housing and Blades
:max_bytes(150000):strip_icc()/How-to-Clean-a-Dusty-Bathroom-Fan-8419-09-bea27a1488e644e1988768fe60b67eb1.jpg)
Now that the cover is off, take advantage of the access to remove built-up dust and lint. This step improves fan performance and extends the life of your equipment.
Use a Vacuum With Brush Attachment
Turn on your vacuum and use the soft brush nozzle to clean the fan blades, the inside of the metal housing, and around the edges where dust accumulates. Wipe gently to avoid bending the blades.
Check for Warning Signs
While cleaning, inspect for rattling noises when the fan runs, loose or damaged wiring, and corrosion or oil buildup. If you notice any of these, stop the process because this is not a cover issue. It is a motor or electrical problem that requires a licensed electrician.
Measure for the Correct Replacement Cover

Not all exhaust fan covers are the same size or shape. Installing the wrong one will not fit or could create a gap in the ceiling, reducing efficiency.
Take Accurate Dimensions
Use a tape measure to record the length and width of the old cover and the distance between the two spring clip slots. This critical measurement ensures your new cover will fit properly. Most standard covers are 15 by 15 centimeters or 10 by 15 centimeters, but sizes vary by model and brand.
Bring the Old Cover When Shopping
The easiest way to ensure a perfect match is to take the old one with you. Hold it next to potential replacements at the store to verify fit, clip placement, and design.
Expert Note: Look for modern covers made from heat-resistant, easy-to-clean plastic. Some have antimicrobial coatings or sleek matte finishes that resist yellowing.
Install the New Exhaust Fan Cover
With the correct replacement in hand, installation is simple and straightforward.
Compress the Spring Clips
Hold the new cover with both hands and gently squeeze the spring clips toward the center. This narrows the width so they can slide into the mounting slots.
Insert and Push Into Place
Align the clips with the slots in the housing and slide the cover upward until it is fully seated. Release the clips so they expand behind the mounting points and gently push the cover until it sits flush with the ceiling.
Visual Cue: The cover should sit flat with no gaps or tilting. If it wobbles, reseat it and ensure both clips are locked securely.
Test the Fan and Restore Power
Now it is time to make sure everything works properly after the installation.
Turn the Breaker Back On
Return to the switchboard and restore power to the bathroom circuit.
Switch On the Fan
Listen for smooth, quiet operation. There should be no scraping, rattling, or delayed start-up.
Checklist After Installation:
* Cover is level and secure
* No visible gaps around edges
* Fan runs normally
* Light (if connected) works
If anything seems off, turn off the power and recheck alignment.
Choose the Right Cover for Your Model
Not all covers are universal. Matching the right one to your fan ensures safety and optimal performance.
Know Your Fan Brand
Popular brands like Panasonic, Broan, and Vent-Axia often use proprietary designs. Check the manufacturer’s website or product label for compatible replacement parts.
Look for OEM or Certified Replacements
OEM (Original Equipment Manufacturer) parts offer an exact match and the best fit. Aftermarket options are often cheaper, but verify dimensions carefully before purchasing.
Avoid: Generic covers that claim to fit most without specific model numbers. These can warp, discolor, or not clip in securely.
Troubleshoot Common Fit Issues

Even with correct measurements, problems can occur during installation. Knowing how to address these saves time and frustration.
Cover Will Not Clip In
This issue usually means the spring clips are too stiff or misaligned. Compress clips fully and angle slightly during insertion. Once one side is in, pivot the other into place.
Gaps Around the Edges
Wrong size or warped cover causes this problem. Double-check measurements. If the cover is bent, return it and get a new one.
Cover Sags or Drops
Weak or broken spring clips are the culprit. Replace the clips or the entire cover. Never use tape or glue as a workaround because this creates safety hazards.
When to Call a Professional
Replacing the cover is safe for DIYers, but some issues go beyond a simple swap. Recognizing these signs protects your home and family.
Motor Is Failing
Signs include loud grinding or screeching sounds, slow spin or no movement, and a burning smell. These require full fan replacement, which involves electrical work.
Wiring Looks Damaged
Exposed wires, fraying, or melted insulation are serious hazards. A licensed electrician must handle repairs.
Rule of Thumb: If you need to touch wires, the motor, or the housing unit, hire a professional. Your safety is worth more than the savings.
Maintain Your New Exhaust Fan Cover
Keep your upgrade looking fresh with simple regular care.
Clean Every 3 to 6 Months
Remove the cover using the same method from Step 2. Wipe with a damp cloth and mild detergent, then dry completely before reinstalling.
Avoid harsh chemicals like bleach or ammonia because they can cloud or weaken plastic over time.
Prevent Yellowing and Dust Buildup
Run the fan for 15 to 20 minutes after showers to reduce steam buildup. Use a ceiling fan duster monthly to remove surface dust before it accumulates.
Frequently Asked Questions About Installing Exhaust Fan Cover
Can I replace my exhaust fan cover without turning off the power?
While the cover itself does not have electrical connections, it is still recommended to turn off the power at the breaker. This prevents accidental contact with wires inside the housing and ensures safe handling during installation.
How do I know if my exhaust fan cover is the right size?
Measure the length, width, and the distance between the spring clip slots on your existing cover. Take these measurements or the old cover itself when shopping for a replacement to ensure a proper fit.
Why does my new exhaust fan cover have gaps after installation?
Gaps usually indicate the wrong size cover or a warped piece. Remeasure your old cover and verify the new one matches exactly. If gaps persist, the cover may be defective and should be replaced.
How often should I clean my exhaust fan cover?
Clean the cover and the fan blades every 3 to 6 months. Regular cleaning prevents dust buildup, maintains airflow efficiency, and extends the life of your fan motor.
What should I do if the fan makes noise after replacing the cover?
Turn off the fan immediately and check that the cover is seated properly. If noise persists, there may be a motor issue or debris inside the housing. Consult a licensed electrician for diagnosis.
Are all exhaust fan covers universal?
No, covers vary by brand, model, and size. Some manufacturers use proprietary designs. Always check compatibility with your specific fan model before purchasing.
Key Takeaways for Installing Your Exhaust Fan Cover
Installing an exhaust fan cover is one of the easiest bathroom upgrades you can do yourself. With the right measurements, a quality replacement, and proper safety precautions, you can complete the job in under 10 minutes. The process involves turning off power, removing the old cover by releasing spring clips, cleaning the fan blades, installing the new cover, and testing that everything works properly.
Choosing the right cover matters significantly for long-term performance. OEM replacements offer the best fit, while generic covers often cause fit problems or warp over time. Regular maintenance, including cleaning every 3 to 6 months and running the fan after showers, keeps your bathroom ventilation working efficiently and prevents mold growth.
For best results, inspect your fan annually to catch problems early. If you encounter motor noise, damaged wiring, or persistent fit issues, do not attempt repairs yourself. Call a licensed electrician to handle any work beyond simple cover replacement. Your safety is always worth the investment.
Leave a Reply