Is your bathroom or kitchen exhaust fan making an annoying squeak, rumble, or grinding noise? You are not alone, and the fix might be simpler than you think. Oiling an exhaust fan motor can silence that noise, restore smooth airflow, and extend the life of your unit by years. But only if done correctly.
Many homeowners assume their fan is broken and needs replacement, especially in older homes. In reality, dry motor bearings are often the culprit, and a few drops of the right oil can bring it back to life. However, not all fans should be oiled. Applying lubricant to a sealed, maintenance-free motor can do more harm than good.
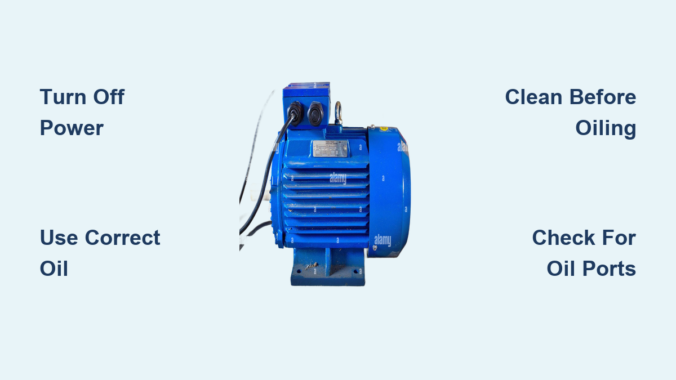
Turn Off Power and Prepare Safely
Before touching any part of your exhaust fan, cut power at the circuit breaker. Never rely on just the wall switch, because many fans are hardwired and remain live even when switched off.
Verify the Fan Is De-Energized
Switch off the correct breaker at the main electrical panel. Use a non-contact voltage tester to confirm no power is present near the fan housing wires. Try turning on the fan switch to ensure nothing happens.
Gather Tools and Safety Gear
You will need a step ladder for ceiling-mounted units, both Phillips and flat-head screwdrivers, wire nuts and electrical tape, and gloves for handling dusty components. Have a camera or smartphone ready to photograph each disassembly step.
Check If Your Fan Motor Needs Oil
Not every exhaust fan should be oiled. Applying oil to the wrong type can damage the motor or void the warranty.
Look for These Signs Lubrication Is Needed
Listen for squeaking, grinding, or rumbling during operation. Notice slow startup or delayed spin-up. Check for reduced airflow despite clean ducts and overheating detectable by smell or warmth after use.
Identify a Lubricatable Motor
Older models pre-2000s often have visible oil ports or felt wicks. Newer models may be labeled permanently lubricated or sealed, which should not be oiled. Always check the manufacturer manual for specific maintenance recommendations.
Remove Fan Cover and Access Motor
Taking off the grille or cover is the first step to reaching the motor assembly.
Take Off the Grille or Cover
Most bathroom exhaust fan covers are secured by spring clips. Pull the cover down gently, then squeeze the internal metal tabs to release. Some units use screws instead, requiring removal of one or two retaining screws before lowering the cover.
Disconnect the Fan Assembly
The motor and fan unit sits inside a ceiling housing mounted between joists. Remove the retaining clips or mounting screws, typically one to three. Gently lower the assembly while supporting it with one hand to avoid straining wires.
Unplug or Disconnect Wires
If your fan has a plug-in connector common in older Broan models, simply unplug it. If hardwired, disconnect black to black, white to white, and green or bare to ground. Label or photograph all connections before disconnecting.
Remove Fan Blade and Motor

With the assembly lowered, you can now access the motor and blade for further disassembly.
Detach the Impeller Fan Blade
On most models like Broan 600 or Aube 7550, twist and pull the blade straight off the shaft. Some use a locking washer requiring a flat-head screwdriver or a set screw needing an Allen wrench. Inspect the blade for warping or cracks.
Take Out the Motor
Remove one or two bolts securing the motor to the housing. Carefully extract the motor while noting the shaft orientation, position of washers and spacers, and direction of electrical leads. Take photos at this stage to ensure correct reassembly.
Clean All Parts Before Oiling

Never apply oil to a dirty motor. Dust, lint, and grease mix with lubricant to form an abrasive sludge that accelerates wear.
Clean the Fan Cover and Blade
Wash the cover with warm soapy water. For kitchen fans, use a degreaser to cut through grease. Clean the fan blade with mild detergent and a soft brush, avoiding bending the blades. Dry all components completely before reinstallation.
Clean the Motor and Bearings
Use a handheld vacuum or soft toothbrush to remove dust from the motor windings, air intake grilles, and bearing access points. For heavy buildup, spray with carburetor cleaner in a ventilated area and let dry completely before oiling.
Locate Bearings for Lubrication
Oiling the exposed shaft will not fix internal bearing wear. You must lubricate the actual bearings.
Find the Oil Access Points
Look for a small oil port on the motor housing usually at the rear. Check for a felt wick protruding from the bearing area designed to absorb oil. Some motors have exposed shaft ends where oil can be applied directly to the bearing housing.
Lubricate Both Bearings If Accessible
Many motors have front and rear bearings. The rear bearing often wears first and is the primary access point. Lubricate both when accessible for best long-term results.
Apply the Right Oil Correctly
Using the wrong lubricant can damage the motor or attract dust and debris.
Best Oils for Exhaust Fan Motors
Three-in-One Blue Label Oil is the best choice, formulated specifically for electric motors. Turbine oil is preferred for HVAC-grade performance with superior heat stability. Synthetic 10W-30 engine oil is acceptable in a pinch but not ideal. Silicone spray works as an alternative for moisture resistance. WD-40 should never be used as a lubricant because it is a degreaser.
How to Apply Oil
For oil port motors, use a dropper or syringe to add approximately one teaspoon of oil. Wait five to ten minutes for wicking into the bearing. For wick bearings, drip oil directly onto the felt wick and saturate fully without overflowing. For side-access bearings, apply oil near the bearing while slowly turning the shaft by hand.
Reassemble the Fan Correctly
Reassemble in reverse order, using your photos as a guide throughout the process.
Reinstall the Motor and Reconnect Wires
Slide the shaft back into both bearings and replace washers and spacers in their original order. Secure motor with mounting bolts. Match black to black, white to white, and ground to ground when reconnecting wires. Use wire nuts and wrap with electrical tape.
Reattach Fan Blade and Cover
Slide the blade back onto the shaft, aligning with the flat section. Secure with a locking washer or set screw. Replace any light bulb. Push the cover up until it clicks into place for spring clips, or reinstall screws for screw-mounted covers.
Test the Fan After Oiling
Restore power at the breaker and test the fan performance.
Check for Improved Operation
Turn on the wall switch and listen for smooth startup with no squeaking or grinding. Feel for strong, even airflow under the vent. The noise should be eliminated or greatly reduced, and the fan should spin up faster than before.
Maintenance Schedule and Long-Term Care
Prevent future issues with regular upkeep to extend fan life.
When to Oil the Motor
Oil lubricatable motors every five years under normal conditions. In high-humidity areas like bathrooms without timers, saunas, or steam showers, oil every two to three years. Oil immediately if you hear noise or notice slow startup.
When to Replace Instead of Repair
Lubrication cannot fix mechanical failure or electrical faults.
Signs You Need a New Fan
Replace if you see seized or pitted bearings, wobbly or bent shaft, burnt smell or charring on windings, or electrical faults detected with a multimeter. Also replace units labeled maintenance-free that are failing.
Frequently Asked Questions About Oiling Exhaust Fan Motors
Can I Use WD-40 to Oil My Exhaust Fan Motor?
No, WD-40 is a degreaser and penetrant, not a lubricant. Using it as oil will remove existing lubrication and cause faster wear. Use Three-in-One Blue Label oil or turbine oil instead.
How Do I Know If My Exhaust Fan Has Sealed Bearings?
Check the manufacturer manual or look for labels stating permanently lubricated or maintenance-free. If you see no oil ports or felt wicks, the motor is likely sealed and should not be oiled.
How Often Should I Oil My Bathroom Exhaust Fan?
For lubricatable motors, oil every five years under normal use. In humid environments, reduce the interval to every two to three years to prevent premature bearing wear.
What Happens If I Oil a Sealed Motor?
Oiling a sealed motor can cause oil to migrate into windings, attracting dust and creating sludge. This can damage the motor, void warranties, and potentially cause electrical shorts or fire hazards.
Can I Oil My Exhaust Fan Without Removing It From the Ceiling?
Some models with accessible oil ports or wick bearings can be oiled in place. However, thorough cleaning is difficult without removal, and you may miss the rear bearing. For best results, remove and disassemble the fan.
Key Takeaways for Oiling Exhaust Fan Motors
Always turn off power at the breaker and verify with a voltage tester before any work. Clean all components thoroughly before applying oil, because dirt mixed with lubricant creates abrasive sludge. Use Three-in-One Blue Label oil or turbine oil, applying directly to the bearings through oil ports or wicks rather than just the shaft. Lubricate both front and rear bearings when accessible, photograph every disassembly step, and test operation after reassembly. Never use WD-40 as a lubricant, and never oil sealed or maintenance-free motors. With proper care, your exhaust fan can run silently for years to come.
Leave a Reply