If you’ve ever heard a rhythmic clack-clack-clack from your bathroom or kitchen ceiling fan on a windy night, you’re not alone. Exhaust fan flapping is a common issue caused by wind forcing the backdraft damper open and shut. This noise is not just annoying, it can signal inefficiency, poor sealing, or long-term wear. The good news is most fixes are simple, inexpensive, and doable in under an hour.
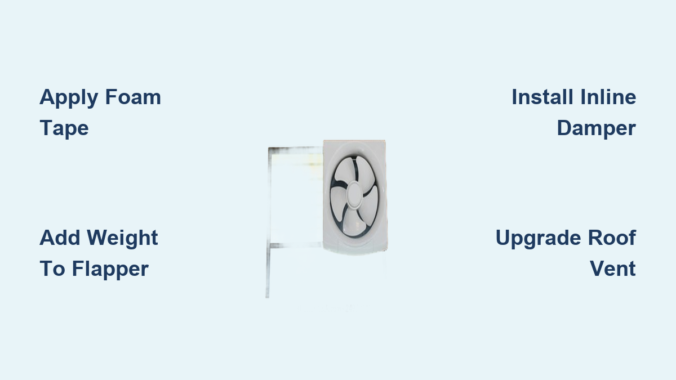
Whether your fan rattles in a breeze or slams shut every few seconds, this guide delivers proven solutions from quick DIY patches to permanent upgrades that stop flapping at the source. You will learn how to silence the noise using foam padding, add stabilizing weight to the flapper, install inline dampers, and modify your roof vent for wind resistance.
Decode the Flapping Sound
Is It Wind or a Faulty Damper
Flapping is not always a broken part, it is often physics at work. When wind blows over a roof vent, it creates a low pressure zone that pulls air up the duct, lifting the internal flapper. Once the gust passes, pressure equalizes and gravity slams the flap shut. This cycle repeats with each breeze.
You can identify wind induced flapping by these signs:
- Clicking every few seconds indicates likely wind induced pressure changes
- Flapper stuck open 30 to 40 percent is common in lightweight plastic dampers
- Noise only at night happens because lower ambient sound makes flapping more noticeable
If the fan is off but the flapper moves, the cause is external airflow, not a malfunction.
What to Look For
Check for these visual and auditory clues to confirm flapping issues:
- Visible flapper movement when accessing the attic side of the duct
- Metal on plastic clack sound on closure
- Draft felt near the fan grille during windy weather
These are clear signs your damper lacks damping or mass.
Add Foam Padding to Silence the Slam
Apply Weather Resistant Foam Tape
Foam padding is the number one fix for eliminating flapper noise. By cushioning the contact point, it turns a loud clack into a soft tap or complete silence.
Materials Needed:
- 3/4 inch wide by 3/16 inch thick vinyl foam tape (weather resistant)
- Isopropyl alcohol and paper towel
- Scissors or utility knife
- Optional super glue for high humidity areas
Step by Step Installation
-
Turn Off Power
Switch off the circuit breaker to avoid accidental fan activation. -
Remove Fan Cover
Squeeze side clips or unscrew the housing. For Broan or Panasonic models, unplug motor wires to swing the unit down. -
Expose the Flapper
The damper is typically inside the housing or at the duct outlet. Locate where the flapper hits its stop when closing. -
Clean the Surface
Wipe contact edges with alcohol. Remove grease, dust, and oils for strong adhesion. -
Cut and Apply Foam
– Measure the top and side edges of the flapper or its strike point
– Apply foam tape along all contact surfaces
– Add a small strip across the top edge so the flapper rests on foam when closed -
Reassemble and Test
Reinstall the fan, restore power, and listen. Use a hair dryer to simulate airflow and check closure.
Pro Tip: Place foam as high as possible on the flapper so it compresses fully when shut. This prevents rattle.
Why It Works
Foam absorbs impact and creates a slight seal, reducing both noise and air leakage. Done right, this fix lasts five years or more.
Increase Flapper Mass with Weight
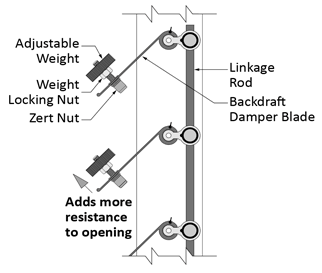
Stop Flapping with a Small Nut
A lightweight flapper opens easily, even from minor drafts. Adding a small weight increases inertia, helping it resist wind forces.
Materials Needed:
- Small metal nut (1/4 inch or 5/16 inch)
- Super glue (cyanoacrylate)
- Rag to hold flapper level during cure
How to Add Weight Safely
-
Access the Flapper
Same as foam installation, remove cover and expose the damper. -
Locate the Back Side
Apply weight to the non-contact side (facing the duct), near the bottom edge for maximum leverage. -
Glue the Nut
– Use a tiny dab of super glue. Too much can drip and restrict movement
– Hold in place for 30 seconds until set
– Let cure overnight before testing -
Test Operation
Turn on the fan. The flapper must still open fully with normal airflow.
Warning: Never glue the flapper shut. It must open during fan use to vent moisture and prevent mold.
When to Use This Fix
Use this fix in these situations:
- Flapper stays partially open when fan is off
- Foam alone does not stop flapping, add weight as a secondary step
- Fans in high wind areas or bathrooms with long duct runs
Combine Foam and Weight for Maximum Effect
Hybrid Fix for Stubborn Noise
For chronic flapping, combine both methods. Foam eliminates closure noise and weight prevents unwanted opening. This dual approach is ideal for older Broan or slim Panasonic models with sensitive teeter-totter flappers.
Installation Order:
- Apply foam first
- Add weight after foam is secure
- Test both manual closure and fan operation
Many users report complete silence after this combo fix, even in strong coastal winds.
Install an Inline Draft Blocker
Add a Secondary Damper in the Attic
An inline damper (or draft blocker) stops wind before it reaches your fan’s internal flapper.
Recommended Product:
Deflecto 4 inch Inline Draft Blocker (five to ten dollars at home improvement stores)
How to Install
-
Access the Duct Run
Go to the attic and locate the duct between the fan and roof vent. -
Cut the Duct
Use tin snips to make a straight cut in the metal or rigid plastic duct. -
Insert the Blocker
Slide the inline damper into the duct. It has a gravity flapper that opens with airflow and closes when fan stops. -
Seal with Foil Tape
Secure both ends with UL 181 foil tape. Never use duct tape. -
Test
Simulate wind with a blower or wait for a breezy night.
Pros and Cons
- Prevents backdrafts from reaching the fan
- Easy retrofit for most duct systems
- Plastic flapper may still make noise (add foam if needed)
- Not 100 percent effective in extreme wind
Upgrade Your Roof Vent Design
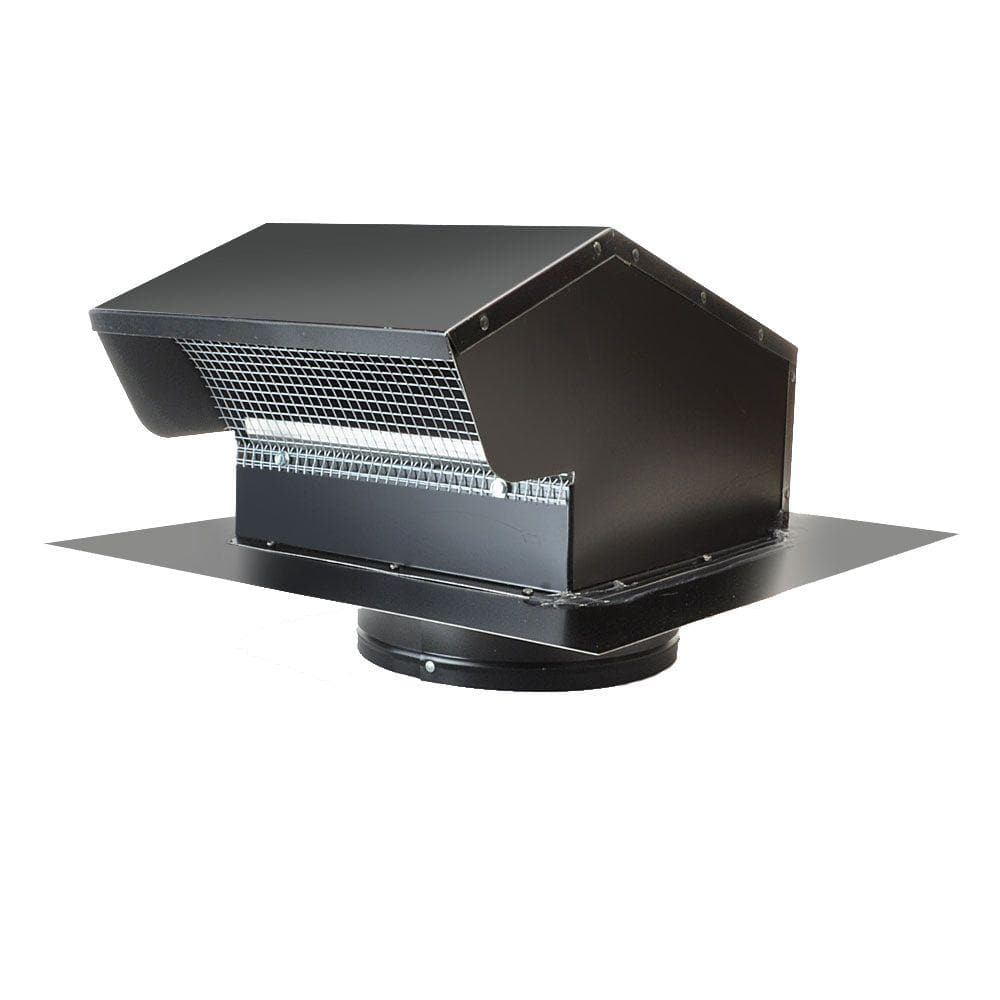
Replace Gooseneck with Hooded Vent
Gooseneck vents are prone to wind capture. Upgrade to a hooded roof jack or baffle style cowl that deflects wind and reduces pressure draw.
Best Features to Look For:
- Sloped hood that sheds wind upward
- Internal baffle to disrupt airflow
- Weather resistant polymer or galvanized steel
Installation Tip:
Install the new vent so the opening faces away from prevailing winds.
Build a DIY Wind Deflector
Create a simple U shaped metal guard:
- Cut a 4 inch high piece of aluminum or galvanized steel
- Bend into a U shape wide enough to fit around the vent
- Screw it to the roof jack on the windward side
This blocks direct wind while allowing exhaust to escape.
Consider Relocating the Exhaust Outlet
Exit through the soffit or wall instead of the roof. This is less exposed to wind and was historically used in coastal homes. You must follow local code requirements for minimum distance from windows and doors.
Upgrade to a Spring Loaded or Motorized Damper
Permanent Fix for Chronic Flapping
Standard gravity flappers lack resistance. Upgraded dampers solve this problem completely.
| Type | How It Works | Best For |
|---|---|---|
| Spring Loaded Damper | Closes with tension, resists wind | High wind areas, older homes |
| Motorized Damper | Opens only when fan powers on | Ultimate noise elimination |
How to Install
- Inline motorized damper wires to fan circuit so it opens and closes with fan
- Replace internal flapper only if compatible with your model
- Consult HVAC pro for duct modifications or bypass systems
Cost: 30 to 100 dollars depending on type.
While not common in standard bathroom fans, some premium models (like certain Panasonic WhisperGreen units) offer motorized dampers.
Prevent Moisture Risks with Safe Modifications
Never Remove the Flapper
The backdraft damper is required by code to prevent cold air infiltration, stop pests and debris from entering, and block attic moisture from entering the duct.
Removing it risks:
- Mold growth in your home
- Condensation in ducts
- Increased energy bills
Avoid Permanent Blocking
Sealing the vent or jamming the flapper shut violates building codes and creates health hazards. Always ensure the damper opens fully during fan operation.
Use Acoustic Duct Treatment to Reduce Noise
Muffle Sound Transmission
Even with a quiet flapper, noise can travel through the duct. Reduce it with these methods:
- Mass loaded vinyl (MLV) wrap around the duct near the exit
- Fiberglass duct liner inside the duct if accessible
- Vibration isolation clamps to decouple duct from framing
DIY Option:
Wrap duct with rockwool insulation and cover with foil jacket.
Model Specific Fixes for Broan and Panasonic
Broan Fans: Add Foam and Weight
Many Broan models have lightweight plastic flappers with no padding.
Fix:
- Remove cover by squeezing clips
- Swing down unit to access internal flapper
- Apply foam tape to contact points
- Add a small nut to the back of the flapper with super glue
Pro Tip: Clean fan blades while disassembled. Dust buildup reduces airflow and increases strain.
Panasonic Whisper Fans: Tune the Teeter Totter Flapper
Slim oval models use a vertical pivot flapper that is highly sensitive.
Access Steps:
- Remove cover
- Unplug motor connector
- Remove 3 to 4 screws to drop assembly
- Locate flapper stop point
Fix:
Apply foam weather strip where the flapper hits the housing.
Maintain Long Term Quiet Operation
Inspect and Clean Annually
While fixing flapping, take the opportunity to:
- Vacuum dust from fan blades and housing
- Wipe down the flapper and duct collar
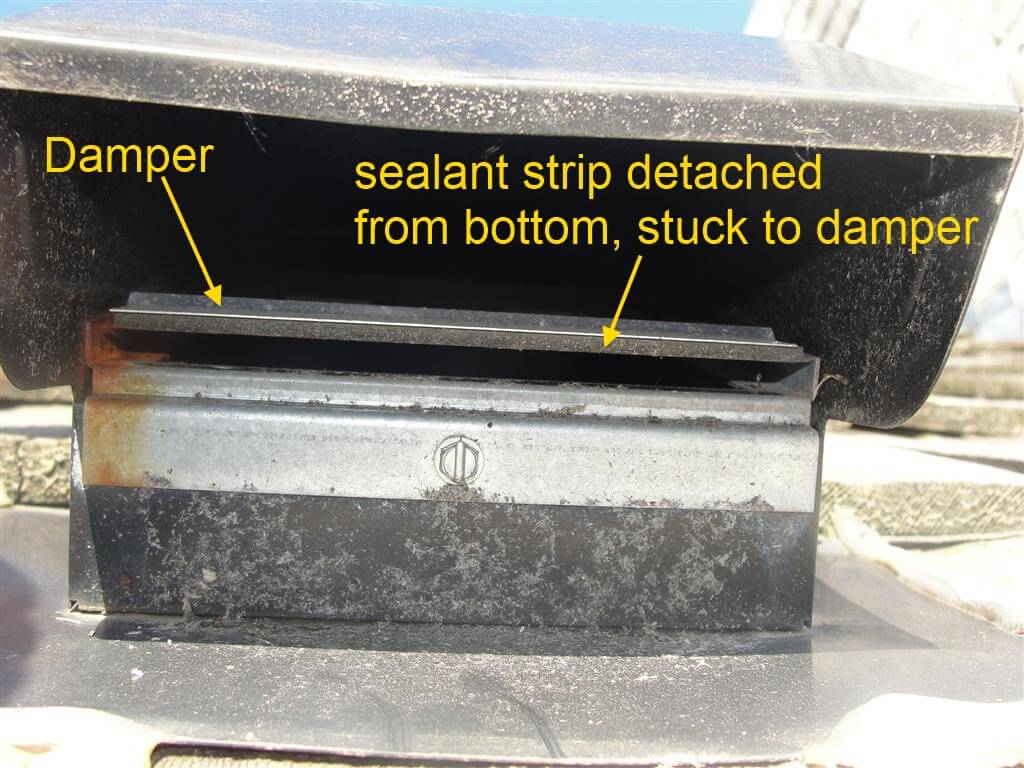
- Check foam tape for compression or detachment
- Replace incandescent bulbs with cooler LED equivalents
Replace Foam Every 3 to 5 Years
Use UV resistant, 3 year warranty grade vinyl foam. Properly cleaned surfaces extend life.
Replacement Signs:
- Foam is flattened or peeling
- Noise returns after years of silence
- Flapper shows wear at contact points
Frequently Asked Questions About Exhaust Fan Flapping
Why does my exhaust fan flap even when turned off?
This happens because wind creates pressure changes that lift the flapper. When the gust passes, pressure equalizes and the flapper slams shut. This is a physics issue, not a malfunction.
Can I remove the flapper to stop the noise?
No. The backdraft damper is required by building code to prevent backdrafts, pest entry, and moisture problems. Removing it risks mold growth and increased energy costs.
How long does foam padding last on a flapper?
Properly applied weather resistant foam tape lasts 5 years or more. Inspect annually and replace if compressed, peeling, or worn.
What is the easiest fix for exhaust fan flapping?
Adding foam padding to flapper contact points is the easiest and most effective fix. It costs under five dollars and takes 20 to 30 minutes.
Does an inline draft blocker completely stop flapping?
An inline blocker helps but may not completely stop noise in extreme wind. Many homeowners add foam padding to the inline damper as well for best results.
Are motorized dampers worth the cost?
Motorized dampers offer the most permanent solution but cost 30 to 100 dollars plus installation. They are best for severe cases where other fixes have failed.
Key Takeaways for Stopping Exhaust Fan Flapping
Exhaust fan flapping is fixable, and usually simple. Start with foam padding and a small weight. If wind is the main culprit, upgrade your roof vent or add an inline damper. Never remove the flapper, and always ensure the fan can vent freely when running.
For immediate relief, apply foam tape to all flapper contact points and add a small weight if the flapper stays partially open. This takes 20 to 30 minutes and costs under ten dollars. For long term prevention, install an inline draft blocker in the attic, upgrade to a hooded roof vent with wind deflector, or relocate the exhaust to the soffit or wall if feasible. For severe or persistent cases, consider replacing the fan with a model featuring a spring loaded or motorized damper, or consult an HVAC professional for pressure balanced systems.
With these proven fixes, you can eliminate noise, improve efficiency, and enjoy quiet, draft free ventilation year round.
Leave a Reply