Is your bathroom still foggy after a hot shower? Does your ceiling exhaust fan sound like a jet engine, or worse, do nothing at all? The culprit is likely a buildup of dust, hair, and moisture inside the fan. Over time, grime accumulates on the vent cover, fan blades, and motor housing, reducing airflow, increasing noise, and even creating mold risks. Cleaning your ceiling exhaust fan every 6 to 12 months restores performance, improves air quality, and prevents long-term moisture damage.
You do not need professional help or expensive tools. With a ladder, screwdriver, vacuum, and a few household supplies, you can deep-clean your exhaust fan in under an hour. This guide walks you through each step safely and efficiently so you can breathe easier and keep your bathroom dry.
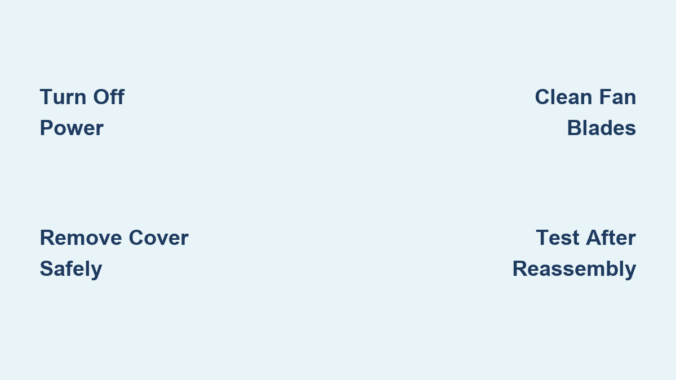
Turn Off Power to the Ceiling Exhaust Fan
Before touching any part of the fan, you must cut the electricity. Even low-voltage bathroom fans can pose a shock risk if wiring is exposed during cleaning.
Switch Off at the Breaker
Flip the wall switch to the off position. Go to your electrical panel and turn off the circuit breaker powering the bathroom. Test the fan by flipping the switch to ensure it does not turn on.
Never rely only on the wall switch. Shutting off the breaker eliminates the risk of accidental energizing while you work. This single step prevents electrical shock and ensures you can clean safely.
Remove the Vent Cover Without Damage
How you remove the cover depends on the fan model. Most fall into three categories: clip-in, screw-secured, or light-integrated.
Clip-In Covers: Pop It Down Gently
Look for a small gap, notch, or arrow on the rim. Insert a flat tool like a butter knife and gently pry one corner down. Squeeze any visible spring clips together while lowering the cover. Support the cover as it releases and do not let it drop.
If it will not budge, check for hidden screws behind a light fixture or consult the manufacturer is manual online using the model number.
Screw-Secured Covers: Unscrew and Lower
Use a Phillips screwdriver to remove screws around the perimeter. Hold the cover with one hand as you remove the last screw. Lower it slowly to avoid damaging wires or the housing.
Place a towel on the floor first. Dust often rains down when the cover comes off.
Light-Integrated Units: Disconnect Wiring First
Turn off and cool the bulb before starting. Unscrew or unclip the light cover. Press the connector is release tab to disconnect power. Remove the acorn nut if present to free the assembly.
Keep small parts like nuts and screws in a bowl to avoid losing them.
Deep Clean the Vent Cover
Once removed, clean the cover based on its material and design.
Plastic or Metal Grilles: Soak and Scrub
Fill a sink with warm water and a few drops of dish soap. Soak the cover for 10 minutes to loosen grime. Use an old toothbrush to scrub between slats and corners. Rinse well and dry completely with a microfiber cloth.
Never soak light fixtures or electrical components.
Light Fixtures: Wipe, Do Not Soak
Vacuum dust with a brush attachment. Dampen a microfiber cloth slightly and wring it well. Wipe the surface gently and avoid moisture near sockets. Let it air-dry fully before reattaching.
Avoid abrasive cleaners that scratch plastic or remove finishes.
Clean Fan Blades and Motor Housing
With the cover off, you will see the squirrel cage blower and motor. This is where dust builds up and reduces airflow.
Vacuum Loose Dust First
Attach a brush tool to your vacuum. Clean the housing, motor casing, and duct opening. Switch to a crevice tool for tight spaces and corners. Focus on the flapper damper, which should swing freely.
Skip this step, and dust will blow back into your bathroom when you turn the fan on.
Deep Clean the Squirrel Cage
Most exhaust fans use a cylindrical squirrel cage instead of flat blades. Use a soft toothbrush to scrub dust from the fins. For sticky buildup, lightly dampen the brush but never spray water. Blow out remaining dust with compressed air, directing it outward.
If the cage is extremely dirty, remove it for deeper cleaning.
Remove and Clean the Motor (Optional)

For annual maintenance or stubborn grime, unplug the motor is electrical connector. Unscrew 1 to 3 mounting screws and hold the motor as you remove the last one. Lower the motor carefully from the housing.
Do not submerge the motor in water. Blow dust from windings with compressed air. Wipe the housing with a barely damp cloth. Remove the C-clip if present, take off the fan wheel, and soak it in soapy water. Dry all parts completely and wait 2 to 4 hours if any moisture touched the motor.
Reinstall only when fully dry.
Wipe Down Internal Surfaces
After vacuuming and brushing, dampen a microfiber cloth and wring it thoroughly. Wipe the inside of the housing, duct collar, and visible duct section. Check the backdraft damper, which should open when the fan runs and close when off.
Ensure no standing moisture remains near wiring or the motor. This step removes remaining residue and ensures all components are clean.
Reassemble the Exhaust Fan
Putting it back together correctly ensures quiet and safe operation.
Reinstall the Motor (If Removed)
Align the motor in the housing. Reconnect the electrical plug firmly. Screw in mounting screws and tighten, but do not overtighten.
Reattach the Vent Cover
For clip-in models, align tabs or wires and push up evenly until it snaps. For screw models, insert screws and tighten in a star pattern. For light units, reconnect wiring, replace the bulb, and secure the cover.
Make sure the cover sits flush with the ceiling and does not wobble.
Test Fan Operation After Cleaning
Restore power and verify everything works properly.
Restore Power and Run the Fan
Turn the circuit breaker back on. Flip the wall switch to activate the fan.
Check for Proper Operation
Listen for grinding, rattling, or excessive vibration. Hold a tissue near the vent. It should pull gently toward the cover. Confirm the light turns on if equipped.
If airflow is still weak or noise persists, the motor may be failing.
When to Replace Instead of Clean
Cleaning helps in most cases, but some fans are beyond repair.
Replace If
The motor smells like burning when running. There is visible damage to wiring or housing. Noise does not improve after cleaning. Airflow remains poor despite a clean unit. The fan is over 10 to 15 years old.
Modern replacements are quieter, more efficient, and offer higher CFM ratings for better moisture control.
Prevent Mold and Maintain Airflow
A clean fan prevents humidity damage and keeps your bathroom fresh.
Schedule Routine Cleaning
Clean every 6 months in frequently used bathrooms. Every 2 to 3 years is enough for guest bathrooms. Set a reminder on your phone or use a home maintenance app.
Inspect Ductwork Annually
Ensure the duct is connected and runs to the outside. Clear obstructions like bird nests or insulation blocking the exit. Check the exterior vent flap opens and closes freely.
A blocked duct renders even the cleanest fan useless.
Essential Safety Tips for Fan Cleaning
Skip safety, and you risk shock, falls, or fire.
Always
Turn off power at the breaker. Wear safety glasses and an N95 mask because dust and mold spores are common. Use a stable stepstool or ladder and never overreach.
Never
Spray water directly into the motor. Submerge electrical parts. Force a stuck cover and look for hidden screws first.
One user reported damaging their fan by prying too hard, only to later find two hidden screws behind the light cover.
Tools Needed for Fan Cleaning
Gather these before starting:
Stepstool or ladder. Screwdriver (Phillips or flathead). Vacuum with brush and crevice tools. Old toothbrush or soft-bristled brush. Compressed air can. Mild dish soap. Microfiber cloths. Safety glasses and dust mask. Towel or drop cloth to catch debris.
No special cleaners or tools are needed. Just common household items will suffice.
How Long Does It Take
Average cleaning time is 30 to 60 minutes. First-time users may need up to 75 minutes due to the learning curve. Experienced DIYers can finish in 20 to 30 minutes.
Time drops significantly once you know your model is quirks.
Frequently Asked Questions About Cleaning Ceiling Exhaust Fans
How often should I clean my ceiling exhaust fan?
Clean every 6 to 12 months for bathrooms used daily. For guest bathrooms or low-use spaces, cleaning every 2 to 3 years is sufficient. Neglecting cleaning for longer periods leads to reduced airflow and mold growth.
Can I clean the fan without removing it from the ceiling?
You can vacuum visible dust and wipe the cover without removal, but thorough cleaning requires removing the vent cover and accessing internal components. Skipping internal cleaning leaves buildup that continues to reduce performance.
What happens if I do not clean my exhaust fan?
Neglect leads to reduced airflow, increased noise, and moisture buildup. This creates perfect conditions for mold and mildew, which can damage walls and ceilings. In extreme cases, dust accumulation near the motor poses a fire hazard.
Why is my fan still noisy after cleaning?
Persistent noise after cleaning indicates motor wear or mechanical damage. Check that all screws are tight and the squirrel cage is not rubbing the housing. If noise continues, the motor may be failing and replacement is needed.
Can I use water to clean the motor?
Never submerge the motor in water or spray liquids directly into it. Use compressed air to blow out dust. If components get slightly damp, allow 2 to 4 hours of drying time before reinstalling.
How do I know if my fan is working properly after cleaning?
Turn on the fan and hold a tissue near the vent. It should pull toward the cover with gentle suction. Listen for smooth operation without grinding or rattling. The fan should remove fog from showers within a few minutes.
Key Takeaways for Cleaning Your Ceiling Exhaust Fan
Cleaning a ceiling exhaust fan is a quick, low-cost task with high-impact benefits. It stops mold, reduces humidity, and prevents costly ceiling damage. Turn off power at the breaker before starting, and remove the vent cover carefully to avoid breaking clips or screws.
Clean the cover, fan blades, and motor housing using vacuuming, brushing, and compressed air. Reassemble everything securely and test the fan to ensure proper airflow and quiet operation. Schedule cleaning every 6 to 12 months to maintain performance.
If cleaning does not restore performance, consider upgrading to a modern, high-efficiency model. Your lungs and walls will thank you.
Leave a Reply