Is your bathroom still foggy after a hot shower? Does cooking leave a haze in the kitchen that lingers for hours? These are classic signs your exhaust fan needs cleaning. Over time, dust, grease, and moisture build up on fan blades, filters, and ducts, choking airflow, increasing noise, and raising health and fire risks. The good news? With just 30 minutes and basic household tools, you can restore your fan to peak performance.
Cleaning an exhaust fan is not just about freshness. It is essential maintenance. A clogged bathroom fan traps moisture, inviting mold and mildew. A greasy kitchen hood becomes a fire hazard. But a clean unit removes 90% of steam in under 10 minutes and clears smoke in seconds. This guide walks you through every step, from power-off to reassembly, using only what you likely already have at home.
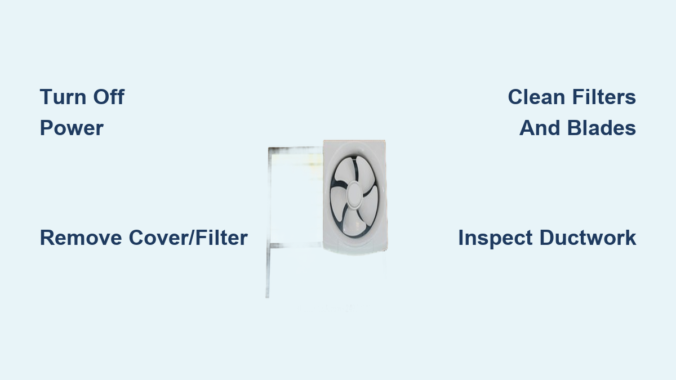
Turn Off Power Safely Before Cleaning
:max_bytes(150000):strip_icc()/safely-turn-off-power-at-electrical-panel-1824677-07-b4810db6af594101ac2be9f68a2f09d5.jpeg)
Before touching any part of the fan, you must cut power completely. This step is non-negotiable for your safety.
Flip the wall switch to off. Go to your circuit breaker and shut off the correct breaker, especially for hardwired bathroom or kitchen units. For plug-in range hoods, unplug from the outlet. If the fan has a light or sensor, ensure both circuits are off.
Never skip this step. Live wires inside the housing can cause shock or short circuits when damp.
Place a towel or sheet underneath to catch falling dust and debris. Use a step stool or ladder on a flat, stable surface. Never stand on chairs or countertops.
Remove Fan Cover or Filter
Bathroom Fan Covers
Most bathroom units use one of three mounting systems. Spring clips require you to gently pull the cover down, then squeeze the metal clips together to release. Snap-in tabs mean you press along the edges to unclip. Acorn nuts or screws are often hidden behind a light cover, so remove them first. Handle plastic covers carefully because older models may be brittle.
Kitchen Grease Filters
Most slide out or unclip easily. Look for release levers or tabs. Lift or slide the filter out horizontally. Some filters are magnetic and detach with a gentle pull.
Take a photo before disassembly. It helps during reassembly, especially with multi-part housings.
Clean Filters and Covers
Plastic Bathroom Covers
Soak the cover in a basin of warm water with a few drops of dish soap for 5 to 10 minutes. Use a soft toothbrush to scrub grime from textured surfaces. Rinse thoroughly and dry flat on a towel. Never hang the cover to dry, which can warp the plastic.
Avoid hot water. It can melt or distort plastic components.
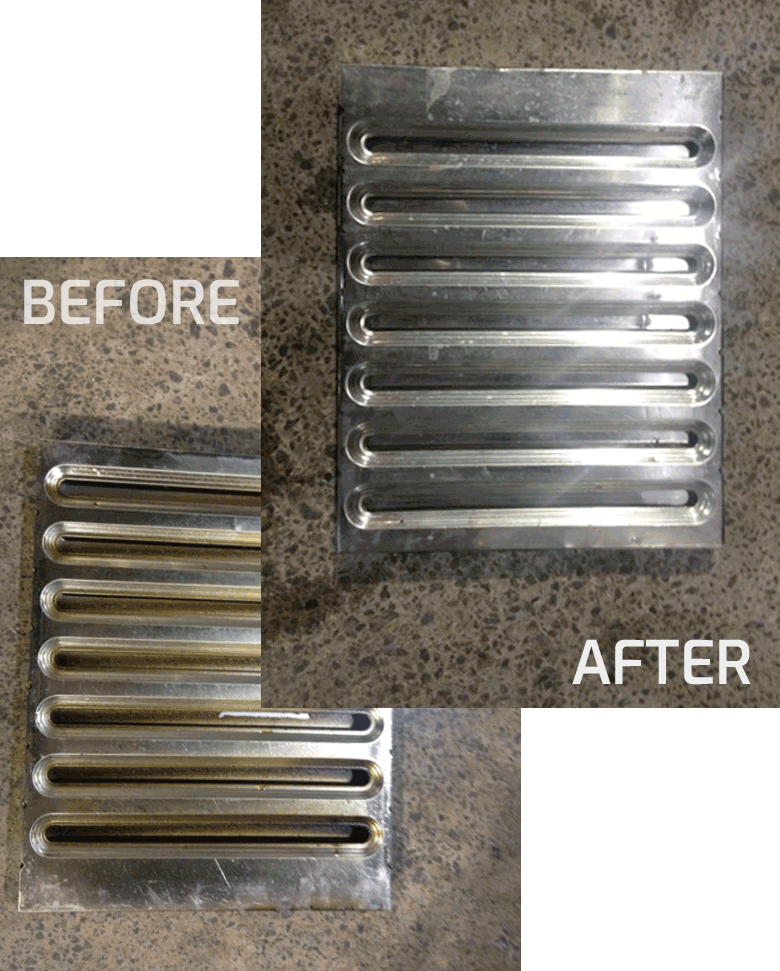
Metal Kitchen Grease Filters
Fill your sink with hot water, dish soap, and 1 to 2 tablespoons of baking soda. Soak the filter for 15 to 20 minutes, or up to 2 hours for heavy buildup. Scrub with a soft brush, rinse well, and air dry completely.
For baked-on grease, mix dish soap with 2 to 3 caps of household bleach into a paste. Apply with a spray bottle, let sit 5 to 10 minutes, then scrub. Rinse thoroughly. Use this method only on metal, never on plastic.
Never submerge light fixtures, motors, or electronic sensors in water.
Vacuum Internal Components
With the cover off, vacuum all accessible parts. Use the brush attachment to sweep dust from fan blades, housing, and motor casing. Switch to the crevice tool for tight corners and fins.
Take the unit outside and use compressed air to blow out stubborn dust from motor fins and squirrel cage. Do this before brushing because it prevents dust clouds indoors.
Avoid wet cleaning the motor unless you are doing a deep clean.
Deep Clean Fan Blades and Motor

Only proceed with this step if you are comfortable with light disassembly.
Remove the Motor If Needed
Unscrew the 1 to 3 mounting screws. Gently lower the motor. Do not yank the wires. Some models have a C-clip securing the impeller, which is the fan rotor. Use a C-clip tool or needle-nose pliers to remove it.
Clean the Impeller
Soak the impeller in soapy water. Scrub with a soft brush. Rinse and dry completely before reattaching.
Wipe the Motor
Use a slightly damp microfiber cloth. Never soak the motor. Clean fins with a toothbrush. Reinstall only when the motor is 100% dry.
Do not lubricate the motor. Most modern units have sealed bearings. Oil attracts dust and can damage components.
Inspect and Clean the Ductwork
Even a spotless fan fails if the duct is blocked.
Check Visible Duct Sections
Use a flashlight and mirror to inspect. Vacuum accessible parts with a brush attachment. Look for kinks, sagging, or compressed insulation. All of these reduce airflow.
Clean the Exterior Vent
Go outside to the roof, wall, or soffit vent. Clear leaves, bird nests, ice, or insect hives by hand or with a long brush. Ensure the flapper opens when the fan runs and closes when off.
A blocked exterior vent forces moisture back into the attic or kitchen, risking mold and fire.
Clean Light Fixtures and Sensors
Light Bulbs and Sockets
Wipe with a dry or slightly damp cloth. Use a crevice vacuum for dust in corners. Replace bulbs if dim or flickering.
Humidity Sensors
Gently wipe with a dry cloth. Grime can delay automatic startup. Test by running a hot shower. The fan should activate within 2 to 3 minutes.
LED-Integrated Units
Clean lenses with a lint-free cloth. Avoid ammonia-based cleaners because they can cloud plastic lenses.
Reassemble and Test the Fan
Reinstallation Steps
Ensure all parts are fully dry with no damp filters or covers. Reattach the motor by aligning it properly, reconnecting wiring or plugging in the connector, and securing with screws. Do not over-tighten. Snap or screw the cover back in place. Replace light bulbs or covers if removed. Restore power at the breaker.
Performance Test
Turn on the fan. Feel airflow at the grille. It should be strong and steady. Listen for rattling, buzzing, or grinding, which are signs of imbalance or debris. Check light and sensor function.
A clean fan removes steam in 5 to 10 minutes and kitchen smoke in 2 to 3 minutes.
How Often to Clean Exhaust Fans
Bathroom Fans
Clean every 6 to 12 months. Clean twice a year if the fan is used daily. High-humidity homes should clean every 6 months.
Kitchen Range Hoods
Clean every 1 to 3 months, depending on cooking frequency. Clean grease filters monthly if frying or grilling often. Replace charcoal filters every 6 months because they are not washable.
Mark cleaning dates in your calendar or home maintenance log.
Signs Your Exhaust Fan Needs Cleaning
Clean It Now If
The fan runs but airflow is weak and steam or smoke stays in the room. There is visible dust or grease on the cover. The fan makes rattling or loud humming sounds during operation. There are mold spots near the vent or ceiling. Paint is bubbling, which is a sign of trapped moisture.
Time to Replace If
The fan is noisy after cleaning. The motor smells burnt or overheats. Blades are cracked or wobbling. The unit is over 10 years old and underperforming. The circuit breaker trips when the fan turns on.
Modern fans are quieter, more efficient, and easier to clean.
Avoid These Common Mistakes
What Not to Do
Do not spray water into the motor. It causes short circuits. Do not use steel wool or abrasive pads. They scratch surfaces and trap grime. Do not reinstall wet parts. It leads to mold, rust, or electrical failure. Do not use oven cleaner or undiluted bleach. They corrode metal and warp plastic. Do not lubricate sealed motors. Oil attracts dust and ruins bearings.
Use only mild soap, soft brushes, and microfiber cloths for safe, effective cleaning.
Boost Performance with Pro Tips
Maximize Airflow
Measure CFM with a digital anemometer. Over 80% of rated CFM means the fan is healthy. Under 50% indicates likely duct blockage or motor failure. Replace long, sagging ducts with rigid metal piping. Add a duct silencer to reduce noise from turbulence.
Prevent Future Buildup
Run the bathroom fan 15 to 20 minutes after showering. Keep the kitchen hood on during cooking and 5 minutes after. Install a timer switch for automatic shutoff. Paint near the vent? Remove and clean the cover afterward because paint can clog airflow.
When to Call a Professional
While most cleaning is DIY, professional service is recommended annually for deep duct cleaning, motor inspection, CFM testing, and hard-to-reach installations like attic-mounted units. Expect to pay $100 to $200, but it prevents costly repairs and fire risks.
Final Checklist for Clean Exhaust Fans
Power turned off at breaker. Cover or filter removed. Filter soaked and scrubbed. Interior vacuumed and wiped. Motor and blades cleaned if needed. Duct and exterior vent inspected. All parts fully dry before reassembly. Power restored and fan tested.
Key Takeaways for Cleaning Your Exhaust Fan
Cleaning your exhaust fan takes less time than baking a cake, but the benefits last months. You will breathe easier, reduce fire risks, and extend your fan is life by years. Do it every 6 months and you will never wonder why the bathroom stays damp or the kitchen smells greasy. With this guide, you are not just cleaning a fan. You are protecting your home.
Frequently Asked Questions About Cleaning Exhaust Fans
How do I know if my exhaust fan needs cleaning?
Check for weak airflow when the fan runs. Look for visible dust or grease on the cover. Listen for rattling or unusual noise. Notice if steam or smoke lingers longer than normal. These are clear signs the fan needs cleaning.
Can I clean my exhaust fan without removing it?
You can clean the cover and filter without full removal. Vacuum visible dust from the grille. Wipe the exterior with a damp cloth. However, deep cleaning requires removing the cover to access fan blades and motor.
What happens if I do not clean my exhaust fan?
A dirty fan reduces airflow and forces the motor to work harder. In bathrooms, this leads to mold and moisture damage. In kitchens, grease buildup becomes a fire hazard. Performance drops 20 to 40% with clogged filters.
Can I use a pressure washer on exhaust fan parts?
Never use a pressure washer. The high-pressure water damages motor components and electrical parts. Use mild soap, warm water, and soft brushes instead.
How long does it take to clean an exhaust fan?
Basic cleaning takes 20 to 30 minutes. Deep cleaning with motor access takes 45 to 60 minutes. Most of that time is soaking and drying.
Should I hire a professional to clean my exhaust fan?
Most homeowners can handle basic cleaning themselves. Hire a pro annually for duct cleaning, motor inspection, or if the fan is difficult to reach. It costs $100 to $200 but prevents major issues.
Leave a Reply