Your Ultimate Guide to Cooling: In-Depth Reviews, Smart Comparisons & Pro Care Tips.

Author: Fan Guide (Page 18 of 38)

How to Clean Ceiling Exhaust Fan: Easy Steps


Is your bathroom still foggy after a hot shower? Does your ceiling exhaust fan sound like a jet engine, or worse, do nothing at all? The culprit is likely a buildup of dust, hair, and moisture inside the fan. Over time, grime accumulates on the vent cover, fan blades, and motor housing, reducing airflow, increasing noise, and even creating mold risks. Cleaning your ceiling exhaust fan every 6 to 12 months restores performance, improves air quality, and prevents long-term moisture damage.

You do not need professional help or expensive tools. With a ladder, screwdriver, vacuum, and a few household supplies, you can deep-clean your exhaust fan in under an hour. This guide walks you through each step safely and efficiently so you can breathe easier and keep your bathroom dry.

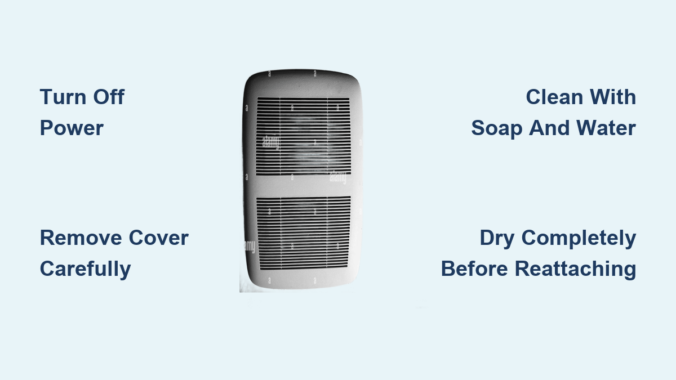
Turn Off Power to the Ceiling Exhaust Fan

Before touching any part of the fan, you must cut the electricity. Even low-voltage bathroom fans can pose a shock risk if wiring is exposed during cleaning.

Switch Off at the Breaker

Flip the wall switch to the off position. Go to your electrical panel and turn off the circuit breaker powering the bathroom. Test the fan by flipping the switch to ensure it does not turn on.

Never rely only on the wall switch. Shutting off the breaker eliminates the risk of accidental energizing while you work. This single step prevents electrical shock and ensures you can clean safely.

Remove the Vent Cover Without Damage
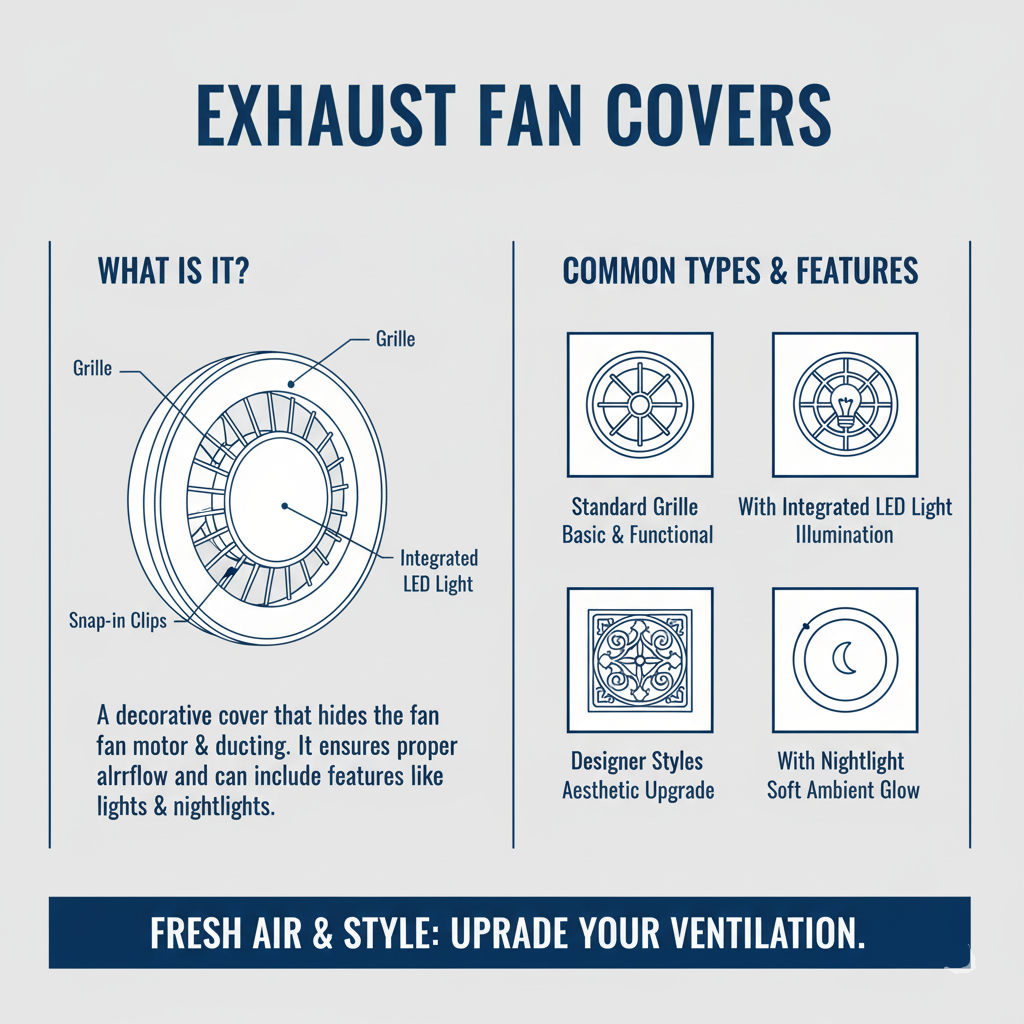
bathroom exhaust fan cover removal types clip-in screw-secured light-integrated

How you remove the cover depends on the fan model. Most fall into three categories: clip-in, screw-secured, or light-integrated.

Clip-In Covers: Pop It Down Gently

Look for a small gap, notch, or arrow on the rim. Insert a flat tool like a butter knife and gently pry one corner down. Squeeze any visible spring clips together while lowering the cover. Support the cover as it releases and do not let it drop.

If it will not budge, check for hidden screws behind a light fixture or consult the manufacturer is manual online using the model number.

Screw-Secured Covers: Unscrew and Lower

Use a Phillips screwdriver to remove screws around the perimeter. Hold the cover with one hand as you remove the last screw. Lower it slowly to avoid damaging wires or the housing.

Place a towel on the floor first. Dust often rains down when the cover comes off.

Light-Integrated Units: Disconnect Wiring First

Turn off and cool the bulb before starting. Unscrew or unclip the light cover. Press the connector is release tab to disconnect power. Remove the acorn nut if present to free the assembly.

Keep small parts like nuts and screws in a bowl to avoid losing them.

Deep Clean the Vent Cover

Once removed, clean the cover based on its material and design.

Plastic or Metal Grilles: Soak and Scrub

Fill a sink with warm water and a few drops of dish soap. Soak the cover for 10 minutes to loosen grime. Use an old toothbrush to scrub between slats and corners. Rinse well and dry completely with a microfiber cloth.

Never soak light fixtures or electrical components.

Light Fixtures: Wipe, Do Not Soak

Vacuum dust with a brush attachment. Dampen a microfiber cloth slightly and wring it well. Wipe the surface gently and avoid moisture near sockets. Let it air-dry fully before reattaching.

Avoid abrasive cleaners that scratch plastic or remove finishes.

Clean Fan Blades and Motor Housing

With the cover off, you will see the squirrel cage blower and motor. This is where dust builds up and reduces airflow.

Vacuum Loose Dust First

Attach a brush tool to your vacuum. Clean the housing, motor casing, and duct opening. Switch to a crevice tool for tight spaces and corners. Focus on the flapper damper, which should swing freely.

Skip this step, and dust will blow back into your bathroom when you turn the fan on.

Deep Clean the Squirrel Cage

Most exhaust fans use a cylindrical squirrel cage instead of flat blades. Use a soft toothbrush to scrub dust from the fins. For sticky buildup, lightly dampen the brush but never spray water. Blow out remaining dust with compressed air, directing it outward.

If the cage is extremely dirty, remove it for deeper cleaning.

Remove and Clean the Motor (Optional)

bathroom exhaust fan motor removal cleaning electrical connector mounting screws

For annual maintenance or stubborn grime, unplug the motor is electrical connector. Unscrew 1 to 3 mounting screws and hold the motor as you remove the last one. Lower the motor carefully from the housing.

Do not submerge the motor in water. Blow dust from windings with compressed air. Wipe the housing with a barely damp cloth. Remove the C-clip if present, take off the fan wheel, and soak it in soapy water. Dry all parts completely and wait 2 to 4 hours if any moisture touched the motor.

Reinstall only when fully dry.

Wipe Down Internal Surfaces

After vacuuming and brushing, dampen a microfiber cloth and wring it thoroughly. Wipe the inside of the housing, duct collar, and visible duct section. Check the backdraft damper, which should open when the fan runs and close when off.

Ensure no standing moisture remains near wiring or the motor. This step removes remaining residue and ensures all components are clean.

Reassemble the Exhaust Fan

Putting it back together correctly ensures quiet and safe operation.

Reinstall the Motor (If Removed)

Align the motor in the housing. Reconnect the electrical plug firmly. Screw in mounting screws and tighten, but do not overtighten.

Reattach the Vent Cover

For clip-in models, align tabs or wires and push up evenly until it snaps. For screw models, insert screws and tighten in a star pattern. For light units, reconnect wiring, replace the bulb, and secure the cover.

Make sure the cover sits flush with the ceiling and does not wobble.

Test Fan Operation After Cleaning

Restore power and verify everything works properly.

Restore Power and Run the Fan

Turn the circuit breaker back on. Flip the wall switch to activate the fan.

Check for Proper Operation

Listen for grinding, rattling, or excessive vibration. Hold a tissue near the vent. It should pull gently toward the cover. Confirm the light turns on if equipped.

If airflow is still weak or noise persists, the motor may be failing.

When to Replace Instead of Clean

Cleaning helps in most cases, but some fans are beyond repair.

Replace If

The motor smells like burning when running. There is visible damage to wiring or housing. Noise does not improve after cleaning. Airflow remains poor despite a clean unit. The fan is over 10 to 15 years old.

Modern replacements are quieter, more efficient, and offer higher CFM ratings for better moisture control.

Prevent Mold and Maintain Airflow

A clean fan prevents humidity damage and keeps your bathroom fresh.

Schedule Routine Cleaning

Clean every 6 months in frequently used bathrooms. Every 2 to 3 years is enough for guest bathrooms. Set a reminder on your phone or use a home maintenance app.

Inspect Ductwork Annually

Ensure the duct is connected and runs to the outside. Clear obstructions like bird nests or insulation blocking the exit. Check the exterior vent flap opens and closes freely.

A blocked duct renders even the cleanest fan useless.

Essential Safety Tips for Fan Cleaning

Skip safety, and you risk shock, falls, or fire.

Always

Turn off power at the breaker. Wear safety glasses and an N95 mask because dust and mold spores are common. Use a stable stepstool or ladder and never overreach.

Never

Spray water directly into the motor. Submerge electrical parts. Force a stuck cover and look for hidden screws first.

One user reported damaging their fan by prying too hard, only to later find two hidden screws behind the light cover.

Tools Needed for Fan Cleaning

Gather these before starting:

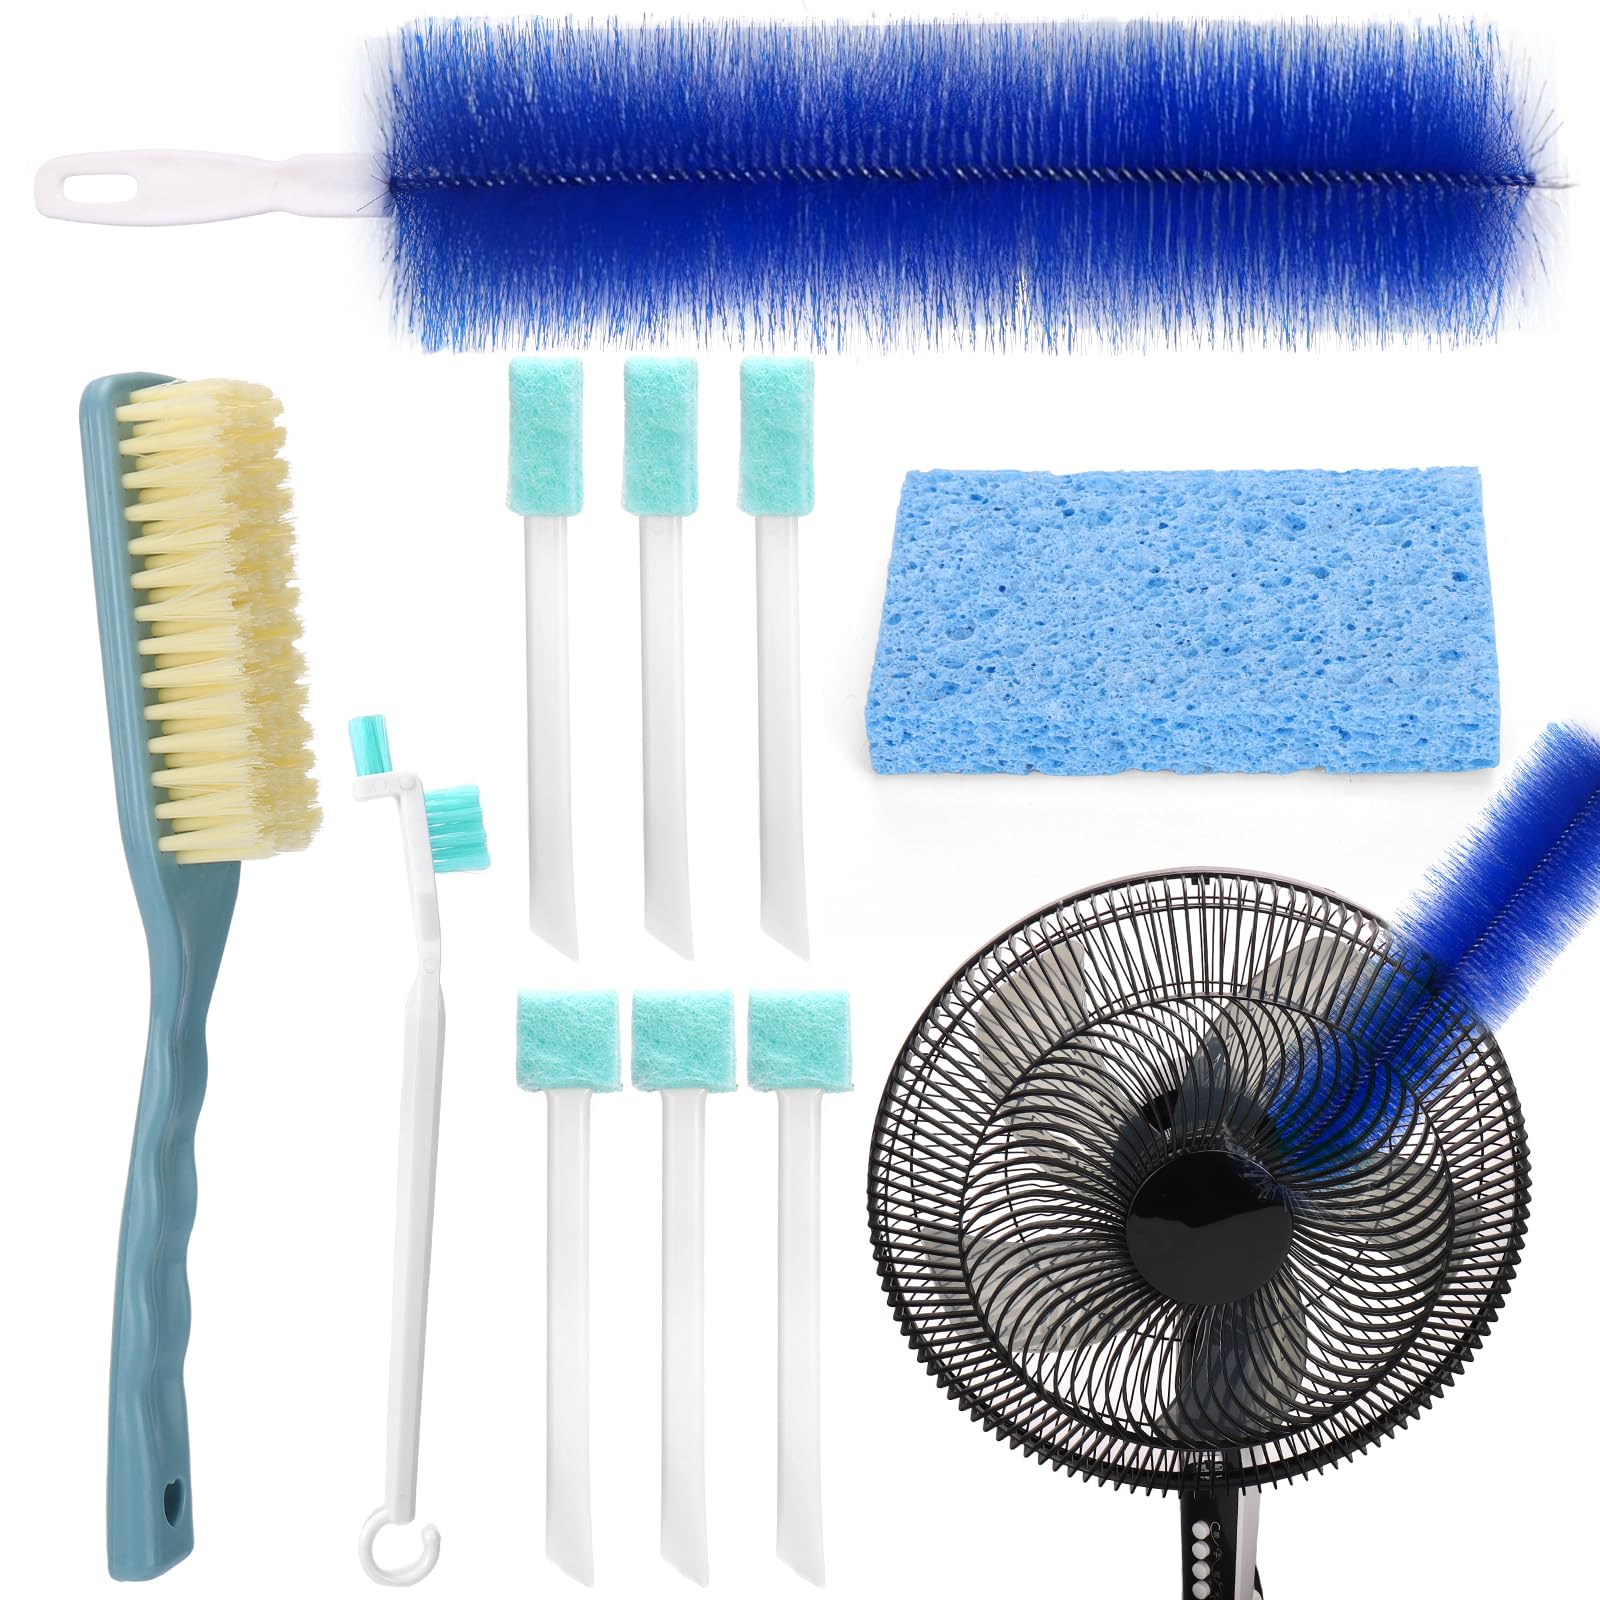
Stepstool or ladder. Screwdriver (Phillips or flathead). Vacuum with brush and crevice tools. Old toothbrush or soft-bristled brush. Compressed air can. Mild dish soap. Microfiber cloths. Safety glasses and dust mask. Towel or drop cloth to catch debris.

No special cleaners or tools are needed. Just common household items will suffice.

How Long Does It Take

Average cleaning time is 30 to 60 minutes. First-time users may need up to 75 minutes due to the learning curve. Experienced DIYers can finish in 20 to 30 minutes.

Time drops significantly once you know your model is quirks.

Frequently Asked Questions About Cleaning Ceiling Exhaust Fans

How often should I clean my ceiling exhaust fan?

Clean every 6 to 12 months for bathrooms used daily. For guest bathrooms or low-use spaces, cleaning every 2 to 3 years is sufficient. Neglecting cleaning for longer periods leads to reduced airflow and mold growth.

Can I clean the fan without removing it from the ceiling?

You can vacuum visible dust and wipe the cover without removal, but thorough cleaning requires removing the vent cover and accessing internal components. Skipping internal cleaning leaves buildup that continues to reduce performance.

What happens if I do not clean my exhaust fan?

Neglect leads to reduced airflow, increased noise, and moisture buildup. This creates perfect conditions for mold and mildew, which can damage walls and ceilings. In extreme cases, dust accumulation near the motor poses a fire hazard.

Why is my fan still noisy after cleaning?

Persistent noise after cleaning indicates motor wear or mechanical damage. Check that all screws are tight and the squirrel cage is not rubbing the housing. If noise continues, the motor may be failing and replacement is needed.

Can I use water to clean the motor?

Never submerge the motor in water or spray liquids directly into it. Use compressed air to blow out dust. If components get slightly damp, allow 2 to 4 hours of drying time before reinstalling.

How do I know if my fan is working properly after cleaning?

Turn on the fan and hold a tissue near the vent. It should pull toward the cover with gentle suction. Listen for smooth operation without grinding or rattling. The fan should remove fog from showers within a few minutes.

Key Takeaways for Cleaning Your Ceiling Exhaust Fan

Cleaning a ceiling exhaust fan is a quick, low-cost task with high-impact benefits. It stops mold, reduces humidity, and prevents costly ceiling damage. Turn off power at the breaker before starting, and remove the vent cover carefully to avoid breaking clips or screws.

Clean the cover, fan blades, and motor housing using vacuuming, brushing, and compressed air. Reassemble everything securely and test the fan to ensure proper airflow and quiet operation. Schedule cleaning every 6 to 12 months to maintain performance.

If cleaning does not restore performance, consider upgrading to a modern, high-efficiency model. Your lungs and walls will thank you.
How to Clean Microwave Exhaust Fan | Easy Guide


If your kitchen still smells like last night’s fried chicken even after wiping down the counters, your microwave exhaust fan is likely overdue for a deep clean. Most homeowners don’t realize their over-the-range microwave has hidden grease filters, internal fans, and vent systems that trap cooking residue, odors, and can even become fire hazards over time. Ignoring this critical maintenance task leads to reduced airflow, lingering smoke smells, and inefficient ventilation.

This guide reveals exactly how to clean every part of your microwave exhaust system, from removable grills and mesh filters to internal fan blades and odor-trapping components. You’ll learn where hidden filters are located, which cleaners actually cut through baked-on grease, how to safely access internal parts, and why Febreze, not vinegar, is the secret weapon for stubborn odors.

Remove Exterior Vent Grill Safely

Before cleaning any internal component, you must first remove the exterior vent grill. This panel blocks access to filters and the fan housing, and it’s often overlooked because screws are hidden out of sight.

Locate Hidden Screws on Top or Bottom

For top-mounted grills, look along the upper edge of the microwave. Most models secure the grill with two to four Phillips-head screws facing upward, often invisible unless you’re standing on a step stool. On some units, opening the microwave door slightly allows the grill to slide off more easily once unscrewed.

For bottom-mounted vents common in over-the-range microwaves, locate screws along the front, sides, or back edges of the lower panel. These panels usually hinge downward after screws are removed, giving you direct access to grease filters and the fan chamber above.

Use gloves and eye protection when working with this area. Decades of grease can flake off during removal, and metal edges may be sharp. Never force the grill if it doesn’t come free after removing visible screws. Check for additional fasteners underneath or behind the unit first.

Lift or Slide Grill Off Carefully

Once screws are removed, top grills typically slide backward or lift straight off. Bottom panels often pivot down like a door, revealing filters beneath. Set the grill aside on a towel to avoid scratching surfaces.

Inspect the area behind the grill. You’ll likely see a metal mesh filter or access point to the internal fan where heavy grease buildup occurs, especially if you fry, sear, or grill frequently.

Clean Grease Filters Thoroughly

microwave grease filter dishwasher cleaning

Grease filters trap airborne oil from stovetop cooking. Over time, they clog, reduce airflow, and create fire risks. Most microwaves have two to three of these metal mesh filters, one behind the top grill and one or two beneath the unit.

Dishwasher Cleaning Method

The most effective way to clean grease filters is placing them in the dishwasher. Remove each filter carefully and load them on the bottom rack. Use regular detergent and run a normal or heavy-duty cycle. Grease melts away, leaving filters shiny and residue-free.

Clean every one to three months depending on cooking frequency. High-heat cooking like stir-frying and bacon demands more frequent cleaning.

Manual Soak and Scrub

If you don’t have a dishwasher or prefer manual cleaning, fill a sink with hot water and dish soap. Dawn works best for cutting through grease. Submerge filters for 15 to 30 minutes, then scrub with an old toothbrush focusing on mesh openings. Rinse thoroughly with hot water and dry completely before reinstalling.

Avoid steel wool or abrasive pads. They damage anti-stick coatings on some filters.

Vinegar Soak for Odor Removal

For filters with lingering smells, mix equal parts white vinegar and water. Soak filters for 30 minutes, then follow with scrubbing and rinsing. Vinegar helps break down stubborn grease and neutralizes odors, but it does not replace degreasing. Always clean grease first, then deodorize.

Never use oven cleaner or caustic chemicals. These can corrode metal filters and cause permanent damage.

Access Internal Fan Components

Surface cleaning won’t fix deep odors or poor suction. To truly clean the exhaust system, you need access to the internal fan, motor housing, and ductwork.

Uninstall Microwave for Full Access

For complete cleaning, unplug the microwave or cut power at the breaker. Remove mounting screws from the cabinet above. Carefully lower the unit and disconnect wiring if hardwired, then lay it on a padded surface.

Now remove side, top, and back panels using a screwdriver. The outer shell pulls straight back or lifts off, exposing the internal blower fan and exhaust path. This step is optional but recommended for units with persistent odors or visible internal grime.

Open Vent Panel Without Removal

If uninstalling isn’t feasible, remove screws from the top or bottom vent panel. Gently pull or hinge the panel open and use a flashlight to inspect the fan blades and surrounding housing.

You should now see the fan motor and ducting. Wipe accessible areas with a damp cloth and apply degreaser as needed. Look for black, sticky residue or oil fuzz clinging to blades. This reduces airflow and spreads odors.

Degrease Fan and Duct Surfaces

microwave fan degreasing before and after

Once internal components are exposed, remove built-up grease that standard wiping can’t reach.

Spray With Effective Degreasers

Use proven cleaners like Dawn Powerwash Spray, which needs no rinsing and clings to vertical surfaces. Lysol Antibacterial Kitchen Cleaner cuts grease and disinfects simultaneously. Krud Kutter is professional-grade degreaser for heavy buildup, and Awesome Orange Cleaner offers a budget-friendly option from dollar stores.

Spray directly onto fan blades, housing, and nearby duct surfaces. Let sit for three to five minutes to break down grease. Avoid oversaturating electrical connections or motor windings.

Scrub Tight Spaces With Tools

Use cotton swabs for corners and crevices. Use a soft-bristle brush for fan blades and microfiber cloth for wiping large surfaces. Focus on areas where grease accumulates, including blade edges, housing seams, and filter mounts.

Wipe with dish soap first if grease is thick, then follow with a disinfecting spray. Never spray liquid directly into the motor. Dampen cloths and wipe carefully instead.

Eliminate Stubborn Cooking Odors

Grease removal doesn’t guarantee odor elimination. Smoke, fish, or burnt food smells embed in filters and plastic housings, even after deep cleaning.

Use Febreze on Internal Surfaces

Contrary to popular belief, vinegar alone won’t eliminate deep odors. The most effective solution is Febreze Fabric Refresher, used by contractors and verified by users.

After grease is removed, spray Febreze directly onto fan housing, duct lining, and inner shell. Alternatively, spray Febreze onto a paper towel and wipe surfaces, which is safer near electronics. Allow to air dry completely before reassembly.

Run Vinegar Steam Cycle

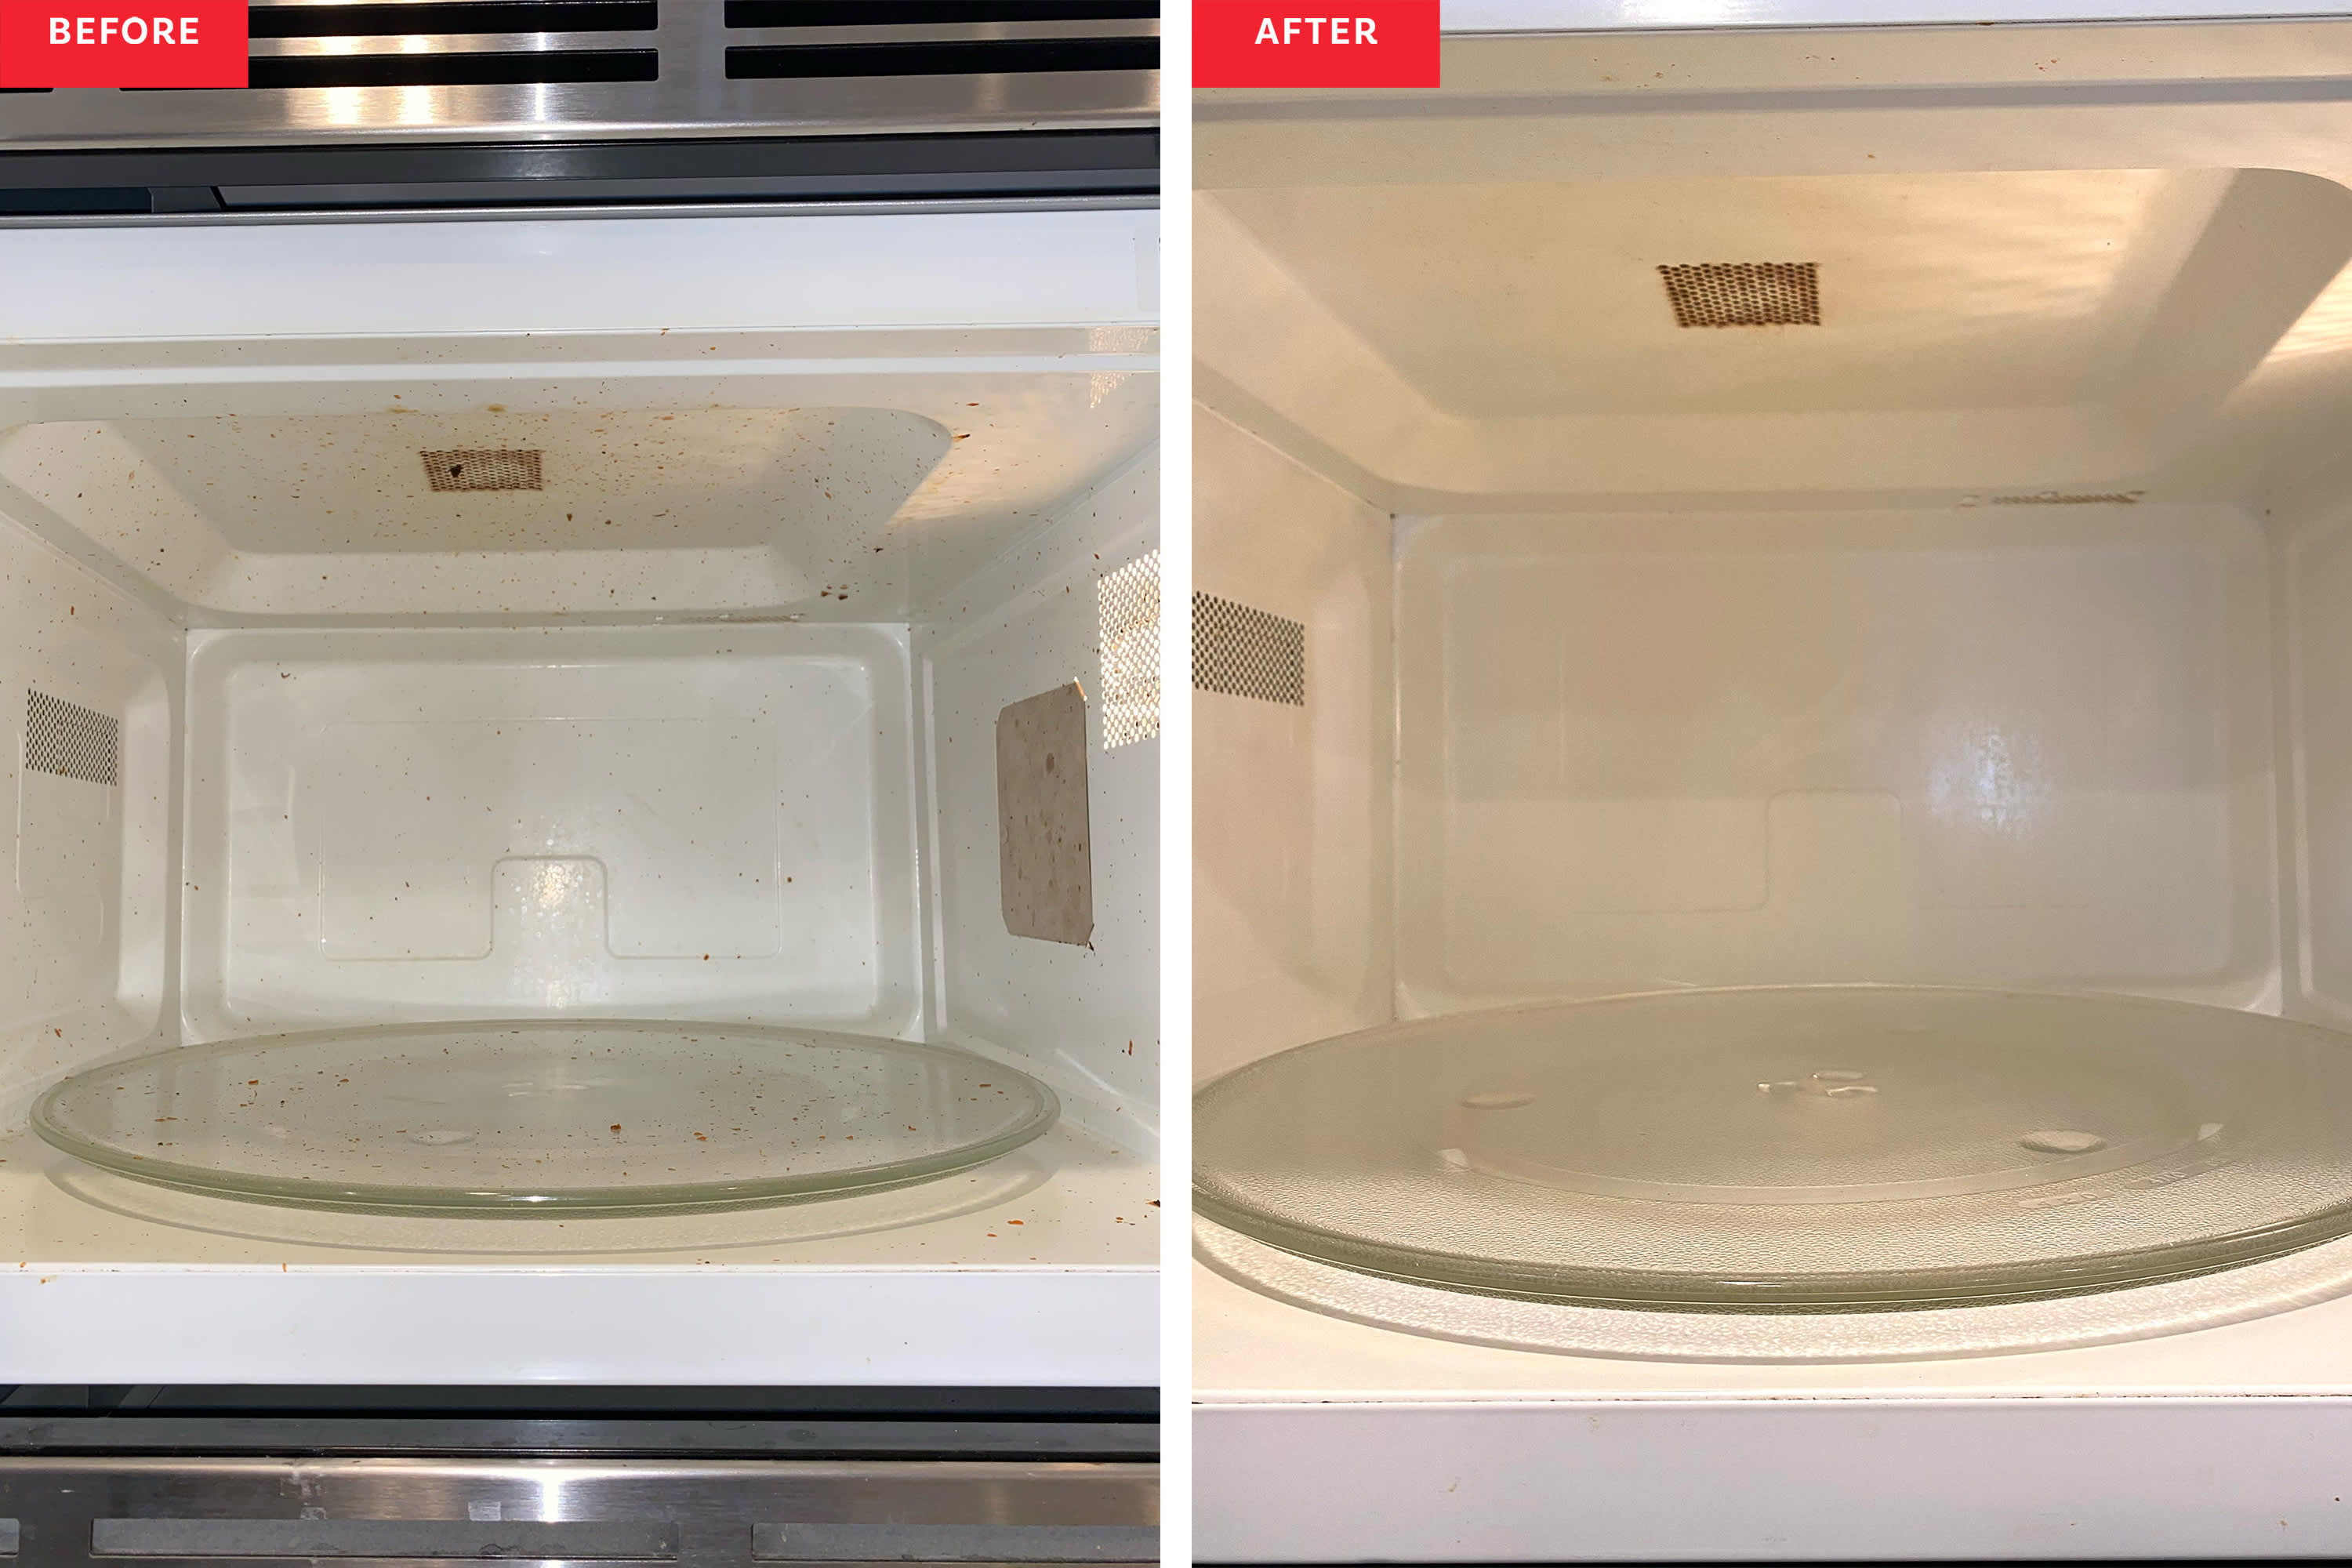
For residual cavity odors, mix one cup water with half a cup white vinegar in a microwave-safe bowl. Microwave on high for three to five minutes until boiling. Let sit five to ten minutes with door closed, then wipe interior with a clean cloth.

This loosens grime and freshens the cooking chamber, but it won’t clean the exhaust duct. Only physical access does that.

Boil Vinegar Under Microwave

To draw steam into the exhaust system, place a pot with one cup water and one cup vinegar on the stove. Position directly under the microwave vent and turn exhaust fan to high. Simmer for 15 to 20 minutes.

This pulls deodorizing steam through the duct, helping loosen residue and neutralize smells. May require repeated sessions for severe odors from fire damage or long-term neglect.

Replace Charcoal Filters Regularly

Unlike grease filters, charcoal odor filters are not cleanable. They absorb cooking smells in recirculating microwave models that don’t vent externally.

Identify Your Filter Type

Check your microwave manual or look inside to identify filter types. Metal mesh filters are grease filters and are cleanable. Black carbon pad or foam indicates a charcoal filter that must be replaced.

If your microwave vents internally instead of outside, it uses charcoal filters.

Install New Filter Every 6-12 Months

Replace charcoal filters every six months with frequent cooking or every 12 months with light use. Failure to replace leads to reduced odor control, musty stale air, and poor air quality.

Purchase OEM or compatible replacement filters online or from appliance stores. No cleaning method restores charcoal filters. Replacement is the only solution.

Reassemble and Test System

After cleaning and drying all components, reassembly ensures everything functions safely and efficiently.

Dry Parts Completely Before Reinstalling

Moisture left on filters or in the housing can cause electrical issues, promote mold growth, and trigger error codes. Let filters and internal areas air dry overnight if needed.

Snap Grill Back Into Place

Reattach the exterior grill by aligning tabs or slots. Slide or press into position and secure with screws. Ensure the panel fits flush and doesn’t rattle when the fan runs.

Restore Power and Run Fan Test

Plug in the microwave or restore circuit power. Turn on the exhaust fan at high speed and listen for smooth operation with no grinding or vibration. Check airflow strength beneath the unit.

If the fan is weak or noisy, double-check for loose panels, obstructed blades, or improper filter placement.

Maintain Clean Performance Long-Term

Regular upkeep prevents grime buildup and extends your microwave’s lifespan.

Follow Recommended Cleaning Schedule

Wipe interior cavity weekly. Clean grease filters every one to three months. Clean exterior grill every six months. Inspect internal fan annually. Replace charcoal filter every six to twelve months.

Set calendar reminders to stay consistent with maintenance.

Prevent Future Buildup

Use your range hood while frying, grilling, or searing. Clean spills immediately inside the microwave. Run the fan during and after cooking for at least five minutes. Avoid aerosol sprays near vents because they leave residue.

Built-up grease is a potential fire hazard. Regular cleaning significantly reduces this risk.

Key Takeaways for Cleaning Your Microwave Exhaust Fan

Cleaning your microwave exhaust fan isn’t just about freshness. It’s about safety, efficiency, and performance. With hidden filters, internal fans, and odor traps, a full clean goes far beyond wiping the outside.

The most important steps are removing the exterior vent grill to access hidden filters, cleaning grease filters monthly using your dishwasher or hot soapy water soak, and accessing internal fan components for deep degreasing when odors persist. Don’t forget to replace charcoal filters every six to twelve months since they cannot be cleaned.

For stubborn odors, Febreze beats vinegar every time. Spray it directly on internal surfaces after grease removal for best results. Start today by unplugging your microwave, removing the grill, and discovering what’s been hiding above your stove.

Frequently Asked Questions About Cleaning Microwave Exhaust Fan

How often should I clean my microwave exhaust fan filters?

Clean grease filters every one to three months depending on your cooking frequency. If you fry or sear often, clean monthly. Light cooking allows for quarterly cleaning. Replace charcoal filters every six to twelve months regardless of cleaning.

Can I put microwave grease filters in the dishwasher?

Yes, the dishwasher method is highly effective for cleaning metal mesh grease filters. Remove filters carefully, place on the bottom rack, and run a normal cycle with standard detergent. Filters come out shiny and grease-free.

Why does my microwave still smell after cleaning?

Vinegar alone doesn’t eliminate deep odors embedded in filters and plastic housings. Use Febreze Fabric Refresher directly on fan housing and duct surfaces after removing grease. Persistent odors may require accessing internal components or repeated treatments.

Do all microwaves have exhaust fans?

All over-the-range microwaves have exhaust fans. Built-in and under-cabinet models may vary. Check your manual to confirm your model includesventing capabilities and where filters are located.

Can I clean the internal fan without uninstalling the microwave?

Yes, you can access the internal fan by removing the top or bottom vent panel without full uninstallation. Remove screws from the vent panel, gently pull or hinge it open, and use a flashlight to inspect and wipe accessible areas.

Is built-up grease in microwave vents dangerous?

Yes, built-up grease is a potential fire hazard. Regular cleaning of filters and exhaust components significantly reduces this risk. Clean filters monthly and inspect internal components annually to maintain safe operation.

How to Clean Exhaust Fan Screens: Easy Steps


Grease-laden exhaust fan screens reduce airflow, trap odors, and create fire hazards, yet many homeowners overlook this simple maintenance task. Cleaning your range hood filters is a fast, low-cost way to boost kitchen performance and safety. Whether you fry weekly or sear nightly, a clean filter captures smoke and grease effectively, keeps your air fresh, and protects your appliance. In this guide, you’ll learn how to identify your filter type, choose the best cleaning method, avoid common mistakes, and maintain peak performance with minimal effort.

Identify Your Filter Type Before Cleaning

range hood filter types metal mesh charcoal

Before cleaning, confirm what kind of filter you have. Using the wrong method can damage the unit or waste your time.

Metal Mesh vs. Charcoal Filters

Aluminum or stainless steel mesh filters are washable and reusable. They trap grease and are found in most ducted range hoods. Charcoal filters are solid, black, and non-porous. Used in ductless or recirculating hoods common in apartments and microwaves, they absorb odors but cannot be cleaned.

How to Check Your Filter

  1. Turn off the hood power.
  2. Slide or unscrew the filter from beneath the unit.
  3. Inspect the material. If it’s a metal grid, it’s cleanable. If it’s a solid black block, it’s charcoal and must be replaced every 6 to 12 months.

Label your filter type on a sticky note inside the hood cabinet to avoid confusion later.

Choose the Right Cleaning Method

range hood filter cleaning comparison dishwasher soak boil

Pick your method based on grease level, time, and tools available. Three proven approaches work for every situation.

For light build-up cleaned every 4 to 8 weeks, the dishwasher method saves time and effort. For moderate grease with visible stickiness, a hot soak breaks it down fast. For neglected filters with years of buildup, boiling is the most powerful home method.

Dishwasher Cleaning for Light Build-Up

The dishwasher method works best for routine maintenance on filters cleaned every 4 to 8 weeks with light to moderate grease and no caking.

Steps to Clean in Dishwasher

  1. Remove the metal mesh filter from the hood.
  2. Place it on the top rack to prevent warping.
  3. Add heavy-duty dish soap like Dawn Ultra.
  4. Run a hot water cycle.
  5. Inspect after washing. If residue remains, scrub lightly and run a second cycle.

This method is fast, hands-off, and sanitizes with high heat. However, it’s not suitable for filters with years of buildup. Avoid if your manufacturer warns against dishwasher cleaning.

Sink Soak and Scrub for Moderate Grease

When grease is visible and sticky, a hot soak breaks it down fast without harsh chemicals.

Supplies You Need

  • Hot water (not boiling)
  • Dish soap with degreasing formula
  • Baking soda (quarter cup, optional)
  • White vinegar (half cup, optional)
  • Soft scrubber like Scrub Daddy or old toothbrush

Soak and Clean Process

  1. Fill sink or basin with very hot water.
  2. Add one squirt of dish soap, quarter cup baking soda, and half cup vinegar.
  3. Mix until it bubbles.
  4. Submerge the filter for 10 to 30 minutes.
  5. Scrub all sides with a non-abrasive brush, focusing on thick mesh areas.
  6. Rinse under running water until clear.
  7. Dry completely before reinstalling.

Hot water melts grease while dish soap emulsifies oil. Vinegar cuts residue and neutralizes odors. Baking soda lifts grime gently without scratching.

Avoid oven cleaner, which can dissolve metal mesh. One user reported that oven cleaner ate right through her filter.

Stovetop Boil for Heavy Build-Up

For neglected filters with years of grease, boiling is the most powerful home method.

Supplies Needed

  • Large stockpot
  • Water enough to cover half the filter
  • Half cup baking soda
  • Tongs or slotted spoon
  • Heat-resistant gloves

Boil Cleaning Steps

  1. Fill pot with water and bring to a rolling boil.
  2. Add half cup baking soda slowly to avoid overflow.
  3. Lower filter into water using tongs.
  4. Simmer for 15 to 30 minutes.
  5. Turn off heat and let cool slightly.
  6. Remove and wipe off softened grease with a cloth.
  7. Rinse thoroughly under tap.
  8. Air dry completely before reinstalling.

Use a disposable aluminum pan under the sink when draining water to catch grease and protect pipes. Do not pour greasy water down the drain, as it can clog PVC pipes or septic systems. This method works best on stainless steel or durable aluminum filters.

Pre-Clean with Steam (Optional Boost)

Loosening overhead grease before removing the filter makes cleaning easier.

How to Steam Clean the Hood

  1. Boil a large pot of water on the stove.
  2. Place it directly under the range hood.
  3. Let steam rise for 8 to 10 minutes.
  4. Turn off and wipe hood interior with a damp cloth.

This softens stuck-on grime on the filter surface and hood underside, improving scrubbing results. Use oven mitts and keep children away from hot steam.

Post-Cleaning Steps

A clean filter isn’t done until it’s dry and properly reinstalled.

Dry Completely

Pat with a microfiber towel and let air dry for 1 to 2 hours. Reinstall only when 100 percent dry to prevent mold or rust.

Reinstall Correctly

Slide or snap the filter back into place. Ensure it’s secure and aligned. Test the fan and listen for smooth operation and strong suction.

Clean the Hood Interior

While the filter is out, wipe the hood surface with soapy water or vinegar. For stainless steel, use a streak-free cleaner and remove any grease drips or splatter.

Prevent Problems and Damage

Avoid mistakes that harm filters, plumbing, or health.

Never Use These Products

Oven cleaner dissolves metal mesh. Lye or industrial solvents are corrosive and unsafe. Steel wool or abrasive pads scratch and degrade filter material.

Stick to dish soap, baking soda, vinegar, and hot water. These are safe, effective, and non-toxic.

Protect Your Pipes

Grease clogs drains over time. Line the sink with aluminum foil or use a disposable pan when dumping cleaning water. Strain water through a mesh cloth to catch debris.

Know the Cleaning Schedule

Cleaning frequency depends on how much you cook.

Cooking Level How Often to Clean
Light (few times weekly) Every 2 to 3 months
Moderate (daily use) Every 4 to 6 weeks
Heavy (frying, grilling) Every 2 to 4 weeks
Commercial-style Weekly

After a deep clean, set a monthly dishwasher cycle as maintenance to prevent buildup.

Check for a Clean Filter

Verify your work with these quick checks.

Visual and Touch Test

The filter should be silver or stainless in color, not dark or yellow. It should feel smooth, not sticky or greasy. Hold it up to light. The mesh should be clear and transparent. It should be odor-free with no lingering cooking smells.

If light passes through easily and it feels dry and clean, you’re done.

Extend Filter Life and Performance

Keep your ventilation system running strong for years.

Avoid Warranty Voiding

Harsh chemicals or abrasives may void your warranty. Always check the appliance manual for approved cleaning methods.

Long-Term Benefits

Clean filters provide up to 70 percent better airflow in clogged units. They reduce fire risk from grease accumulation and lower motor strain for longer appliance life. You’ll enjoy cleaner indoor air and fewer kitchen odors.

Key Takeaways for Cleaning Exhaust Fan Screens

clean range hood filter benefits infographic

Cleaning exhaust fan screens is a small task with big rewards. In less than an hour, you restore airflow, eliminate odors, and reduce fire risks. Use the dishwasher for easy upkeep, a hot soak for moderate grime, or boiling for deep cleans. Avoid harmful chemicals, protect your plumbing, and dry filters completely. With a simple schedule of every 1 to 3 months, you’ll keep your kitchen safer, cleaner, and more efficient. Make it part of your routine, and your range hood will thank you for years to come.

Frequently Asked Questions About Cleaning Exhaust Fan Screens

How often should I clean my exhaust fan screen?

Clean your exhaust fan screen every 1 to 3 months depending on cooking frequency. Light cooking warrants cleaning every 2 to 3 months, while heavy frying or grilling requires cleaning every 2 to 4 weeks.

Can I put my range hood filter in the dishwasher?

Yes, if your filter is aluminum or stainless steel mesh and you clean it regularly. Place it on the top rack and run a hot water cycle with heavy-duty dish soap. This method works best for light to moderate build-up.

What happens if I don’t clean my exhaust fan screen?

Neglected filters reduce airflow, trap odors, and create fire hazards. Grease accumulation strains the motor, shortening appliance life. Dirty filters can also attract pests and recirculate toxins back into your kitchen air.

Can I clean a charcoal filter instead of replacing it?

No. Charcoal filters are solid, black, and non-porous. They absorb odors but cannot be cleaned. Replace charcoal filters every 6 to 12 months or as recommended by your manufacturer.

What is the best way to clean a greasy exhaust fan screen?

For heavy build-up, the stovetop boil method works best. Fill a large pot with water, add half cup baking soda, and simmer the filter for 15 to 30 minutes. This melts and lifts years of accumulated grease.

How do I know if my exhaust fan screen is clean?

A clean filter appears silver or stainless with no yellowing. It feels smooth, not sticky. Hold it up to light—you should see clearly through the mesh. It should have no lingering cooking odors.

How to Clean Exhaust Fan Cover: Easy Steps


Dust, grease, and moisture silently accumulate on your exhaust fan cover until you notice strange noises, lingering steam, or a musty smell. If your bathroom mirror won’t stop fogging after a shower or your kitchen fan struggles to clear cooking fumes, a dirty exhaust fan cover could be the culprit. Learning how to clean exhaust fan cover properly isn’t just about appearance, it is essential for safety, efficiency, and healthy indoor air quality. Over time, caked-on grime reduces airflow, increases fire risk, and strains the motor. But with the right tools and a few simple steps, you can restore peak performance in under 30 minutes. This guide walks you through every stage from power-down to reassembly, including internal cleaning, troubleshooting, and maintenance tips tailored to bathroom and kitchen models.

Why Your Exhaust Fan Cover Needs Regular Cleaning

A clean exhaust fan cover keeps your home safe, dry, and quiet while maintaining proper airflow.

Prevent Fires and Mold Growth

Dust buildup inside the fan housing represents a leading fire hazard. When the motor heats up during operation, accumulated lint and debris can ignite. Bathroom fans, often forgotten for years, become ticking risks. Similarly, poor ventilation traps moisture, creating ideal conditions for mold and mildew on ceilings, walls, and tiles. Cleaning the cover ensures proper airflow, reducing humidity and preventing structural damage throughout your home.

Boost Airflow and Efficiency

A clogged cover forces the fan to work harder, lowering efficiency, increasing energy consumption, and shortening motor life. Users report airflow improvements of up to 50% after cleaning. You will notice faster steam removal, quieter operation, and cooler running, essentially like having a brand-new unit without the purchase price.

Extend Fan Lifespan

Regular cleaning reduces wear on internal components. Motors last significantly longer when not choked by dust and debris. For homes with pets or allergy sufferers, removing accumulated dust and dander improves overall air quality and system reliability.

Identify Your Exhaust Fan Cover Type

bathroom exhaust fan cover types comparison

Different fans require different removal and cleaning methods. Knowing your cover type prevents damage during maintenance.

Bathroom Fan Covers

Most bathroom units use plastic covers made from ABS or polycarbonate in square, rectangular, or round designs. They often include louvers to direct airflow and may integrate lights, humidity sensors, or speakers.

  • Mounting styles:
  • Spring clips: Gently pull down and squeeze side tabs to release
  • Screws: Two to four visible screws secure the cover in place
  • Twist-lock: Rotate slightly to release the mechanism
  • Smart models: If your fan has lighting or electronics, disconnect the wiring harness before removal to prevent damage

Kitchen Fan Covers

Kitchen models typically form part of a range hood and are made of stainless steel or metal designed to handle grease, not just dust.

  • Grease filters: Remove these first as they are often dishwasher-safe for easy cleaning
  • Cover removal: May require unscrewing or unclipping depending on the model
  • Heavy buildup: Expect thick, sticky grease that requires commercial degreasing solutions

When to Clean Your Exhaust Fan Cover

Timing matters significantly. Clean too late and performance drops noticeably. Clean too often and you risk unnecessary wear on components.

Recommended Cleaning Schedule

Environment Frequency
Standard bathroom Every 3-6 months
High-use bathroom Every 3 months
Light-use kitchen Every 6 months
Heavy-cooking kitchen Every 3-4 months
Arid or dusty areas Every 6 months minimum
Homes with pets or allergies Every 3-4 months

Pro Tip: Schedule cleanings with seasonal HVAC filter changes in spring and fall for consistent maintenance habits.

Safety First: Power Down and Protect Yourself

Never skip safety protocols when working with electrical appliances near moisture.

Turn Off Power Completely

  • Switch off the fan at the wall first
  • Shut off the circuit breaker to eliminate shock risk entirely
  • Use a non-contact voltage tester near the unit to confirm no live current exists

Warning: Even low-voltage fans can deliver dangerous shocks. Always verify power is off before proceeding.

Wear Protective Equipment

  • Eye protection: Dust and debris can fall into your eyes during cleaning
  • Face mask: Prevents inhaling mold spores, dust, or allergens
  • Gloves: Use when handling greasy kitchen components to protect your skin

Use a Stable Ladder

Ceiling-mounted fans require a stepstool or ladder for safe access. Ensure it sits on a flat, non-slip surface. Have someone spot you if possible while working at heights.

Tools and Supplies You Will Need

exhaust fan cleaning kit tools supplies

Gather everything before starting to avoid mid-cleaning trips to the hardware store.

Cleaning Supplies

  • Dish soap (mild, non-abrasive)
  • Warm water for soaking
  • Baking soda (1-2 tablespoons for degreasing)
  • Commercial degreaser for kitchen grease
  • Microfiber cloths (lint-free for drying)
  • Old towels for floor protection and handling wet parts

Essential Tools

  • Screwdriver (magnetic tip helps prevent lost screws)
  • Vacuum with brush and crevice tools
  • Soft-bristled brush or old toothbrush
  • Sink or basin for soaking covers
  • Non-contact voltage tester
  • Stepstool or ladder
  • Compressed air for deep dust removal

Step-by-Step: Remove the Fan Cover

Bathroom Fan Cover Removal

For clip-mounted covers, gently pull downward and press inward on both sides to release spring tabs. Squeeze metal mounting wires together and slide out carefully.

For screw-mounted covers, use a screwdriver to remove the two to four screws. Hold the cover as you remove the last screw to prevent it from dropping unexpectedly.

For units with lights or electronics, remove the light cover first if separate. Unplug the wiring harness before removing the main cover. Take a photograph of connections for easy reassembly.

Kitchen Fan Cover Removal

Remove the grease filter first as this is typically the primary barrier. Unscrew or unclip the cover based on your specific model. Some range hood covers require full disassembly, so consult manufacturer instructions for complex systems.

Clean the Cover Properly

Plastic or Non-Electrical Covers

  1. Fill a sink or basin with warm water and a few drops of dish soap
  2. Add one to two tablespoons of baking soda for extra cleaning power
  3. Soak the cover for 15-30 minutes to loosen grime
  4. Use a soft brush or toothbrush to scrub vents, crevices, discolored areas, and mildew spots
  5. Rinse thoroughly under running water
  6. Dry completely with a microfiber cloth or air-dry on a clean towel

Critical: Ensure 100% dryness before reinstallation. Moisture causes mold growth and electrical issues.

Electrical or Integrated Covers

  • Never soak in water
  • Wipe with a damp microfiber cloth only
  • For stubborn spots, lightly dampen the cloth with soapy water, then dry immediately
  • Avoid spraying liquids directly onto the cover

Warning: Moisture can damage sensors, lights, or circuitry. Less is more when cleaning electronic components.

Clean the Internal Components

exhaust fan motor cleaning dust removal

A clean cover is not enough. Dust inside the housing kills performance and increases fire risk.

Vacuum the Housing and Blades

Use the crevice tool to remove dust from corners and edges. Switch to the brush attachment to gently vacuum fan blades, motor housing, and duct opening edges without applying excessive pressure.

Scrub Blades and Housing

Use a dry or slightly damp toothbrush to dislodge caked-on dust from fan blades. For sticky buildup, lightly moisten the brush but never pour water directly onto components. Wipe with a damp microfiber cloth that is not dripping wet.

Deep Clean with Compressed Air

Take the unit outdoors or to a well-ventilated area. Use compressed air to blow dust from motor fins and housing. Follow with vacuuming to remove dislodged particles for a thorough clean.

Reassemble and Test the Fan

Reattach the Cover

For clip-mounted models, squeeze mounting wires together, align with slots, and push up until they snap securely into place.

For screw-mounted models, insert screws and tighten gently. Over-tightening can crack plastic covers.

Restore Power and Test

Turn the circuit breaker back on and flip the wall switch. Observe for smooth startup, no unusual noise, and strong airflow. Test by holding tissue near the vent to confirm proper suction.

Listen for grinding or rattling sounds that indicate misalignment or motor damage. If the fan hums but does not spin, the motor may be seized. If it does not turn on at all, check power and wiring connections.

Troubleshoot Common Post-Cleaning Issues

Fan Is Noisy After Cleaning

Loose screws or misaligned cover often cause noise. Tighten all screws and ensure proper seating of the cover in its track.

Reduced Airflow

Clogged blades, dirty housing, or blocked external vent reduce airflow. Recheck internal cleaning and inspect the outdoor exhaust for obstructions.

Cover Will Not Snap Back

Bent tabs or debris in the track prevent proper attachment. Clean the track thoroughly and gently bend tabs back into shape if needed.

Musty Smell When Running

Mold in the duct or housing causes persistent odors. Clean interior with a vinegar-dampened cloth and inspect for moisture sources.

Maintain Peak Performance

Monthly Inspection

Visually check for dust buildup on the cover and housing. Listen for unusual sounds during operation. Run the fan during and 15-20 minutes after showering to manage humidity.

Every Six Months

Perform a full cleaning cycle and inspect the exterior vent for blockages like leaves, bird nests, or debris accumulation.

Annual Check

Test backdraft damper function to ensure proper airflow direction. Consider professional duct cleaning if airflow declines despite thorough cleaning.

Final Thoughts on Cleaning Your Exhaust Fan Cover

Cleaning your exhaust fan cover is a quick, low-cost task with high-impact benefits. It prevents fires, stops mold growth, improves air quality, and extends your fan’s operational life significantly. Whether dealing with a bathroom unit clogged with dust or a kitchen hood coated in grease, a thorough cleaning takes less than 30 minutes and pays off immediately in performance, safety, and comfort. Regular maintenance every three to six months keeps your home’s air flowing freely and your ventilation system running efficiently for years to come.

Frequently Asked Questions About Cleaning Exhaust Fan Covers

How often should I clean my exhaust fan cover?

Clean standard bathroom fans every three to six months and high-use bathrooms every three months. Kitchen fans cleaning frequency depends on cooking habits, ranging from every three to six months.

Can I submerge my exhaust fan cover in water?

Only non-electrical covers can be soaked. Never submerge covers with lights, sensors, or electronics. Wipe these with a damp microfiber cloth only.

Why is my exhaust fan still noisy after cleaning?

Loose screws or a misaligned cover typically cause post-cleaning noise. Tighten all screws and verify the cover sits properly in its mounting track.

What happens if I do not clean my exhaust fan cover?

Neglected covers lead to reduced airflow, increased fire risk from dust ignition, mold growth from poor ventilation, and premature motor failure from excessive strain.

Can I use a pressure washer on my exhaust fan cover?

Never use pressure washers on exhaust fan covers. High-pressure water damages internal components, electronics, and motor housing. Stick to gentle hand cleaning with mild soap and water.

How to Clean Exhaust Fan Blades: Easy Steps


Dust, grease, and moisture silently build up on exhaust fan blades, turning a once-quiet ventilation system into a noisy, inefficient hazard. Over time, this grime reduces airflow by over 50%, strains the motor, traps allergens, and even increases fire risk. Whether it is a bathroom fan struggling to clear steam or a kitchen hood dripping with grease, cleaning exhaust fan blades is a simple yet powerful maintenance task that restores performance and safety.

Most homeowners overlook this chore until the fan starts rattling, smells musty, or fails to prevent mirror fogging. With just 30 minutes, a few basic tools, and the right technique, you can revive your unit is efficiency, reduce noise, and improve indoor air quality. This guide walks you through every step from power shutdown to final testing.

Safety First: Turn Off Power

electrical panel circuit breaker switch off

Before touching any part of the fan, eliminate electrical risk.

Cut Power at the Breaker

Flip the circuit breaker that controls the fan. While turning off the wall switch is a start, it does not guarantee the unit is de-energized. Cutting power at the panel ensures no accidental shock during handling.

Confirm No Live Current

Use a non-contact voltage tester near the fan housing or switch. If it beeps or lights up, double-check the correct breaker is off. Never skip this step even older fans can carry lethal current.

Wear Protective Gear

Safety goggles shield eyes from falling dust and debris. A face mask or respirator prevents inhalation of mold spores, dust, and allergens. Gloves protect hands from grime, especially in greasy kitchen hoods. Hair covering keeps hair out of moving parts and dust.

Gather Cleaning Tools and Supplies

Use the right tools to clean thoroughly without damaging the fan.

Essential Supplies

Warm (not hot) water and mild dish soap form the base of your cleaning solution. You will need microfiber cloths (both damp and dry) for wiping and drying. A soft-bristled brush such as an old toothbrush works perfectly for scrubbing tight spaces. Have a towel or absorbent mat ready to catch debris.

Cleaning Tools

A vacuum with brush and crevice attachments removes loose dust before scrubbing. A screwdriver is essential for removing screws or acorn nuts. Optional tools include compressed air for blowing dust from motor fins and a soft plastic scraper for stubborn buildup.

Avoid: Harsh chemicals like bleach, oven cleaners, or degreasers. They can warp plastic or corrode metal components.

Remove the Fan Cover Safely

bathroom exhaust fan cover removal types spring clips tabs screws

Access begins with removing the cover carefully.

Identify Mounting Type

Most covers use one of three fasteners. Spring clips require gently pulling one side down, squeezing the clips, and releasing. Tabs need pressing inward while lowering the cover. Screws require a screwdriver to remove acorn nuts or fasteners.

Handle with Care

Set the cover on a soft towel to avoid scratches. If the unit has a light, disconnect wiring or remove the lens per manufacturer instructions.

Pro Tip: Note the cover is orientation. Some models have alignment marks. Match them on reinstallation.

Clean the Vent Cover Thoroughly

A dirty cover restricts airflow just as much as grimy blades.

Soak and Scrub

Fill a basin with warm, soapy water. Submerge the cover for 5 to 10 minutes to loosen grime. Use a toothbrush to scrub between louvers and along edges. Rinse under clean water, ensuring all soap residue is gone.

Dry Completely

Pat dry with a microfiber cloth or air-dry fully. Reinstalling a wet cover risks water dripping into the motor.

Warning: Never use steel wool, scouring pads, or abrasive cleaners. They scratch surfaces and trap more dirt over time.

Access the Fan Blades

Now reach the blades either by removing the assembly or cleaning in place.

Inspect the Interior

After removing the cover, look inside to identify the fan type. A squirrel cage (centrifugal) design is common in bathrooms with an enclosed structure and radial fins. An axial (propeller-type) design appears in older or kitchen units with exposed blades.

Remove the Fan Assembly If Possible

Locate one or two screws on the motor plate. Unscrew and gently lower the unit. Unplug any electrical connector if accessible.

Note: Some models do not allow full removal. If stuck, clean blades in place.

Clean the Fan Blades Properly

Tailor your method based on rotor accessibility.

Remove Rotor for Deep Cleaning

If the fan has a C-clip, snap ring, or setscrew, remove the fastener from the motor shaft. Slide the rotor off carefully. Soak in warm, soapy water for 10 minutes. Scrub between blades, along edges, and inside the hub with a toothbrush. Rinse and dry completely. No moisture should remain in crevices.

Never soak the motor or wiring. Only the plastic rotor can be submerged.

Clean Blades In Place

For fixed assemblies, vacuum first using a brush attachment to remove loose dust from blades and housing. Wipe each blade using a slightly damp microfiber cloth, rotating the fan by hand. Dip a toothbrush in soapy water for caked-on grime. Avoid wetting the motor. Never spray or drip liquid near electrical parts. Finish with compressed air or a dry brush to remove residue.

Goal: Restore smooth, balanced blades. Any warping or debris disrupts airflow.

Clean Internal Components and Duct

Do not stop at the blades. Clean the whole system.

Vacuum the Interior

Focus on the motor housing, wiring compartments (without touching wires), duct opening, and flapper valve if present.

Inspect the Flapper Damper

Ensure it opens when the fan runs and closes when off. Clean hinges and seals with a damp cloth to prevent sticking.

Check the Duct Connection

Confirm the duct is secure and kink-free. Look for mold, lint, or rodent nests. Clean accessible sections with a long-handled brush.

Clear the Exterior Vent

Go outside and remove leaves, nests, or ice blocking the cap. Ensure the backdraft damper moves freely. Confirm no pests have entered the duct.

Pro Tip: Clean the exterior vent annually even if the indoor fan looks fine.

Dry and Reassemble the Unit

Moisture is the enemy. Dry everything before reassembly.

Wipe and Air-Dry

Use dry cloths to remove surface moisture. If the motor got damp, wait 6 to 12 hours before powering on. Never rush this step. Water near wiring causes shorts.

Reinstall the Fan Assembly

Slide rotor back onto the shaft if removed. Replace the C-clip or setscrew. Secure the motor plate with screws. Reconnect electrical plugs. Align and snap the cover back into place.

Check clearance: Ensure the cover does not touch the blades when spinning.

Restore Power and Test Operation

Final step: turn it on and verify performance.

Power Up Safely

Flip the circuit breaker back on. Turn on the fan at the wall switch.

Listen and Feel

Listen for strange noises. Grinding, buzzing, or scraping means misalignment or debris. Feel for strong airflow. Hold your hand near the vent. Air should feel brisk. Confirm smooth shutdown. Fan should stop completely when turned off.

Run for 5 to 10 Minutes

Let it operate to confirm stability. Many users report immediate improvements, quieter operation, faster steam removal, and no more foggy mirrors.

User Feedback: After cleaning a neglected fan, one homeowner said it sounds like a brand-new unit.

Measure Airflow to Confirm Results

digital anemometer measuring airflow CFM exhaust fan

Verify cleaning success with objective data.

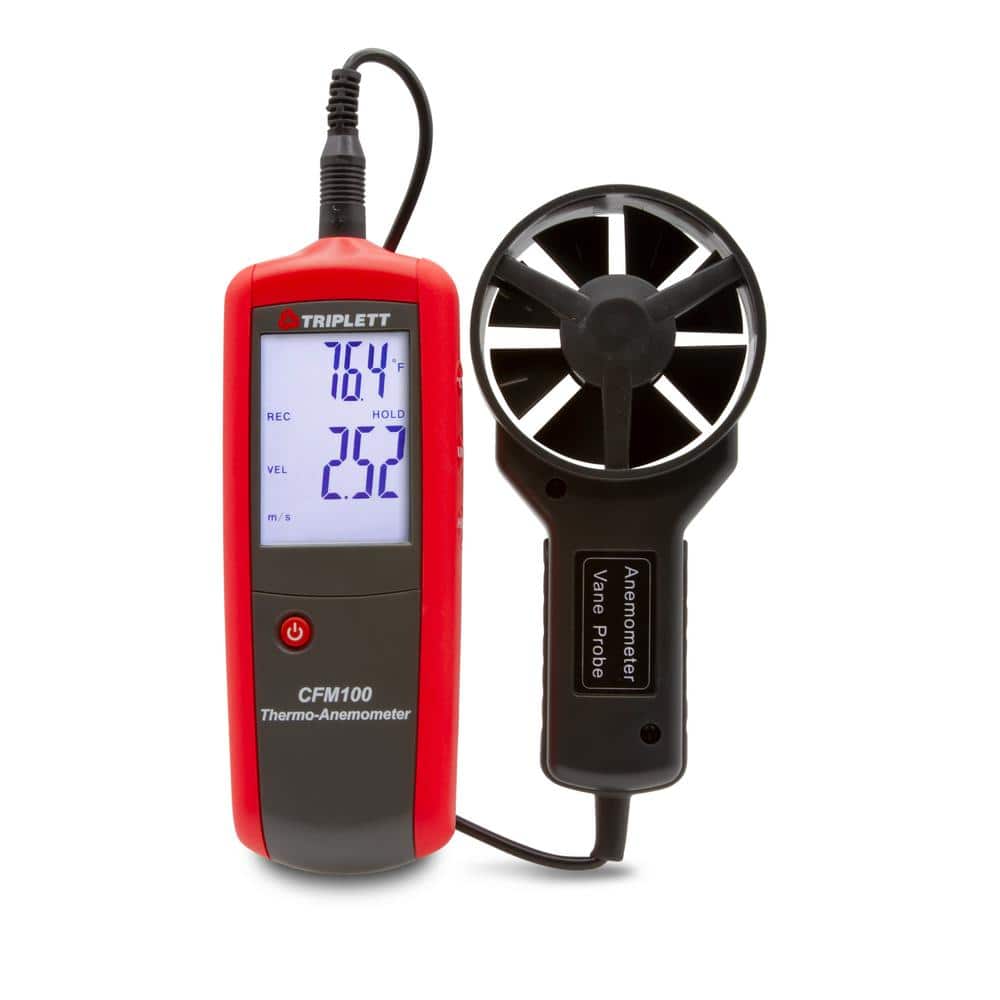
Use a Digital Anemometer

Hold it near the vent outlet. Record air velocity in feet per minute (fpm). Calculate CFM (cubic feet per minute) using velocity multiplied by duct area.

Compare to Rated CFM

Check the manufacturer label for the fan is rated airflow. If post-cleaning CFM is below 70%, the motor may be failing.

Note: Low-cost anemometers are not lab-accurate but work well for before and after comparisons.

Recognize When to Replace the Fan

Cleaning helps but not forever.

Replace If

The fan is still noisy after cleaning. Blades are cracked or warped. Motor won not spin or hums without starting. No steam removal occurs despite clean blades. Unit is 10 to 15 years or older. CFM remains low after maintenance.

Example: A 20-year-old fan replaced by an electrician in 30 minutes now clears steam in under a minute. Age matters.

Prevent Future Buildup with Smart Habits

Keep fans clean longer with simple routines.

Run Fan Strategically

In bathrooms, run during and 15 to 20 minutes after showers. In kitchens, turn on before frying or boiling and run 5 to 10 minutes after. Avoid leaving fans on unattended for hours. This reduces fire risk.

Schedule Regular Maintenance

High-use bathrooms need cleaning every 3 to 6 months. Kitchen internals need cleaning every 6 months (filters monthly). Low-use areas need cleaning every 1 to 2 years.

Pro Tip: Mark cleaning dates on a calendar or use a home maintenance app.

Avoid Harsh Chemicals

Stick to mild soap and water. Degreasers or bleach can degrade plastic, create fumes, or void warranties.

Know When to Call a Pro

Some jobs are best left to experts.

Call a Technician If

You are uncomfortable with electrical work. The fan is hardwired into a light fixture. Burning smell persists after cleaning. Ductwork is damaged or disconnected. Motor needs lubrication (if serviceable). Manufacturer recommends professional servicing.

Safety First: If you smell smoke or see sparks, shut off power and call an electrician immediately.

Real-World Cleaning Tips from Users

Homeowners share what actually works.

I Was Shocked by the Dust

One user placed a towel under the fan. Hundreds of dust clumps fell during cleaning. Always catch debris before it lands on your bathroom floor.

15 Minutes with a Toothbrush

Even if the cover looks okay, blades can be caked with hidden grime. Scrub thoroughly. Do not assume it is clean.

Finally Quiet

Multiple users reported dramatic noise reduction after cleaning fans neglected for 2 to 3 years.

Mirror Does Not Fog Anymore

Improved airflow means faster moisture removal. This is a clear sign the cleaning worked.

Key Takeaways for Cleaning Exhaust Fan Blades

Clean exhaust fan blades every 6 to 12 months (3 to 6 months in high-use areas) to maintain efficiency, safety, and air quality. Always cut power at the breaker before servicing. Use a vacuum, toothbrush, and damp cloth but never submerge the motor. Remove the rotor if possible for deep cleaning. Dry all parts completely before reassembly. Test airflow and noise after reinstallation. Replace the fan if it remains ineffective or damaged. Measure CFM for objective results. Inspect exterior vents annually. Label cleaning dates to stay on schedule.

Cleaning exhaust fan blades is not just about performance. It is about safety, air quality, and efficiency. A 30-minute job can prevent mold, reduce fire risk, and extend your fan is life by a decade. Make it part of your seasonal routine and breathe easier knowing your home is ventilation is working as it should.

Frequently Asked Questions About Cleaning Exhaust Fan Blades

How often should I clean my exhaust fan blades?

Cleaning frequency depends on usage. High-use bathrooms (daily showers) need cleaning every 3 to 6 months. Moderate-use bathrooms or kitchens need cleaning every 6 to 12 months. Low-use or guest bathrooms need cleaning every 1 to 2 years.

Can I use bleach or harsh chemicals to clean exhaust fan blades?

No. Avoid bleach, oven cleaners, degreasers, or solvents. These chemicals can warp plastic components, corrode metal finishes, create toxic fumes, or void warranties. Stick to mild dish soap and warm water.

What happens if I do not clean my exhaust fan blades?

Neglected fans accumulate dust, grease, and moisture. This reduces airflow by over 50%, strains the motor, increases fire risk, and degrades indoor air quality. You may notice increased noise, slow steam removal, musty odors, and mold growth.

Can I spray water directly on the fan blades to clean them?

No. Never spray water or cleaning solutions directly into the fan housing. Do not allow liquid to pool near electrical components. Use a damp cloth for wiping and avoid saturating the motor. Moisture near wiring causes short circuits.

How do I know if my exhaust fan needs replacement instead of cleaning?

Replace the fan if it remains noisy after cleaning, blades are cracked or warped, the motor won not spin or hums without starting, steam removal is ineffective despite clean blades, or the unit is over 10 to 15 years old with low CFM readings.

Do I need special tools to clean exhaust fan blades?

No special tools are required. Basic supplies include warm water, mild dish soap, microfiber cloths, a soft-bristled toothbrush, a vacuum with brush and crevice attachments, and a screwdriver for removing the cover. Optional tools include compressed air and a soft plastic scraper.

How to Clean Exhaust Fan: Easy Steps


Is your bathroom still foggy after a hot shower? Does cooking leave a haze in the kitchen that lingers for hours? These are classic signs your exhaust fan needs cleaning. Over time, dust, grease, and moisture build up on fan blades, filters, and ducts, choking airflow, increasing noise, and raising health and fire risks. The good news? With just 30 minutes and basic household tools, you can restore your fan to peak performance.

Cleaning an exhaust fan is not just about freshness. It is essential maintenance. A clogged bathroom fan traps moisture, inviting mold and mildew. A greasy kitchen hood becomes a fire hazard. But a clean unit removes 90% of steam in under 10 minutes and clears smoke in seconds. This guide walks you through every step, from power-off to reassembly, using only what you likely already have at home.

Turn Off Power Safely Before Cleaning

electrical panel breaker switch off safety

Before touching any part of the fan, you must cut power completely. This step is non-negotiable for your safety.

Flip the wall switch to off. Go to your circuit breaker and shut off the correct breaker, especially for hardwired bathroom or kitchen units. For plug-in range hoods, unplug from the outlet. If the fan has a light or sensor, ensure both circuits are off.

Never skip this step. Live wires inside the housing can cause shock or short circuits when damp.

Place a towel or sheet underneath to catch falling dust and debris. Use a step stool or ladder on a flat, stable surface. Never stand on chairs or countertops.

Remove Fan Cover or Filter

Bathroom Fan Covers

Most bathroom units use one of three mounting systems. Spring clips require you to gently pull the cover down, then squeeze the metal clips together to release. Snap-in tabs mean you press along the edges to unclip. Acorn nuts or screws are often hidden behind a light cover, so remove them first. Handle plastic covers carefully because older models may be brittle.

Kitchen Grease Filters

Most slide out or unclip easily. Look for release levers or tabs. Lift or slide the filter out horizontally. Some filters are magnetic and detach with a gentle pull.

Take a photo before disassembly. It helps during reassembly, especially with multi-part housings.

Clean Filters and Covers

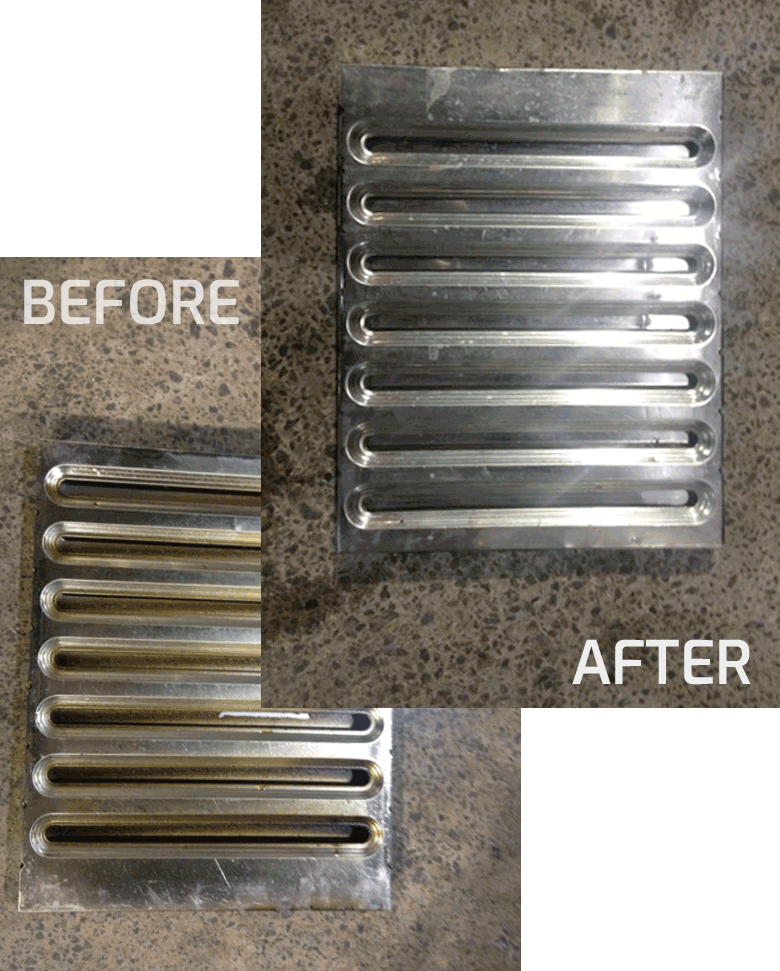
kitchen range hood grease filter cleaning before after

Plastic Bathroom Covers

Soak the cover in a basin of warm water with a few drops of dish soap for 5 to 10 minutes. Use a soft toothbrush to scrub grime from textured surfaces. Rinse thoroughly and dry flat on a towel. Never hang the cover to dry, which can warp the plastic.

Avoid hot water. It can melt or distort plastic components.

Metal Kitchen Grease Filters

Fill your sink with hot water, dish soap, and 1 to 2 tablespoons of baking soda. Soak the filter for 15 to 20 minutes, or up to 2 hours for heavy buildup. Scrub with a soft brush, rinse well, and air dry completely.

For baked-on grease, mix dish soap with 2 to 3 caps of household bleach into a paste. Apply with a spray bottle, let sit 5 to 10 minutes, then scrub. Rinse thoroughly. Use this method only on metal, never on plastic.

Never submerge light fixtures, motors, or electronic sensors in water.

Vacuum Internal Components

With the cover off, vacuum all accessible parts. Use the brush attachment to sweep dust from fan blades, housing, and motor casing. Switch to the crevice tool for tight corners and fins.

Take the unit outside and use compressed air to blow out stubborn dust from motor fins and squirrel cage. Do this before brushing because it prevents dust clouds indoors.

Avoid wet cleaning the motor unless you are doing a deep clean.

Deep Clean Fan Blades and Motor

exhaust fan motor impeller cleaning disassembly

Only proceed with this step if you are comfortable with light disassembly.

Remove the Motor If Needed

Unscrew the 1 to 3 mounting screws. Gently lower the motor. Do not yank the wires. Some models have a C-clip securing the impeller, which is the fan rotor. Use a C-clip tool or needle-nose pliers to remove it.

Clean the Impeller

Soak the impeller in soapy water. Scrub with a soft brush. Rinse and dry completely before reattaching.

Wipe the Motor

Use a slightly damp microfiber cloth. Never soak the motor. Clean fins with a toothbrush. Reinstall only when the motor is 100% dry.

Do not lubricate the motor. Most modern units have sealed bearings. Oil attracts dust and can damage components.

Inspect and Clean the Ductwork

Even a spotless fan fails if the duct is blocked.

Check Visible Duct Sections

Use a flashlight and mirror to inspect. Vacuum accessible parts with a brush attachment. Look for kinks, sagging, or compressed insulation. All of these reduce airflow.

Clean the Exterior Vent

Go outside to the roof, wall, or soffit vent. Clear leaves, bird nests, ice, or insect hives by hand or with a long brush. Ensure the flapper opens when the fan runs and closes when off.

A blocked exterior vent forces moisture back into the attic or kitchen, risking mold and fire.

Clean Light Fixtures and Sensors

Light Bulbs and Sockets

Wipe with a dry or slightly damp cloth. Use a crevice vacuum for dust in corners. Replace bulbs if dim or flickering.

Humidity Sensors

Gently wipe with a dry cloth. Grime can delay automatic startup. Test by running a hot shower. The fan should activate within 2 to 3 minutes.

LED-Integrated Units

Clean lenses with a lint-free cloth. Avoid ammonia-based cleaners because they can cloud plastic lenses.

Reassemble and Test the Fan

Reinstallation Steps

Ensure all parts are fully dry with no damp filters or covers. Reattach the motor by aligning it properly, reconnecting wiring or plugging in the connector, and securing with screws. Do not over-tighten. Snap or screw the cover back in place. Replace light bulbs or covers if removed. Restore power at the breaker.

Performance Test

Turn on the fan. Feel airflow at the grille. It should be strong and steady. Listen for rattling, buzzing, or grinding, which are signs of imbalance or debris. Check light and sensor function.

A clean fan removes steam in 5 to 10 minutes and kitchen smoke in 2 to 3 minutes.

How Often to Clean Exhaust Fans

Bathroom Fans

Clean every 6 to 12 months. Clean twice a year if the fan is used daily. High-humidity homes should clean every 6 months.

Kitchen Range Hoods

Clean every 1 to 3 months, depending on cooking frequency. Clean grease filters monthly if frying or grilling often. Replace charcoal filters every 6 months because they are not washable.

Mark cleaning dates in your calendar or home maintenance log.

Signs Your Exhaust Fan Needs Cleaning

Clean It Now If

The fan runs but airflow is weak and steam or smoke stays in the room. There is visible dust or grease on the cover. The fan makes rattling or loud humming sounds during operation. There are mold spots near the vent or ceiling. Paint is bubbling, which is a sign of trapped moisture.

Time to Replace If

The fan is noisy after cleaning. The motor smells burnt or overheats. Blades are cracked or wobbling. The unit is over 10 years old and underperforming. The circuit breaker trips when the fan turns on.

Modern fans are quieter, more efficient, and easier to clean.

Avoid These Common Mistakes

What Not to Do

Do not spray water into the motor. It causes short circuits. Do not use steel wool or abrasive pads. They scratch surfaces and trap grime. Do not reinstall wet parts. It leads to mold, rust, or electrical failure. Do not use oven cleaner or undiluted bleach. They corrode metal and warp plastic. Do not lubricate sealed motors. Oil attracts dust and ruins bearings.

Use only mild soap, soft brushes, and microfiber cloths for safe, effective cleaning.

Boost Performance with Pro Tips

Maximize Airflow

Measure CFM with a digital anemometer. Over 80% of rated CFM means the fan is healthy. Under 50% indicates likely duct blockage or motor failure. Replace long, sagging ducts with rigid metal piping. Add a duct silencer to reduce noise from turbulence.

Prevent Future Buildup

Run the bathroom fan 15 to 20 minutes after showering. Keep the kitchen hood on during cooking and 5 minutes after. Install a timer switch for automatic shutoff. Paint near the vent? Remove and clean the cover afterward because paint can clog airflow.

When to Call a Professional

While most cleaning is DIY, professional service is recommended annually for deep duct cleaning, motor inspection, CFM testing, and hard-to-reach installations like attic-mounted units. Expect to pay $100 to $200, but it prevents costly repairs and fire risks.

Final Checklist for Clean Exhaust Fans

Power turned off at breaker. Cover or filter removed. Filter soaked and scrubbed. Interior vacuumed and wiped. Motor and blades cleaned if needed. Duct and exterior vent inspected. All parts fully dry before reassembly. Power restored and fan tested.

Key Takeaways for Cleaning Your Exhaust Fan

Cleaning your exhaust fan takes less time than baking a cake, but the benefits last months. You will breathe easier, reduce fire risks, and extend your fan is life by years. Do it every 6 months and you will never wonder why the bathroom stays damp or the kitchen smells greasy. With this guide, you are not just cleaning a fan. You are protecting your home.

Frequently Asked Questions About Cleaning Exhaust Fans

How do I know if my exhaust fan needs cleaning?

Check for weak airflow when the fan runs. Look for visible dust or grease on the cover. Listen for rattling or unusual noise. Notice if steam or smoke lingers longer than normal. These are clear signs the fan needs cleaning.

Can I clean my exhaust fan without removing it?

You can clean the cover and filter without full removal. Vacuum visible dust from the grille. Wipe the exterior with a damp cloth. However, deep cleaning requires removing the cover to access fan blades and motor.

What happens if I do not clean my exhaust fan?

A dirty fan reduces airflow and forces the motor to work harder. In bathrooms, this leads to mold and moisture damage. In kitchens, grease buildup becomes a fire hazard. Performance drops 20 to 40% with clogged filters.

Can I use a pressure washer on exhaust fan parts?

Never use a pressure washer. The high-pressure water damages motor components and electrical parts. Use mild soap, warm water, and soft brushes instead.

How long does it take to clean an exhaust fan?

Basic cleaning takes 20 to 30 minutes. Deep cleaning with motor access takes 45 to 60 minutes. Most of that time is soaking and drying.

Should I hire a professional to clean my exhaust fan?

Most homeowners can handle basic cleaning themselves. Hire a pro annually for duct cleaning, motor inspection, or if the fan is difficult to reach. It costs $100 to $200 but prevents major issues.

How to Wire Bathroom Exhaust Fan with Light


Wiring a bathroom exhaust fan with light can feel intimidating, but with the right guidance, it is a manageable DIY project that improves comfort, air quality, and energy efficiency. Whether you are replacing an old unit or installing one for the first time, understanding how to wire the fan and light, especially with single or dual switches, is essential for safe, code-compliant operation. This guide walks you through every step, from choosing the correct cable and tools to grounding, connecting wires, and testing your setup.

Understanding Single-Switch vs Dual-Switch Wiring for Bathroom Fans

Your wiring method depends on how you want to control the fan and light. A single-switch configuration simplifies wiring because both fan and light turn on and off together. This works well for smaller bathrooms where simultaneous operation is acceptable. A dual-switch configuration offers greater flexibility, allowing you to run the fan without the light or keep the light on without the noise. This is ideal for bathrooms used at night when you want ventilation without bright lighting, or during the day when you need airflow without illumination.

Selecting the Correct Cable Type for Your Setup

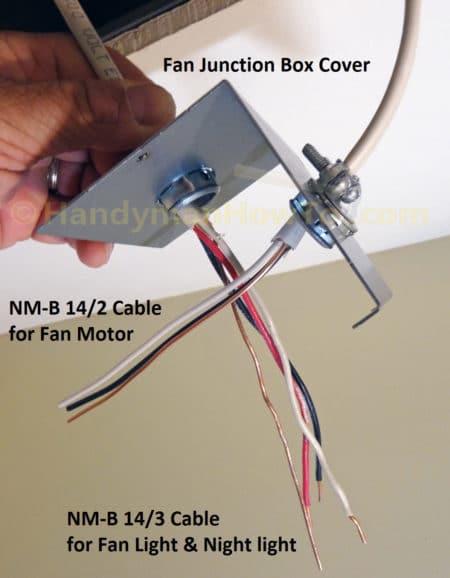
Use the appropriate cable based on your switch configuration. For single-switch control, use 14/2 with ground wire. This cable provides the hot, neutral, and ground conductors needed to power both fan and light from one switch. For dual-switch control requiring independent operation, use 14/3 with ground wire. The additional red conductor serves as the second switched hot, allowing separate control of the fan and light. For 20-amp circuits, upgrade to 12/2 or 12/3 respectively, matching the wire gauge to your breaker size.

Essential Tools and Materials for Wiring a Bathroom Exhaust Fan

electrician tool kit bathroom fan wiring

Required Tools

Collect these tools before starting your installation. A voltage tester confirms power is off before you begin working. Wire strippers remove one-half inch of insulation cleanly without damaging conductors. Needle-nose pliers twist wires and handle connectors in tight spaces. A screwdriver set includes both Phillips and flathead options for securing connections. A cable ripper or utility knife opens sheathing without damaging the wires inside.

Required Materials

Gather these materials for a complete installation. Wire connectors include standard wire nuts or WGO lever nuts, which are easier to disconnect later. Cable clamps secure cables entering the boxes. Grounding pigtails bond ground wires to switches and fixtures. Dual rocker switches or two single-pole switches provide independent control. Electrical tape insulates switch bodies when installed in metal boxes.

Critical Safety Steps: Turning Off Power Before Wiring

Shutting Off the Circuit

Begin by turning off the breaker controlling the bathroom circuit. Test the wires at both the switch location and the ceiling box using a non-contact voltage detector. Confirm no power is present on black, white, or red wires before touching any conductors. Never assume the power is off based on breaker position alone. A single mistake can lead to serious injury.

Labeling the Breaker

Place tape over the breaker with a note reading “Bathroom Fan, Do Not Turn On.” This prevents accidental re-energizing while you are working. Have someone else in the household understand that the circuit should not be touched until you confirm the work is complete.

Installing the Junction Box and Running Cable

bathroom exhaust fan junction box installation remodel box

Box Size and Placement

Use a remodel box if working above existing drywall. Ensure the box volume meets NEC 314.16(B) requirements by calculating based on wire count. Each 14 AWG wire requires 2.0 cubic inches of space. Ground wires count as one wire total. Each device such as a switch counts as two wires. Cable clamps count as one wire each. For example, a dual-switch metal box with two 14/3 cables needs at least 21.0 cubic inches.

Securing the Cable

Feed the 14/3 cable from the switch box to the fan location. Use cable clamps to secure wires inside each box. Leave 6 to 8 inches of slack in both boxes for easy connections. Never stretch wires tightly because slack prevents strain on terminals during installation and future maintenance.

Ceiling Box Wiring: Connecting Fan and Light Wires

Connecting Ground Wires

Join all bare copper ground wires with a wire nut. Add a ground pigtail and connect it to the green grounding screw on the fan housing. Wrap the wire clockwise around the screw and tighten securely. All metal parts must be grounded, and even plastic-housed fans require fixture grounding for safety.

Joining Neutral Wires

Connect all white neutral wires together. This includes the source neutral from the cable, the fan neutral, and the light neutral. Use a three-conductor lever nut or wire nut for a secure connection. Neutrals are never switched; they run straight through to the fixture regardless of switch position.

Connecting Hot Wires by Configuration

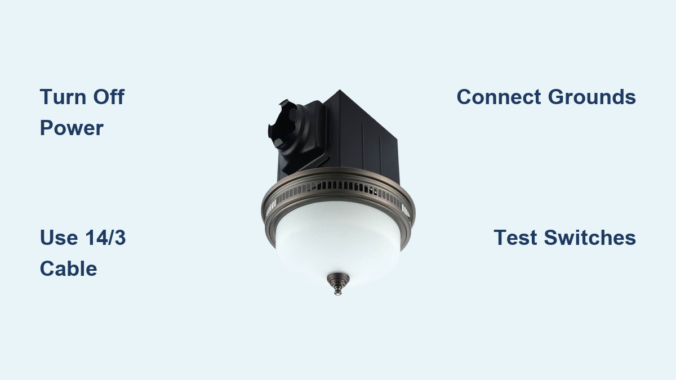
For a single-switch setup, the incoming black switched hot connects to both the fan black wire and the light blue wire. Use a wire nut to join all three conductors. The result is one switch that powers both devices simultaneously.

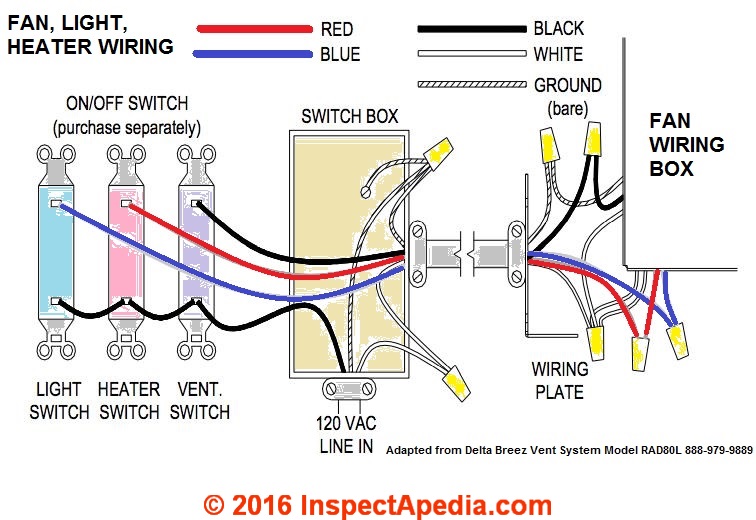
For a dual-switch setup, connect the black wire from the cable to the fan black wire. Connect the red wire from the cable to the light blue wire. Use separate two-conductor lever nuts for clean, reliable connections. Keep all connections tight and insulated because exposed copper can cause short circuits.

Switch Box Wiring: Connecting Power and Switches

bathroom fan switch wiring diagram dual switch

Feeding Power to the Switch

Most bathroom fan circuits receive power at the switch box. The incoming 14/2 cable brings constant power with black as hot, white as neutral, and bare copper as ground.

Grounding All Components

Join the incoming ground, the cable ground going to the fan, and the metal box ground if applicable. Attach a pigtail to the green terminal on each switch. Metal boxes must be bonded to the grounding system for safety.

Tying Together Neutrals

Connect all white wires with a wire nut even if the switches do not use them. This is required by NEC 2011 and later for smart switch compatibility. Never cap off the neutral; leave it connected and accessible for future upgrades.

Distributing Constant Hot

Connect the incoming black constant hot to both switches. Use a pigtail, which is a short 6-inch black wire, to feed both switches from one source. Alternatively, connect to a common terminal if using a dual rocker switch. Secure all connections with screw terminals.

Connecting Switched Hots

Connect the red wire going to the light to the top terminal of one switch to control the light. Connect the black wire going to the fan to the bottom terminal of the second switch to control the fan. Label terminals with tape if they are not clearly marked. Wrap the switch body in black electrical tape if installing in a metal box to prevent accidental contact.

Completing Connections and Mounting Your Fan Unit

Tuck Wires Neatly

Fold all wires into the box without pinching them. Ensure no bare copper is exposed beyond the wire nuts. Proper wire management prevents damage and makes final assembly easier.

Mount the Fan Unit

Secure the fan housing to the joists or mounting brackets. Attach the grill and light cover. Install bulbs or LEDs if they are not pre-installed. Do not overtighten screws because plastic housings can crack under pressure.

Testing Your Installation: Restoring Power and Verifying Function

Turning On the Breaker

Double-check all connections before restoring power. Turn the breaker back on at the panel.

Testing Each Switch

Test the top switch, which should turn on the light only. Test the bottom switch, which should turn on the fan only. Try all combinations including light on with fan off, fan on with light off, both on, and both off. All combinations should function correctly.

Fixing Common Issues

If the light does not work, check for a loose red or blue wire connection at both the switch and the fixture. If the fan does not run, verify the black connection or test the motor. If both devices are dead, check for a tripped breaker or loose hot wire. If the wrong device turns on, swap the red and black wires at either the switch or the fixture. If you hear a buzzing sound, tighten all connections and confirm the switch is a standard switch, not a dimmer, because exhaust fans require standard switches.

Electrical Code Compliance and Safety Best Practices

NEC Compliance Checklist

Ensure the neutral wire is present in the switch box, which is required since 2011. Ground all metal parts including fixtures, boxes, and switches. Keep all junction boxes accessible with no buried splices. Calculate correct box fill based on wire and device count. Secure all cables within 8 inches of the box per NEC 314.17(C).

Safety Tips

Always turn off power at the breaker before touching any wires. Use lever nuts for reliable, tool-free connections. Label your switches after testing to identify which controls the fan and which controls the light. Install a GFCI breaker if an outlet is present in the bathroom, though this is not required for fan-only circuits.

Troubleshooting Common Bathroom Fan Wiring Issues

No Power? Check These First

Start by checking if the breaker has tripped and reset it if needed. Inspect for a loose neutral connection in the white wire bundle. Verify that the ground wire is properly bonded. Test the switch for continuity to confirm it is functioning.

Verifying with a Multimeter

Test voltage between black and ground, which should read approximately 120 volts. Test the switched red and black wires at the fan box with the switch in the on position. Confirm neutral continuity with ground, which should show as open.

Practical Example: Wiring a Commercial Electric 7132-12-CE Fan

Commercial Electric 7132-12-CE fan wiring diagram

This popular fan and light combination features an 80 CFM quiet fan rated at 1.5 sones, an adjustable white LED with color temperatures ranging from 3000K to 5000K, and a night light feature. The blue wire controls the light, the black wire controls the fan, and the white wire is neutral.

Run 14/3 cable from the dual switch location to the ceiling. At the ceiling box, connect all grounds together with a pigtail to the green screw. Tie all white neutrals together. Connect the black cable wire to the fan black wire. Connect the red cable wire to the light blue wire. At the switch box, connect the constant hot pigtailed to both switches. Connect the red wire to the top switch controlling the light. Connect the black wire to the bottom switch controlling the fan. Tie all neutrals together and bond all grounds with a pigtail. The result is full independent control that is code-compliant and operates quietly.

Maintenance Tips to Prevent Future Wiring Issues

Regular Upkeep

Clean fan blades and grille every six months to maintain airflow and prevent dust buildup. Replace bulbs as needed, noting that LEDs last significantly longer than incandescent bulbs. Check for loose wires during cleaning sessions. Listen for unusual noises that could indicate motor wear or mounting issues.

Upgrade Ideas

Consider replacing standard switches with timer switches such as the Lutron Maestro for automatic shutoff. Install a humidity sensor switch that activates the fan based on moisture levels. Use smart switches with app control, ensuring your box has both neutral and ground wires required for smart switch operation.

Key Takeaways for Successfully Wiring Your Bathroom Exhaust Fan

Remember these fundamental wiring rules. Neutrals always connect together and are never switched. Ground all metal parts for safety. For single-switch setups, use 14/2 cable and connect black to both fan and light. For dual-switch setups, use 14/3 cable with black for the fan and red for the light. The switch box must have a neutral wire present, which is an NEC 2011 requirement. Junction boxes must remain accessible, never bury splices. Always turn off power at the breaker and test before touching any wires. Test each function separately to verify independent operation.

If you are unsure at any point, especially with older wiring, aluminum conductors, or shared circuits, consult a licensed electrician. Bathrooms involve moisture, and mistakes can lead to shocks or fire hazards. However, with this guide, most homeowners can confidently wire a bathroom exhaust fan with light safely and correctly.

Frequently Asked Questions About Wiring a Bathroom Exhaust Fan with Light

What cable do I need for a bathroom exhaust fan with light?

You need 14/2 with ground for single-switch operation where the fan and light turn on together. Use 14/3 with ground for dual-switch operation allowing independent control of the fan and light.

Can I wire a bathroom fan and light on the same switch?

Yes, you can wire both on the same switch using 14/2 cable. Connect the black switched hot to both the fan black wire and the light blue wire with a wire nut.

Does a bathroom exhaust fan need a neutral wire?

Yes, the NEC 2011 and later codes require a neutral wire in the switch box even if the switch does not use it. This is necessary for smart switch compatibility and proper circuit function.

How do I know if my bathroom fan wiring is correct?

Test each switch function independently. One switch should control only the light, and the other should control only the fan. Verify all combinations work including both on, both off, and each individually.

What happens if I wire the fan and light wires backwards?

If the wires are reversed, the switch labeled for the light will control the fan and vice versa. Simply swap the red and black wires at either the switch or the fixture to correct this.

How to Wire a Canarm Exhaust Fan – Step-by-Step Guide


If your workshop or garage needs powerful ventilation, a Canarm exhaust fan is a top-tier solution. But before it starts pulling out fumes and freshening the air, you need to wire it correctly. Whether you are installing a P1107-F, P1170 CG, or another single-phase model, improper wiring can lead to motor failure, safety hazards, or no operation at all. This guide walks you through every step, from identifying voltage requirements to connecting wires safely and testing the unit.

You will learn exactly how to wire a Canarm exhaust fan for 115V or 230V systems, interpret color-coded leads, and avoid common mistakes that damage motors. Let us get your fan running safely and efficiently.

Identify Your Canarm Fan Model and Voltage Requirements

Before touching any wires, confirm your Canarm exhaust fan model and required voltage. Most units like the P1107-F and P1170 CG support dual-voltage operation, but they must be wired specifically for your supply.

Locate the Motor Wiring Diagram

Find the wiring diagram on the motor housing. This label shows acceptable voltage, wire grouping instructions, and terminal numbers. Look for two diagrams: one for low voltage on the left side and one for high voltage on the right side. Always match your supply voltage to the correct diagram.

Verify Your Power Supply

Use a multimeter to test your circuit before connecting anything. For 115V systems, you need one hot wire (black), one neutral wire (white), and a ground wire. For 230V systems, you need two hot legs (black and red) plus ground, with no neutral used. Never assume your outlet type matches the correct voltage without verifying first.

Match Your Model to the Correct Wiring Type

Different Canarm models use different connection methods. The P1107-F uses loose colored leads that require manual grouping. The P1170 CG uses numbered terminal posts for simpler connections. Some models like the XFS12 come with a plug (NEMA 5-15P) and require no hardwiring at all.

Wire the Canarm P1107-F Motor for 115V or 230V

The P1107-F uses individual colored wires that must be grouped based on your voltage selection. Incorrect grouping can burn out the motor immediately, so follow these steps precisely.

Connect the P1107-F for 115V Single-Phase Operation

This configuration uses a neutral wire and is common in residential workshops.

Attach Line 1 (Hot) to P1

Connect the black circuit wire (hot) to the P1 terminal on the motor. Use a wire nut or appropriate terminal connector to secure the connection firmly.

Join Black, White, and Yellow Wires to Neutral

Twist together the motor black, white, and yellow leads. Connect this group to the Line 2 (neutral/white circuit wire). Strip one-half inch of insulation and use a UL-listed wire nut. Tug each wire after connecting to ensure security.

Cap Off P2 and Orange Wire Together

Twist the P2 lead and orange lead together, then insulate with a wire nut. Do not connect this group to any power source.

Insulate All Remaining Unused Leads

Any wires not specifically mentioned should be capped individually. Tuck them neatly into the junction box to prevent accidental contact with terminals or metal parts.

Connect the P1107-F for 230V Single-Phase Operation

In 230V mode, both lines are hot and no neutral is used. This configuration is typical for heavy-duty commercial applications.

Attach Line 1 (Hot) to P1

Connect the circuit black wire to P1 on the motor. This serves as the primary hot input.

Link Black and Yellow to Line 2 (Hot)

Twist the motor black and yellow leads together. Connect this group to the second hot leg (red circuit wire).

Isolate Red, Orange, and White Leads

Group the red, orange, and white motor leads together and cap them with a wire nut. These windings are not used in 230V operation.

Cap P2 Alone

The P2 lead must be capped off by itself. Do not connect it to any other wire or terminal.

Warning: In 230V mode, never connect anything to neutral. Doing so creates a direct short circuit that can damage the motor or trip breakers.

Wire the Canarm P1170 CG Motor Using Terminal Posts

Canarm P1170 CG wiring diagram terminal posts

The P1170 CG simplifies wiring by using numbered terminals instead of loose leads. This reduces confusion and makes connection more straightforward.

Use Terminals 1 and 4 for Power in Both Voltage Configurations

Both 115V and 230V setups use the same two terminals. Only the power source connection changes.

For 115V Operation: Hot and Neutral

Connect L1 (hot) to Terminal 1. Connect L2 (neutral) to Terminal 4. Attach the ground wire to the grounding screw on the motor housing.

For 230V Operation: Two Hot Legs

Connect L1 (hot) to Terminal 1. Connect L2 (hot) to Terminal 4. The motor does not distinguish neutral from hot. It simply sees the voltage difference between the two terminals.

Ground the Motor Housing Properly

Locate the green grounding screw on the motor frame. Attach the bare copper or green circuit wire. Loop the wire clockwise around the screw for better grip, then tighten securely. After connection, tug the wire gently to confirm it will not pull out.

Understand Five-Wire Color Codes for Multi-Speed Fans

Canarm exhaust fan 5 wire color code diagram

Some Canarm fans include five wires: black, white, yellow, blue, and brown. These indicate multi-speed or capacitor connections that require proper identification.

Decode Each Wire Function

The black wire serves as the main power input and is always connected. The white wire carries neutral in 115V systems only. The yellow wire connects to the capacitor or start winding and is critical for startup. The blue wire provides the medium speed tap on three-speed models. The brown wire offers the low speed tap when used with pull-chain switches.

Test Wire Functions with a Multimeter

Set your multimeter to resistance (Ω) mode. Test between pairs of wires to identify winding connections. The highest resistance reading typically indicates the start winding (often yellow combined with black). The lower resistance indicates the run winding. Match your findings to the manufacturer diagram.

Follow Critical Safety Protocols Before Wiring

Electric shock and motor damage are real risks. Follow these safety steps every time you work on your Canarm fan.

Turn Off Power at the Breaker

Switch off the circuit breaker supplying power to the fan location. Apply Lockout/Tagout (LOTO) procedures if working in a commercial setting. Test all wires with a non-contact voltage tester before touching any conductors. Never rely on a wall switch alone to ensure power is off.

Inspect Wires and Junction Box

Check all wiring for frayed insulation, burns, or corrosion. Ensure the junction box is dry, accessible, and code-compliant. Use a weatherproof box if installing outdoors or in damp areas like workshops.

Use Proper Tools and Personal Protective Equipment

Wear insulated gloves and safety glasses during all electrical work. Use wire strippers designed for the gauge you are working with. Choose only UL-listed wire nuts or lever connectors. Keep a fire extinguisher rated for electrical fires nearby throughout the project.

Install a Code-Compliant Junction Box

All connections must be enclosed in an accessible junction box that meets electrical codes.

Choose the Right Box

Select a minimum 4-inch by 4-inch by 1.5-inch box for most fan installations. Both metal and PVC boxes are acceptable if properly rated. The box must allow full access without removing the fan from its mounting position.

Mount the Box and Route Wires

Mount the junction box as close to the motor as possible. Keep wire runs short and direct. Use clamps or strain reliefs where wires enter the box to prevent damage from vibration.

Seal Against Moisture

Use grommets or bushings on knockout entries. Apply silicone sealant around outdoor box seams. Ensure the lid seals tightly. For outdoor installations, use a rainsafe cover with drip loop wiring.

Test the Fan After Wiring

Never assume the fan works correctly. Verify every connection before finalizing the installation.

Perform a Visual Inspection First

Check that all wire nuts are tight and secure. Look for any exposed copper that could cause shorts. Confirm the ground connection is solid. Ensure wire management is neat with no pinched or compressed conductors.

Conduct a Continuity Test

With power still off, set your multimeter to continuity mode. Test between Line 1 and P1 (should beep). Test between Line 2 and the neutral group for 115V setups. Verify no continuity exists between any wire and the motor housing, which would indicate a short.

Power Up and Observe

Restore power at the breaker. Turn on the switch. Watch for immediate startup and smooth rotation. Listen for abnormal sounds like grinding or humming. Smell for any burning or smoke. If the motor hums but will not start, the capacitor or start winding is likely faulty.

Confirm Proper Rotation Direction

Stand behind the fan. The blades should move away from the motor housing. If rotation is reversed, swap the two power leads (only if your specific model allows reversal).

Troubleshoot Common Wiring Problems

Even careful work can encounter issues. Use this guide to diagnose problems quickly.

Fan Does Not Start

Possible causes include incorrect wire grouping, an open circuit from a loose connection, or a tripped breaker. Recheck all diagrams and connections. Test voltage at the source. Ensure every wire nut is tight and making proper contact.

Motor Hums but Will Not Run

This typically indicates a failed start capacitor or a disconnected yellow wire. Test the capacitor with your multimeter (should read 8-12 µF). Replace if bulging, leaking, or outside the range. Confirm the yellow wire connects per the diagram.

Breaker Trips Immediately

This usually means a short circuit, ground fault, or miswired 230V setup with neutral connected. Disconnect power and inspect for pinched wires or exposed copper. Verify no neutral wire connects in 230V configurations.

Motor Overheats During Operation

Causes include wrong voltage applied to the motor, high resistance in loose connections, or poor ventilation around the fan. Confirm your supply voltage matches the motor requirements. Tighten all terminals. Ensure the fan is not blocked or surrounded by insulation.

Maintain Your Canarm Fan for Long-Term Performance

Proper wiring is just the beginning. Long-term performance depends on regular maintenance.

Clean Blades and Louvers Annually

Turn off power before cleaning. Wipe blades with a damp cloth to remove dust buildup. Remove debris that forces the motor to work harder. For magnetic louver models, ensure louvers close fully when the fan is off.

Inspect Wiring Yearly

Check for loose terminals that may have vibrated loose. Look for heat discoloration on wires and connectors. Replace any cracked wire nuts or damaged insulation immediately.

Never Lubricate the Motor

Canarm motors are permanently sealed. Adding oil damages internal bearings and attracts dirt. Do not drill lubrication holes. You will void the warranty and potentially destroy the motor.

Key Takeaways for Wiring Your Canarm Exhaust Fan

Wiring a Canarm exhaust fan correctly ensures safety, efficiency, and long motor life. Whether connecting a P1107-F with loose leads or a P1170 CG with terminals, always match your voltage configuration precisely, use a code-compliant junction box, ground the motor properly, and test thoroughly before full operation. For plug-in models like the XFS12, no wiring is required, but proper mounting and sealing remain essential. When in doubt, consult a licensed electrician. Your workshop air quality and your safety depend on correct installation.

Frequently Asked Questions About Wiring Canarm Exhaust Fans

Can I wire my Canarm fan for 230V if my workshop has 115V power?

No. The motor must match your available supply voltage. Wiring a 115V motor to 230V will destroy it immediately. Conversely, wiring a 230V motor to 115V will cause it to run poorly or not start at all. Always verify your supply voltage before purchasing or wiring a fan.

What happens if I do not ground my Canarm exhaust fan?

Skipping the ground connection creates a serious shock hazard. If a wire shorts to the motor housing, the metal frame could become energized. Grounding ensures the circuit trips the breaker quickly if a fault occurs. Proper grounding is required by electrical codes and essential for safety.

How do I know if my P1107-F is wired correctly for 230V?

In 230V mode, P1 connects to one hot leg. The black and yellow motor leads connect together to the second hot leg. P2 is capped off alone. The red, orange, and white leads are capped together. No neutral wire should be connected to the motor in a 230V configuration.

Can I use my Canarm fan with a speed control switch?

Yes, if your model supports multi-speed operation. Fans with five-wire configurations (black, white, yellow, blue, brown) include speed taps. Connect the blue wire for medium speed or the brown wire for low speed. Always verify against the manufacturer wiring diagram before connecting speed controls.

Why does my fan hum but not start when I turn it on?

This usually indicates a failed start capacitor or a disconnected yellow wire (start winding). Test the capacitor with a multimeter set to capacitance mode. It should read approximately 8-12 microfarads. Replace if the reading is outside this range or if the capacitor shows physical damage.

How to Wire a Broan Exhaust Fan


Wiring a Broan exhaust fan correctly ensures safe, efficient bathroom ventilation and compliance with electrical codes. Whether replacing an old unit or installing a new smart model with humidity sensing or continuous run features, proper wiring is essential. This guide walks through every step, from safety prep and mounting to model-specific wiring and final troubleshooting.

By the end, you will know exactly how to match wires, configure switches, and test your system for full functionality across all Broan models.

Safety First: Power Off and Prep

Before touching any wires, verify the workspace is safe and code-compliant. Electricity in bathrooms requires extra caution due to moisture and GFCI requirements.

Shut Off Power at the Breaker

Turn off the circuit breaker supplying power to the bathroom. Use a non-contact voltage tester at the ceiling box to confirm no live current exists. Lock or tag the breaker to prevent accidental re-energizing. If the circuit includes GFCI outlets, test and reset them after power restoration.

Never assume the switch cuts all power. Always verify at the source.

Gather Required Tools and Materials

Ensure you have these items before starting:

Wire strippers for 14 to 12 AWG wire, screwdrivers and an impact driver, 1-5/8 inch deck screws for housing, UL-listed wire nuts and electrical tape, a strain relief connector for NM cable entry, 3M duct tape for sealing ducts, and correct NM-B cable. Use 14/2 for 15-amp circuits, 12/2 for heaters or 20-amp circuits, and 14/3 for independent fan and light control.

Confirm Code Compliance

All wiring must follow NEC and IRC standards. Exhaust must vent outside, not into the attic. GFCI protection is required if the circuit powers outlets. Use junction box-rated housing, which Broan units include.

Mount the Fan Housing Securely

Broan exhaust fan housing installation joist mounting

A stable mount ensures quiet operation and safe wire access. Proper installation also prevents vibrations that can loosen connections over time.

Position for Optimal Venting

Install near the ceiling center, ideally over the shower or tub. Align with joists or rafters for support. Plan the shortest, straightest duct path to the roof or wall.

Secure the Metal Housing

Bend up side flaps on the housing to fit between joists. Mark screw holes on adjacent joists. Drive 1-5/8 inch deck screws partially, slide unit in, then fully tighten. Bend flanges down after installation to avoid drywall interference.

The housing cover doubles as a junction box, so all wiring happens inside.

Connect the Duct Early

Slide 3-inch flexible aluminum duct onto the outlet. Secure with a snap-lock clamp or metal band. Seal with 3M duct tape, wrapping fully and leaving a tab for future removal. Route duct toward exterior termination with no kinks or sags.

Broan 688: Fan-Only Wiring (Single Switch)

The 688 model works best for small bathrooms up to 80 square feet. This basic fan-only configuration uses a single switch.

Model Specs at a Glance

This unit delivers 50 CFM at 4.0 sone. It uses 3-inch duct and requires 14/2 NM-B cable.

Wiring Steps

Run 14/2 cable from switch to fan housing. Inside the junction box, connect black (hot) to fan black, white (neutral) to fan white, and bare copper (ground) to fan green. Secure with wire nuts, wrap in electrical tape, and tuck wires neatly before reinstalling the cover.

The fan runs only when the switch is on.

Broan 678: Fan and Light with Dual Control

Broan 678 wiring diagram dual switch

This model allows independent operation of fan and light through separate switches. It is ideal for bathrooms where lighting and ventilation need separate control.

Identify the Wires

Black powers the fan motor, blue powers the light, two white wires provide neutral, and green is ground. All must be connected properly for the system to work.

Dual-Switch Wiring Setup

Connect constant hot by splicing incoming black to white wires from both switches (marked with black tape) and to the black of any outlet or vanity light. Complete the neutral path by connecting switched white to both fan white wires, outlet white, and vanity light white. Link fan switch black to fan black and light switch black to fan blue. Ground all components by tying all ground wires together.

The fan and light now operate separately, and the outlet stays powered.

Broan 162: Fan, Light, and Heater Wiring

This model provides supplemental heat for cold climates. It requires a dual-function switch with separate red and black terminals.

Key Wires

Red powers the heater, blue controls fan and light, white is neutral, and green is ground.

Use a Dual-Function Switch

Feed 12/2 or 14/2 cable into the switch box. Connect incoming black to the switch hot terminal and incoming white spliced with unit white. Bond all grounds together. Connect switch red terminal to unit red (heater) and switch black terminal to unit blue (fan and light).

The heater and fan/light run independently.

AER110LK: LED Fan/Light (Single Switch)

This modern model features integrated LED lighting. By default, the fan and light operate together through a single switch.

Default Wiring (Single Switch)

Splice switch black with fan black and light black. Splice switch white with fan white and light white. Tie all grounds to green.

Both light and fan turn on together when the switch is activated.

Upgrade to Independent Control

Replace 14/2 with 14/3 cable (black, red, white, ground). Install a dual rocker switch. Connect black wire to fan via switch terminal and red wire to light via the second terminal. Tie all whites to neutral and bond all grounds.

You can now control fan and light separately.

AE110SL: Humidity-Sensing Fan Wiring

This smart model automatically runs the fan when bathroom moisture reaches a set level. It uses a humidity sensor to detect excess moisture.

Internal Wires

Black powers the light, brown controls the humidity sensor (auto fan), gray provides manual fan control, white is neutral, and green is ground.

Option A: Dual Switch (Light Plus Manual Fan)

Connect top switch to black (light) and bottom switch to gray (manual fan). Cap the brown wire to disable humidity sensing.

Humidity sensing is disabled with this configuration.

Option B: Three-Switch (Full Automation)

Connect switch one to black (light), switch two to gray (manual fan), and switch three to brown (auto/humidity). Tie all whites together and ground the green wire.

This enables auto fan, manual fan, and light, all operating independently.

Never cap the brown wire if you want humidity sensing enabled.

LP510R: Continuous Run Fan Wiring

This model provides energy-efficient always-on ventilation. It runs continuously at a preset speed to maintain air quality.

Set Dip Switch First

Inside the housing, set the dip switches. A equals 50 CFM, B equals 80 CFM, and C equals 100 CFM. Choose one speed, as it remains fixed.

Single-Switch Wiring

Splice switch black to fan black and brown. Connect switch white to fan white. Ground the fan green.

The fan runs continuously when powered. The DC motor may pause 1 to 2 seconds at startup, which is normal.

Evolve Series: PTEL511RK Programmable Fan

Broan Evolve PTEL511RK wiring diagram controller settings

This advanced model offers boost, delay, and nightlight features. It provides the most control options for modern bathrooms.

Controller Dials Explained

The right dial sets CFM (fan speed). The middle dial enables continuous run. The left dial sets the delay timer (post-use run time).

Boost only works if continuous run is ON. This is critical for proper operation.

Required Cables

Use 143 cable to power the controller and light. Use 142 cable to send the boost signal.

Three-Switch Setup (Recommended)

The top switch powers the controller, enabling nightlight and continuous run. The second switch provides boost for temporary high speed. The third switch controls the task light.

Wiring Connections

Tie all white wires (neutrals) together and all green wires (grounds) together. For 143 cable, connect red to black of 3-pin Molex (task light) and black to blue of 3-pin and black of 4-pin Molex (powers controller and continuous run). For 142 cable, connect black to red wire of 4-pin Molex (boost input).

If the top switch is off, boost fails because continuous run must stay powered.

Universal Wiring Rules

These principles apply to all Broan models. Following them prevents mistakes and ensures safe operation.

Wire Color Functions

Black carries hot (fan, light, heater). Blue indicates light or nightlight. White is neutral and always ties together. Green or bare copper is ground and bonds all components. Red carries switched hot (heater, boost). Brown or gray is model-specific (humidity, manual fan).

Never connect a taped white wire (used as hot) directly to neutral.

Switch Loop Best Practices

In switch loops, white is often hot. Mark it with black tape. Use pigtails for neutrals and grounds, and test all wires with a voltage tester before connecting.

Secure All Connections

Use correctly sized wire nuts. Pull-test each connection. Wrap with electrical tape. Tuck wires without pinching.

Duct Installation: Maximize Airflow

Broan exhaust fan duct installation best practices

Even perfect wiring fails with poor ducting. Proper duct installation ensures the fan performs at its rated CFM.

Duct Specs

Use 3-inch diameter flex or rigid duct. Maximum length is 25 feet. Each 90-degree bend equals 5 feet of lost efficiency. Avoid kinks, sags, and compression.

Installation Steps

Flatten the end of flex duct and slide onto the fan outlet. Clamp with snap-lock or metal band. Seal with 3M duct tape, wrapping fully. Route to exterior termination. Connect to metal pipe stub and seal with tape.

Exterior Vent Cap

The vent cap must have a backdraft damper (flaps open when fan runs). This prevents rain, snow, and pests. Never vent into attic, soffit, or crawlspace.

Troubleshooting Common Issues

Fix problems before they become safety hazards. These solutions cover the most frequent issues.

Fan Will Not Turn On

Check for loose black (hot) wire. Test voltage at the switch and fan. Verify power at the breaker and GFCI.

Light Works, Fan Does Not

On Evolve models, check if continuous run is off. Test the fan motor wire and inspect for cuts.

Excessive Noise

Tighten housing screws. Secure the duct to prevent vibration. Check for debris in fan blades.

Humidity Sensor Not Working

If the brown wire is capped, uncap it. If the auto switch is off, turn it on. Verify power reaches the controller.

Boost Function Fails

If continuous run is off, turn on the top switch. Verify 142 cable is correctly wired to red (4-pin Molex).

Final Checks and Maintenance

Ensure long-term performance with proper testing and upkeep.

Post-Installation Tests

Restore power and test all switches. Feel airflow at the exterior vent. Confirm the damper opens. Listen for unusual noises. Check duct joints for leaks.

Maintenance Schedule

Monthly, clean the grille with soapy water. Annually, vacuum fan blades and housing. Every five years, inspect duct for nests and moisture.

Warranty Notes

Motor carries a limited lifetime warranty. Electrical parts carry 1 to 5 years. Register online for full coverage.

Frequently Asked Questions About Wiring a Broan Exhaust Fan

What wire size is needed for a Broan exhaust fan?

Most Broan fans use 14/2 NM-B cable for 15-amp circuits. Use 12/2 for heaters or 20-amp circuits. Use 14/3 when running separate switches for fan and light.

Can I control my Broan fan and light separately?

Yes, for models like the 678 and AER110LK, you can upgrade to 14/3 cable and install a dual rocker switch. This allows independent on/off control of fan and light.

How do I wire a Broan humidity-sensing fan?

Connect the brown wire to a dedicated switch for automatic operation. Use a three-switch setup to enable light, manual fan, and auto humidity sensing. Never cap the brown wire if you want the sensor active.

Why is my Broan fan not working after installation?

Check that all wire connections are secure, especially the black (hot) and white (neutral) wires. Verify the breaker is on and test the GFCI outlet if one exists on the same circuit.

Does a Broan exhaust fan need a dedicated circuit?

It depends on the amp draw. Most fan-only units can share a bathroom circuit. Heater units and large fans may require dedicated circuits. Check the manufacturer’s specifications and local code requirements.

Can I install a Broan fan myself, or do I need an electrician?

DIY installation is possible for basic models if you follow code and safety procedures. For heater circuits, complex automation, or if you are unsure about wiring, hire a licensed electrician.

Key Takeaways for Wiring Your Broan Exhaust Fan

Wiring a Broan exhaust fan requires matching wire colors correctly and understanding your model is specific features. Always turn off power at the breaker and verify with a voltage tester before working. Use the correct cable gauge (14/2, 12/2, or 14/3) based on your circuit and control needs.

For basic fans like the 688, a simple single-switch setup works. For advanced features like humidity sensing or programmable boost, follow the model-specific wiring sections in this guide. Test all functions after installation and perform annual maintenance to keep your fan running efficiently for years.

How to Install a Bathroom Exhaust Fan


Adding a bathroom exhaust fan is one of the most effective upgrades you can make to protect your home from moisture damage. Without proper ventilation, steam from showers lingers on walls and ceilings, creating the perfect environment for mold growth, peeling paint, and even structural rot over time. A well-installed exhaust fan removes humid air outside, maintaining indoor humidity between 30% and 50% to keep your bathroom dry and healthy. This guide walks you through selecting the right fan, planning venting, routing ductwork, making safe electrical connections, and completing the installation yourself.

Choose the Right Exhaust Fan for Your Bathroom

bathroom exhaust fan CFM chart comparison

Selecting the correct fan ensures effective moisture removal without excessive noise or energy costs. The right choice depends on your bathroom size, mounting requirements, and desired features.

Calculate the Correct CFM for Your Space

CFM (cubic feet per minute) measures how much air the fan moves. Match this rating to your bathroom square footage for optimal performance.

Calculation method:

  • Measure your bathroom length and width
  • Multiply to get square footage
  • Multiply square footage by 1.1 for minimum required CFM

Example: An 8 ft × 10 ft bathroom equals 80 sq ft, requiring at least 88 CFM (80 × 1.1).

Quick reference guide:

Bathroom Size Minimum CFM
Up to 50 sq ft 50 CFM
50–100 sq ft 80–100 CFM
Over 100 sq ft 110+ CFM

Code requirement: Most building codes mandate at least 50 CFM for bathrooms with showers or tubs.

Check the Sone Rating for Quiet Operation

The sone rating measures fan noise. Lower values mean quieter operation.

Sone ratings to know:

  • 0.5–1.0 sone: Whisper-quiet, ideal for master bathrooms
  • 1.0–2.0 sone: Quiet, similar to a refrigerator hum
  • 2.0–3.0 sone: Moderate noise, acceptable for guest bathrooms
  • Above 3.0 sone: Noticeably loud, avoid unless necessary

Pro tip: Choose a fan under 3 sones for comfortable daily use in frequently occupied bathrooms.

Select the Best Mounting Style

Your home structure determines which mounting style works best.

Ceiling-mounted fans:

  • Most common installation type
  • Installed between ceiling joists
  • Duct runs vertically through attic
  • Ideal when attic access exists

Wall-mounted fans:

  • Mount directly on exterior walls
  • Duct runs horizontally through wall studs
  • Perfect for homes without attic access
  • Works well when fan location aligns with outside wall

Design note: Modern fans include integrated LED lights, heaters, or humidity sensors—useful for combining functions and saving space.

Plan Proper Venting to the Outside

bathroom exhaust fan venting diagram correct vs incorrect

Exhaust must terminate outside your building envelope. Never vent into attics, crawlspaces, or interior walls, as this causes mold, rot, and insulation damage.

Pick the Best Vent Exit Location

Choose an exit point that minimizes duct run length while staying code-compliant.

Recommended exit locations:

  • Sidewall: Easiest and most reliable option
  • Roof: Possible but requires careful flashing
  • Gable wall: Good alternative when accessible
  • Soffit: Only with a proper backdraft damper

Critical rule: Venting indoors is unsafe and violates building codes. Always vent outside.

Use Correct Ducting Materials

Proper ductwork is essential for airflow efficiency. Poor ducting kills performance even with a powerful fan.

Duct specifications:

  • Diameter: 4 inches (standard residential size)
  • Material: Rigid or flexible metal duct (aluminum or galvanized steel)
  • Avoid: Plastic, vinyl, or foil-wrapped ducts—they collapse and are not code-compliant

Duct run limits:

  • Keep total run under 25 feet
  • Each 90-degree bend adds 5 feet of equivalent length
  • Slope duct ¼ inch per foot downward toward exterior to prevent condensation pooling

Efficiency tip: Use smooth rigid ducts instead of flexible ducting when possible for better airflow and less resistance.

Gather Tools and Materials for the Job

Having everything ready before starting prevents mid-project delays.

Tools You Will Need

  • Drill/driver
  • Jigsaw or drywall saw
  • Hole saw (4½ inch)
  • Extended spade bit (3/8 inch)
  • Tape measure
  • Layout square
  • Circuit tester
  • Wire strippers and wire nuts
  • Caulk gun
  • Safety goggles
  • Respirator mask
  • Ladder

Materials Checklist

  • Bathroom exhaust fan unit
  • 4-inch metal duct (rigid or flexible)
  • 90-degree duct elbow
  • Wall cap or roof vent cap
  • Foil duct tape or HVAC mastic
  • Cable clamp
  • Roofing cement (for roof venting)
  • Screws, spackling compound, and paint

Install a Bathroom Exhaust Fan with Attic Access

This method works best for unfinished attics and standard ceiling installations.

Mark Location and Drill Reference Hole

Choose a spot between ceiling joists, ideally centered between the shower and toilet for optimal air capture. Drill a 3/8-inch reference hole through the ceiling into the attic. Access the attic, locate the hole, and clear insulation to expose the joists.

Tip: Avoid plumbing vents and electrical wires running through the ceiling cavity.

Cut the Ceiling Opening

Measure the fan housing intake size and transfer those measurements to the ceiling using the reference hole as your guide. Draw a rectangle with a layout square, then cut with a jigsaw. Support the drywall as you cut to prevent it from falling.

Mount the Fan Housing in the Attic

Attach a 4-inch 90-degree elbow to the fan exhaust port and seal with foil duct tape (not regular duct tape). Slide the housing into the ceiling hole and expand mounting brackets against the joists. Screw securely to prevent vibration and noise.

Warning: Ensure the fan is level and tight. A loose unit causes annoying vibrations and operational noise.

Run Ductwork to the Exterior

Route metal duct from the fan to an exterior wall. Select a spot between two studs and drill through the wall sheathing with a 5-inch hole saw. Install the wall cap and secure with screws. Connect the duct to the cap and seal all joints with foil tape or HVAC mastic.

Cold climate tip: Use HVAC mastic instead of tape—it won’t crack in freezing temperatures.

Make Safe Electrical Connections

Turn off power at the breaker and verify with a circuit tester. Remove the blower motor from the housing and save the screws. Knock out the wiring knockout on the housing and install a cable clamp. Feed house wires through and connect black to black (hot), white to white (neutral), and green or bare to the ground screw. Secure with wire nuts, tuck wires inside, and replace the cover.

Safety note: If no existing switch or power source exists, hire a licensed electrician before proceeding.

Reinstall Motor and Test the Fan

Plug the blower motor back into the housing and secure with screws. Snap on the grille, restore power, and turn on the switch.

Test for success:

  • Fan runs smoothly without unusual sounds
  • No loud vibrations
  • Tissue held near the exterior vent cap gets pulled outward

Finish with Drywall Repair

Patch any gaps around the cutout with spackling compound. Sand smooth, repaint to match the ceiling, and clean the grille. Your installation is complete.

Install an Exhaust Fan Without Attic Access

No attic? No problem. Install from below in finished ceilings or cathedral-style designs.

Prepare the Ceiling Opening

Remove the old fan or test fit the new housing. If the opening is too small, enlarge it with a jigsaw. If too large, install a wood support block between joists and patch the drywall.

Attach Duct Connector from Below

Connect the duct adapter to the fan exhaust port and seal with HVAC tape. Anchor the connector to the ceiling hole with a screw for stability.

Route Duct Through Wall or Roof

Drill through the exterior wall between studs. Install the wall cap and connect the duct. For roof venting, cut through shingles with a hole saw, install the roof cap, and seal with roofing cement.

Pro tip: Use rigid duct for roof runs—it’s sturdier and easier to support than flexible duct.

Handle Wiring in Confined Space

Remove the wiring cover and knockout plug. Install a cable clamp and feed wires through. Connect by color (black-black, white-white, ground-ground), tuck wires inside, and reattach the cover.

Mount Fan and Finalize

Insert the fan into the housing and secure with screws. Install the grille, test operation, and patch drywall as needed.

Replace an Existing Exhaust Fan

Upgrading an old or noisy fan? Reuse existing ducts and wiring to save significant time.

Remove the Old Fan

Turn off power at the breaker. Remove the grille and unscrew the blower motor. Unplug the motor from the housing. Detach the old housing if replacing it entirely.

Install the New Fan

Place the new housing between joists and expand mounting brackets. Screw brackets securely. Reconnect the existing duct to the exhaust port. Feed wires through the cable clamp and connect by color. Plug in the new motor, secure it, and snap on the grille.

Time-saver: Full replacement takes 1–2 hours with existing infrastructure.

Vent Through the Roof When Needed

Sidewall venting isn’t always possible. Roof venting works but requires careful installation.

Cut the Roof Opening

Drill a pilot hole from the attic and mark the location outside. Use a 5-inch hole saw to cut through shingles and sheathing. Slide the roof vent cap under the shingles, nail in place, and seal edges with roofing cement.

Connect and Insulate the Duct

Attach the duct to the cap with HVAC tape. Insulate the duct in the attic to prevent condensation buildup. Ensure the backdraft damper opens and closes freely.

Caution: Roof flashing must be watertight. If unsure about proper installation, hire a professional roofer.

Avoid Common Installation Mistakes

Small errors reduce performance or create safety hazards. Steer clear of these common pitfalls.

Never Vent Into the Attic

Moist air in the attic causes mold, rot, and insulation collapse—a costly mistake that violates building codes.

Do Not Use Plastic or Vinyl Ducts

These materials collapse over time and are not fire-rated. Use metal ducts only for code-compliant installation.

Minimize Bends and Length

Each bend restricts airflow. Keep duct runs short and straight for maximum efficiency.

Seal All Joints Properly

Leaky joints mean moist air escapes into walls or ceilings. Use foil tape or mastic—never standard duct tape.

Always Include a Backdraft Damper

Without one, cold air flows back into your bathroom when the fan is off. Always use a self-closing damper.

Maintain Your Fan for Long-Term Performance

A well-maintained fan lasts 10–15 years. Regular upkeep keeps it running efficiently.

Clean the Grille Monthly

Remove dust and soap scum with mild soap and water. Clogged grilles reduce airflow and force the fan to work harder.

Inspect Duct and Vent Annually

Check the exterior vent cap for birds’ nests, ice, or debris. Inspect attic ductwork (if accessible) for sagging or disconnected sections.

Know When to Replace

Signs it’s time for a new fan:

  • Loud grinding or rattling sounds
  • Weak airflow compared to new performance
  • Fan won’t turn on
  • Visible moisture damage on the ceiling around the unit

Alternatives When Ducting Is Not Possible

Sometimes running ductwork isn’t feasible. Limited options exist, though they’re not ideal substitutes.

Ductless Recirculating Fans

These units filter air and blow it back into the room using charcoal filters for odor control. They do not remove moisture, so mold risk remains.

Not recommended unless paired with a dehumidifier or consistent window ventilation.

Portable Solutions

Run a dehumidifier after showers. Open windows during and after use. Use a window exhaust fan temporarily.

Best for renters or short-term fixes—not permanent solutions.

Frequently Asked Questions About Adding a Bathroom Exhaust Fan

Can you add an exhaust fan to any bathroom?

Yes—most bathrooms can be retrofitted with an exhaust fan, though complexity varies based on access and structural constraints.

Do bathroom exhaust fans need to vent outside?

Yes. Venting indoors (into attics, crawlspaces, or walls) is unsafe and violates building codes. Always vent outside the building envelope.

Can you install a bathroom exhaust fan without a duct?

Only with a recirculating fan, but it won’t reduce humidity. Proper moisture control requires a ducted system venting outside.

How much does it cost to install a bathroom exhaust fan?

DIY installation costs $120–$175 for the fan and materials. Professional installation runs $300–$600 depending on ductwork complexity, electrical needs, and roofing.

Do ductless bathroom exhaust fans work?

They reduce odors but do not remove moisture. They are not a substitute for proper ducted ventilation in moisture-prone bathrooms.

What if there is no exhaust fan in the bathroom currently?

Open windows while showering, use a portable dehumidifier, and install a fan as soon as possible to prevent mold and moisture damage.

Key Takeaways for Installing Your Bathroom Exhaust Fan

Adding a bathroom exhaust fan pays off in comfort, air quality, and home protection. Follow these essential points for a successful installation.

Size correctly: Calculate CFM using the 1.1 multiplier method (square footage × 1.1) to ensure adequate airflow.

Vent outside only: Never vent into attics, crawlspaces, or interior walls. This causes serious mold and structural damage.

Use proper materials: Install metal ducts only—avoid plastic or vinyl. Keep duct runs short and minimize bends.

Hire professionals when needed: For electrical work or complex roof venting, a licensed electrician or roofer ensures safe, code-compliant installation.

Test your work: Hold a tissue at the exterior vent cap. If it pulls inward, your fan is working correctly.

With proper planning and tools, most homeowners complete this project in one weekend. The result is a drier, healthier bathroom that stays mold-free for years to come.

« Older posts Newer posts »

© 2026 Hampton Fan Reviews

Theme by Anders NorenUp ↑